Blog

Five Proven Ways to Unclog Your Shower Drain

Trying to take a relaxing shower? It’s not so easy when you have a clogged shower drain! If you think you’re dealing with a clog, check the speed at which water drains. If it has slowed or won’t drain at all, leaving you with standing water at the bottom of the bathtub, you have a clog somewhere.

We have five expert solutions for unclogging your shower without damaging the plumbing.

What causes shower clogs

There are a few possible reasons why your shower drain has clogged, but it’s likely that there is an obstruction. Hair, soap residue, dirt, and grease can accumulate and block the path water needs to take out of the tub.

Whatever the case, here are five plumber-recommended drain cleaning methods.

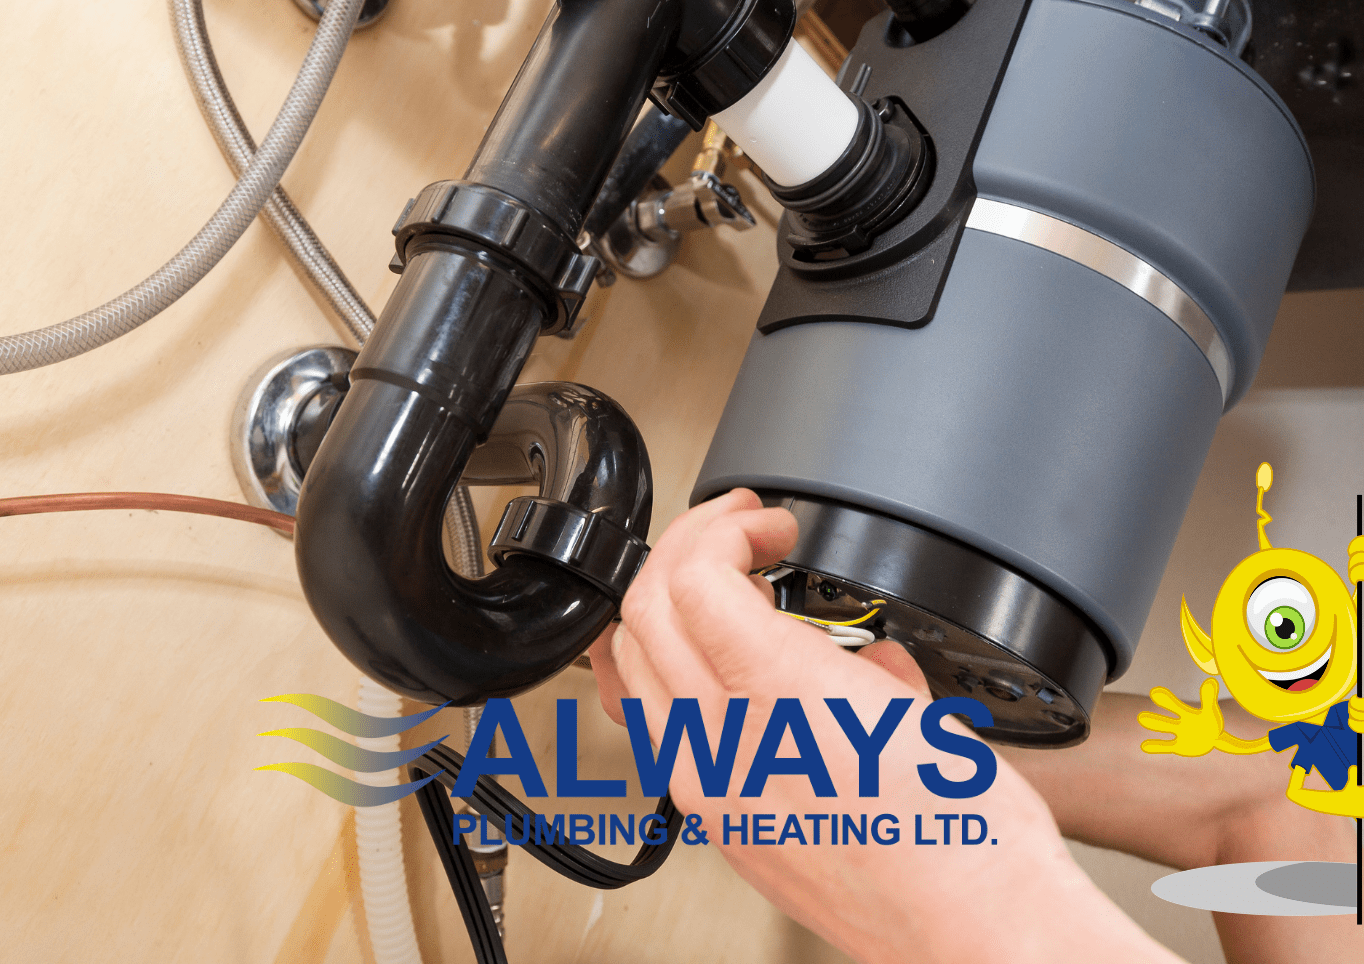
Unclog the drain using a snake auger (toilet jack)

One approach for unclogging a bathtub or shower drain is to use an auger, sometimes called a snake or toilet jack. These tools can be manual or electric. If the auger is electric, you will require a power drill to operate it. 

The first step to unclogging the drain is to insert the auger into it. Keep threading it into the pipe until you feel it hit the clog. If you are using a manual tool, you will turn the handle to do this. If you are using a power drill to operate the auger, you will use the trigger switch to rotate it inside the pipe. You should feel resistance during this process. That means the snake is catching debris in the pipe. 

Once the toilet jack turns more easily, the drain has likely cleared. Now you’ll slowly move the handle (or power drill) in the opposite direction to get the auger out of the drain. The materials clogging the drain will come out with the snake. 

Once you’ve removed the tool from the drain, discard the clog in the trash. Don’t try to put it back down another drain somewhere else in your house! Run hot water down the shower drain to make sure you got everything out of the pipe. If you notice the water is still draining slowly, you may have to try the process again to get the remaining bits. 

There are a few pitfalls to using an auger. If inserted into the drain incorrectly, it can scratch the inside of the pipe. That scratch will eventually corrode and impact the structure of the pipe. If you choose to use an electric snake, be careful! We’ve seen cracked pipes from incorrect usage. What was a simple clog can become something much more serious if dealt with in the wrong way. Please give us a call! Our expert plumbers are ready to help.

Remove thick particles or debris

If you’re dealing with a thick clog, you might need to give it a pre-clean before using a snake. Think of it as a head start! You may be able to see some of the debris near the top of the pipe. First, you’ll need to take off the drain cover. Then, we recommend putting on a pair of rubber gloves and fishing around for whatever you can grab. Use only your hands! Inserting a wire hanger or any other tool into the drain could damage the pipe.

If you’re able to pull materials out, dispose of them in the trash. Then, you may find you’ve cleared enough space to try the snake for the rest of the debris.

Use a drain cleaner

Not all drain cleaners are suitable for shower drains. That’s a plumbing myth! The most common drain cleaners are packed with chemicals, which may clear your pipes, but they also damage them in the long run. 

We like BioSmart, which is much kinder to your plumbing system and the environment. The Drain Unblocker uses a combination of enzymes, not chemicals, to break down organic debris. You might also consider BioDrain, which is chock-full of naturally occurring microbes that digest organic material. It can be used weekly for maintenance. You could also try a baking soda and vinegar solution to try and break up what’s blocking the flow of water.

If you’re not sure what to pour down a troublesome drain, we can help! Give us a call for expert advice on drain cleaners that maintain the health of your home’s plumbing. 

Pull out the clog by hand

You might be lucky and realize you’re not dealing with a significant clog. That’s great news! You may see hair tangled near the top of the drain. Try pulling it out with your fingers. If the water drains, then you’ve fixed the clog.

If the water doesn’t drain after your initial attempt, then you can attempt using a plumber snake, following the steps outlined above. If the snake doesn’t get the job done, or you’re concerned about proper usage of the tool, please call a plumber for assistance. 

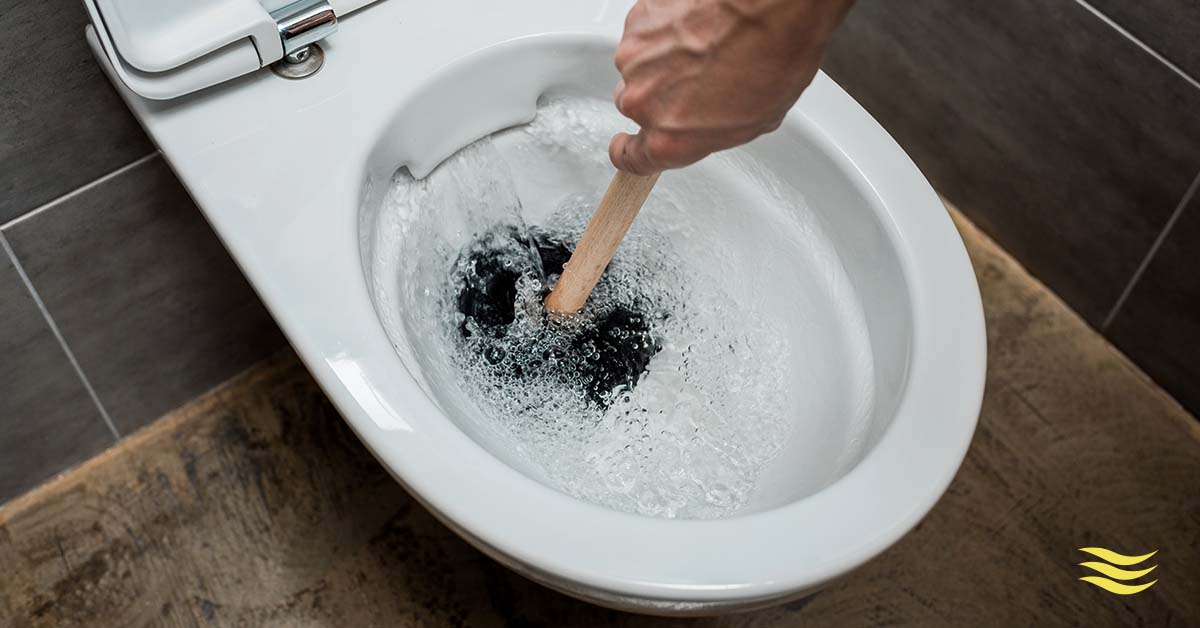
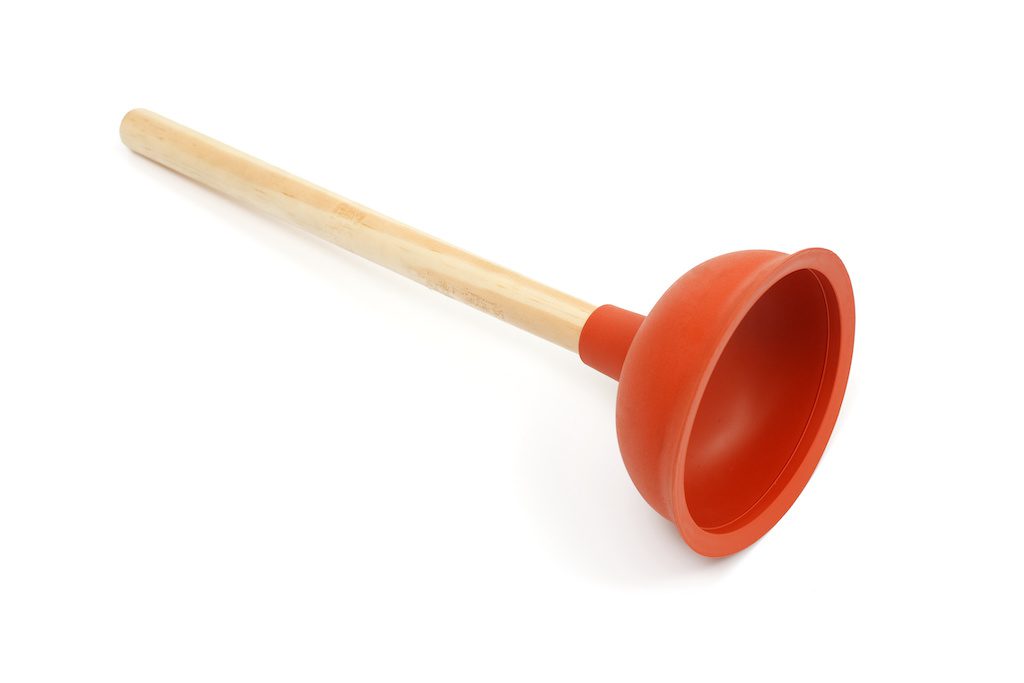
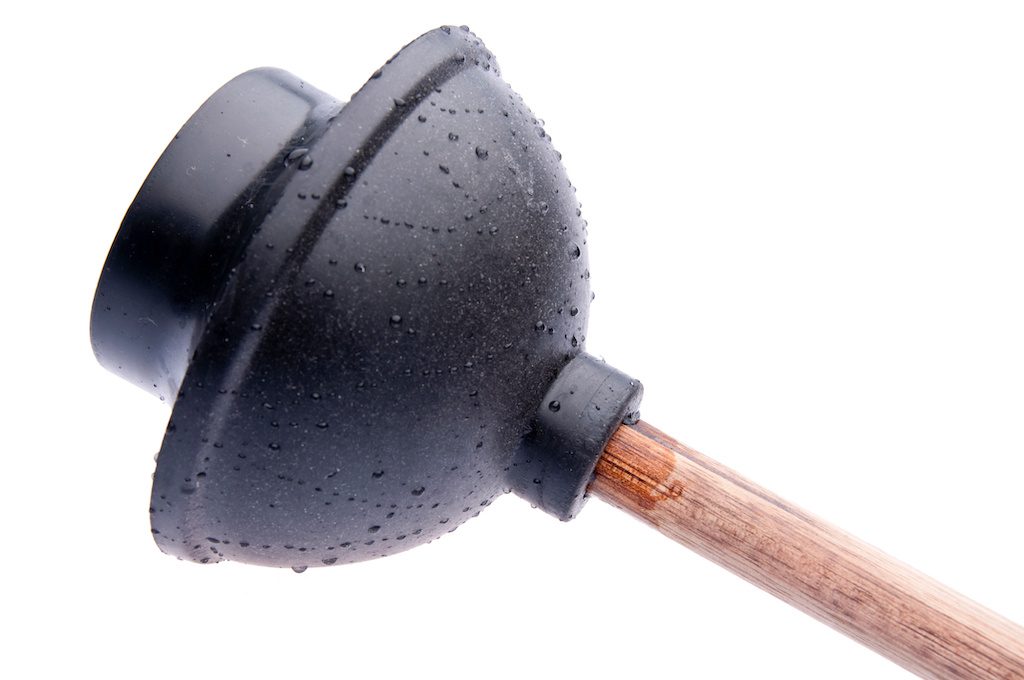
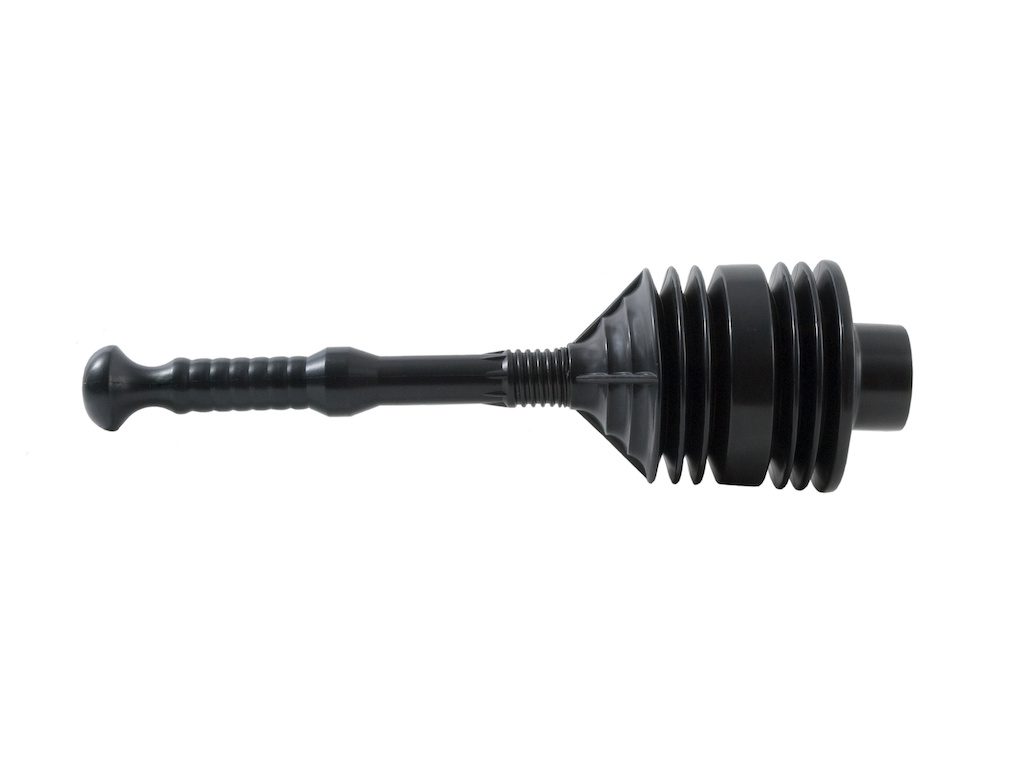
Use shower drain plunger

A shower plunger is another option when it comes to clearing blocked drains. When you place the plunger over the drain, you’ll want enough water in the bathtub to cover the lip on the rubber cup. From there, the method is quite similar to plunging a toilet. You’ll move the handle up and down quickly, forcing the debris in the drain to loosen.

Just like with a snake or auger, you’ll need to run hot water down the drain to see if the clog has been removed. If the water is still draining slowly, you may need to try again or use another method. 

The one issue with using a plunger is that it doesn’t remove the clog, it just loosens the materials so it will move farther down the pipe. If the debris doesn’t move out of your plumbing system, you’ll find it a very short-term solution. We recommend contacting a plumber if the job is more complex. 

How to prevent shower drain clogging

There are several things to try so you don’t have to deal with a clogged shower drain. First, get a drain cover. They’re inexpensive, made of plastic or rubber, and catch hair and debris before they wind up in your pipes. 

Avoid dumping waste in the tub. This might sound like a no-brainer, but waste includes things like dirty water from a mop bucket, dustbins, or shaking out a towel after a trip to the beach. Those little bits of debris can build up over time. 

Proper drain maintenance goes a long way, too. We encourage you to pour some of a chemical-free cleaner or baking soda and vinegar mixture down the shower drain each time you clean the bathroom. If you build it into your routine, you’ll have fewer clogs in the future. 

Let the professionals unclog your shower drain

Always Plumbing technicians harness HDD Drain Vision Cameras to analyze drains from the inside. Once we locate the problem, we use BioSmart to dissolve the debris, so you have clear pipes with no threat of damage to your plumbing system. Book an appointment today!

How to Dispose of Cooking Oil, Grease, and Fats

Keep cooking oil where it belongs—out of your drain! Even the smallest amount of grease can have a big impact on your home’s plumbing system and the environment. We have advice on how to dispose of cooking oil, use it responsibly, and how to recycle any leftovers.

How to use cooking oil responsibly

There are multiple cooking methods to try that reduce overall vegetable oil usage. If you use less oil, there’s less to worry about discarding!

In many cases, recipes call for more fat than what is needed. If you’re deep-frying something, consider using a shallow pan with a lid instead of a deep pot. Not only will you need less oil, but this method also traps moisture which allows the food to cook more quickly and taste better.

While fried foods are certainly delicious, there are other techniques that don’t require a lot of grease. If meat is on the menu, consider roasting, broiling, or slow cooking it (bonus points: choose a leaner cut, so the meat itself has less fat). Basting the meat keeps it moist and flavourful. If you love churros, doughnuts, or cannolis, try baking them instead of frying them. You’ll use a lot less oil and your treats will still be delectable. 

Air fryers are one of the hottest appliances on the market right now, and act as a countertop mini convection oven, circulating hot air to crisp up food. Using an air fryer is a great way to reduce the amount of oil used in your kitchen.  

How to re-use cooking oil

If you find yourself with leftover cooking oil, there are many ways to re-use it. One of the tastiest ways is to use it when preparing other foods. For example, bacon fat is an incredible addition to many dishes. Try roasting vegetables with it, frying a grilled cheese sandwich, incorporating it into baked beans, or as a butter substitute for corn on the cob. It won’t be the healthiest option, but it will be so tasty.

To store leftover oil, let it cool in the pan you cooked in. Once it has fully cooled (and likely solidified a bit), you can transfer it into a container. We recommend a glass jar or other glass vessel. Seal it tightly and stick it in the fridge. Be sure to store different types of cooking oil separately. For example, if you have bacon fat, don’t mix it with grease from potato chips. Let each grease have its own container. 

That oil won’t keep forever. Be sure to use it before it goes rancid. A quick sniff test will tell you if something is off. You can use the oil multiple times, too! All cooking oil is different, but a good rule of thumb is if it is a clearer oil and you used it for something like potato chips, it’s safe to reuse about eight times. If the oil is darker and was used for frying something like chicken or fish, or something else breaded, it’s safe to use around three times. If in doubt, (responsibly) throw it out.

You can also re-use cooking oil for purposes other than cooking. As has been done for centuries, leftover oil can be used in soap, balms, or candles. You can also make your own non-toxic insecticide by mixing one tablespoon of dish soap with one cup of oil. Once that is mixed, apply it to the leaves of plants to kill unwanted bugs.

How to dispose of cooking oil environmentally

You should never, ever pour cooking oil down a sink drain or toilet. When the grease cools, it solidifies and sticks to the sides of the pipes, which creates a clog or even a sewer backup. If you continue to dispose of it this way, you will have a big problem on your hands. If this has been your method so far, give us a call so we can assess the status of your pipes. 

Avoid putting grease on the ground, as well. This might be especially tempting if you’re camping and have whipped up a big breakfast with bacon and the works. If you pour leftover cooking oil on the ground, you are tempting wildlife to taste it. Some oil is toxic to plants and animals. That oil could also find its way into nearby water systems and cause even greater damage. 

Don’t put leftover cooking oil into the garbage can, either. It can attract mice, rats, raccoons, or other unwelcome critters. 

In Edmonton, residents can pour small amounts of fats, oils, and grease into covered, labelled plastic containers and put them out for garbage collection. Call 311 to find out your collection day. If you have more than one litre of used oil to dispose of, you must take it to an Eco Station.

How to compost using cooking oil

Composting is a great option for some leftover cooking oils. If you’re using 100% vegetable oil, like olive oil, coconut oil, sunflower oil, grapeseed oil, or corn oil, it is safe to put into the compost pile. These are all-natural products that will break down. The exception, however, is if you cooked meat or added animal fat while cooking. Not only could leftover animal fats attract small animals, but they also won’t break down like other compost materials. 

Fun fact: Earthworms love cooking oil. By adding it to your compost pile, you’re providing a tasty treat for those crawlers. You want to avoid adding too much, though. If you have more oil than moisture in your mix, you may wind up with an ecosystem where the grease is blocking airflow in the compost. Add a little oil at a time, and find alternative ways to use any remnants.

There are many options for safely getting rid of cooking oil. If you’re curious about waste and recycling other items in the City of Edmonton, we recommend checking out the garbage disposal guide. If you’ve been pouring grease down the drain and need an expert, judgment-free opinion on the status of your home plumbing system, we’re here to help. Please give us a call!

Three Types of Plungers & Their Purposes

You never know when a clogged toilet or sink will strike, and no one wants a dirty and stinky mess in their home! That’s why it’s important to have a powerful plunger at the ready. Affordable and simple to use, it can help you solve common drain problems—without needing to call your plumber right away. The only dilemma is: How do you know which type of plunger is right for you? Well, there are three main kinds, each serving a different purpose.

Types of plungers

1. Standard or sink plunger

Plumber’s drain cleaner tool. Rubber suction cup with wooden handle


When people think about plungers, this is the type that comes to mind most often. Sink plungers have a simple rubber cup connected to a long wooden handle. Sometimes the size of the cup can vary, but the general structure remains the same. Sink plungers are ideal for kitchen sinks, bathroom sinks, and bathtubs. They work best with flat surfaces where the rubber cup can form a tight seal.

2. Flange or toilet plunger

Wet plunger isolated on white with a clipping path.


Toilet plungers have a lot in common with sink plungers, but with one significant difference: There is a flange on the bottom of the rubber cup. A flange is a fold-out flap that helps the plunger form a tight seal inside the toilet drain. This makes it easy for you to clear clogs in toilets, but the flange can also be used for sinks or tubs.

3. Accordion plunger

Accordion plunger with rubber cup and curls.


Accordion plungers are less common, but they work very well for tough toilet clogs. Designed with a single piece of plastic, they have a small cup that forms into accordion-like bumps and ridges. Many people find these types of plungers challenging to use. But, when you get it right, you can form an extremely tight seal and create strong suction. Just be careful with the plastic, as it can scratch your toilet.

How do plungers work?

Plungers work with the power of pressure and suction. Sealing the plunger over the drain and pushing it down increases the pressure in your pipes. This moves any water and clogs downward. Then, when you pull the plunger up, it creates suction against the seal, pulling water and clogging out from the inside.

How to use a plunger

  1. If your toilet or sink looks like it’s about to overflow, don’t try to flush away the water. Wait about 10 minutes for it to go down.
  2. If the bowl or sink is still too full after that, use a bucket to remove some water. If there is no water, add a little with the bucket, as this will help improve the plunger’s suction.
  3. Select the right plunger for the problem at hand: A sink plunger for your sink and a flange or accordion plunger for your toilet.
  4. Submerge the plunger in the water and line it up with the drain to form a tight seal.
  5. Push the plunger down, and then pull it up in quick movements. Do this for about 20 seconds, and keep it sealed against the drain.
  6. After this, your clog should be cleared! Your toilet should flush and your sink should drain properly. But, if you’re still having trouble, it’s time to call a plumber.
  7. When you’re not using your plunger, make sure it stays clean and dry. This will keep it in good condition and avoid any cracks from forming.

Let’s fix your clogged toilet or sink

Are your drain issues beyond the help of a plunger? Don’t worry; we’re here for you! Our plumbers harness our HDD Drain Vision Cameras to look deep into your drains⁠—without needing to excavate them. After locating the clog, we flush it out with BIO Smart, an environmentally friendly cleaning solution. Book your plumbing service today!

Plunger FAQs

What’s the best type of plunger for a toilet?

Depending on your preference, a flange plunger or an accordion plunger. Simple to operate, the flange plunger has a flap that fits easily into the toilet drain. An accordion plunger functions similarly, but it requires a bit more dexterity. However, the ridged design provides more effective suction and plenty of force to clear clogs.

How do I choose a plunger?

Make sure you pick the right plunger for your needs! A flange or accordion plunger is best for toilets. A standard or sink plunger is ideal for (you guessed it!) sinks. Once you’ve figured that out, find a plunger with a good grip to make it easy to maneuver. It should also be able to form a tight seal, so make sure there are no cracks or deformities along the cup.

What kind of plunger do plumbers use?

Plumbers may use a taze plunger to clear clogs along with the above plungers. Taze plungers have a steel rod that connects to a snake that goes down your drain. These tools are best reserved for professionals, so make sure a qualified plumber is helping you with this. Plumbers may also use a snake or drain auger to clear nasty clogs. These flexible wire coils extend into your drain pipe to either pull or push the obstruction out.

Why does my toilet keep clogging?

There are a variety of reasons why your toilet might keep clogging.

  1. Family members may be flushing feminine products, wet wipes, or too much toilet paper down.
  2. There could be grease, calcium, minerals, and household cleaning products built up in your pipes.
  3. Your S-trap or P-trap may be blocked, making the clog impossible to clear with a plunger. S-traps and P-traps are serpentine sections in your pipes that prevent odourous gas from releasing.
  4. Your plumbing vents, which are ventilation pipes that release sewer gas from your home’s roof, could be blocked. 

If clogging is becoming a consistent problem in your home, contact us to investigate and fix the issue!

Do plungers push or pull?

Plungers both push and pull! Thanks to physics (more specifically, Boyle’s Law), the seal moves clogs inward as you push the plunger down. As you pull the plunger up, the plunger extracts clog out.

Can you use Draino in a toilet?

No! Draino is meant for sinks and bathtubs. Do not use it in a toilet. Our plumbers recommend more environmentally friendly products than Draino. We use BIO Smart to get rid of clogs in toilets and sinks. Biodegradable and pathogen-free, it naturally harnesses biological digestion to eliminate organic waste and grease.

More plunger resources

How to Keep Your Drains Clear of Hair and Other Buildup

Inspecting the P-Trap in Your Edmonton Home

How to Know Your Water Heater Needs Repair

Is your hot water water not working the way it should? That’s lousy! If you think you have hot water tank problems, you’ve come to the right place.

When it comes to troubleshooting hot water tank issues, there could be several culprits. There are many parts in a water heater. One issue may be the result of another. If you’re dealing with hot water tank problems, it’s best to observe any changes, and then call a professional who can spot the less obvious signs. 

Here are a few common issues to watch out for.

Hot Water Supply Is Inadequate

If you’ve ever asked yourself, “Why is my hot water not working?”, you’re not alone. One of the most frequent hot water tank issues is an inadequate amount of hot water. If you find you’re running out of hot water quickly, that could be a sign that there is sediment building up in the tank. This is normal as your hot water tank ages. Minerals like calcium or magnesium can start to collect in the bottom. As they build, they take up space, leaving less room for hot water. 

Mineral deposits also impact the overall efficiency of the unit. Flushing out the tank can help with this. An expert technician can take care of this for you. 

Heater Temperature Fluctuates Abruptly

It can be so frustrating to have hot water one second, and cold water the next—especially when you’re in the shower! Temperature fluctuations can be caused by a few things, including a leak in the tank, issues with the pressure relief valve, sediment building up in the tank, or a malfunctioning pilot light. All of these can lead to your hot water tank not heating consistently. 

Major leaks are pretty easy to spot. If you see water on the floor around the unit, then there’s the problem. Take a flashlight and check the tray under the unit. If there’s no water, but you see white mineral deposits on the floor, then that’s an indication a leak has dried and left calcium or magnesium behind. Check around the top of the tank to see if any of the pipes or valves are leaking. If you can’t spot anything, and your hot water is not hot, a professional can help with more detailed detective work. 

Uneven Water Pressure

Does it take forever to fill the sink or tub? Low water pressure is likely the culprit, and excess sediment could be to blame. Not only can magnesium and calcium build up in your hot water tank, but those minerals can also sit in the pipes in your home or apartment building. As they build up, the flow of water becomes restricted and travels far less efficiently.

A plumber can assess and determine if your water pressure problems are due to mineral deposits. 

Water Heater Pilot Light Went Off

If you have no hot water in the house, the pilot light could be to blame. That small flame has a lot of power! 

If you have a gas water heater, and the hot water tank is not heating up at all, check to see if the light has gone out. If you smell a mild garlicky odour around the tank, it’s an indication that the light needs to be relit. This is a simple process.

However, if the smell is very strong, it’s more serious. If strong odours are coming from the unit, you could have a problem with the gas line. If this happens, turn off the tank, open a window, leave the building, and call us and the gas utility company. 

Water Tank Produces Abnormal Sounds

One of the most common water heater problems is noise. An unusually loud water heater can be annoying. Sometimes they rumble, sometimes they emit a sharp whining sound, and sometimes you might hear a popping noise.

Sediment building up could be the issue. Magnesium and calcium deposits could be disrupting the regular operation of the unit, or they may have burnt on the heating element. If that has happened, you’ll notice a change in water temperature as well.

If you ever hear a bubbling or boiling noise coming from your hot water tank, the unit could be overheating. This is serious. You’ll need to call a professional immediately, since this sound indicates a pressure buildup that needs to be released. 

Water Is Discoloured

While discoloured water isn’t dangerous, it’s not appealing to shower or cook with, and it can impact the performance of your home appliances. This can happen with “hard” water—water that has higher concentrations of iron or copper. Hard water can rust the pipes in your home, leaving you with water that has a brown, rusty tinge to it.

A home water softener can help with this. Water softeners treat water through a process called ion exchange. Those mineral deposits that impact the pipes or cause build up are exchanged for potassium and sodium, which are much kinder to the plumbing. 

Water Has Bad Odour

If your water is smelly, then you could be dealing with bacteria in the hot water tank. Bacteria thrive in warm environments! If your hot water heater is improperly maintained, then it becomes a breeding ground for that nasty stuff. This will not correct itself on its own. If the smell continues, then your hot water tank needs to be looked at by a professional plumber. 

Hot Water Not Working? Call An Expert

If you’re in the midst of hot water tank troubleshooting, our expert technicians are available 24/7! Please give us a call if your water heater is not working. 

If the time has come to replace your unit, schedule a consultation! We’ll go through all the purchase and installation costs, and recommend units that best fit your needs and budget. Visit our specials page to learn more about leasing a hot water tank for as low as $13.99/month, or purchasing a new one for as low as $19.99/month. 


Water Heater FAQs

How frequently should I maintain my hot water tank?

Hot water tanks are usually out of sight, out of mind. Don’t forget about them! We recommend setting a regular reminder in your calendar to check on the unit every few months. Inspect the top and bottom, check for leaks, and listen for any unusual noises.

Maintenance should be done annually, to ensure maximum performance and longevity of the unit. Doing your regular checks will help you get ahead of any issues that may not be able to wait until the next maintenance appointment. 

Should you drain your hot water tank every year?

It will depend on the quality of your water. If you’re dealing with municipal water, there’s no need to drain your tank often. The water shouldn’t have enough magnesium or calcium to cause significant buildup in just one year.

However, if you’re connected to a water well and the water is “hard”, you may want to drain and flush the unit more often. A professional plumber can help you determine a proper schedule, and can suggest a schedule during annual maintenance checks. 

How do I make my hot water heater last longer?

The key to extending the life of your hot water heater is regular maintenance. Annual inspections by a professional along with regular onceovers by the homeowner or property manager are key.

How much does it cost to replace a hot water heater?

If your hot water heater is not working, you have a couple of options for getting a replacement. Prices vary, depending on whether you’d like to lease or buy. Schedule a consultation with one of our experts for information on leasing or buying a new water heater. Bonus: We currently have specials running on our water tanks!

How do I reset my hot water heater?

Look for the reset switch on the tank. It’s usually near the top, and might be behind a panel. If you find you need to hit the button often, call a professional. They can diagnose what’s going on with the unit and offer a proper solution.

How long do water tanks last after they begin to leak?

If your tank is leaking, you don’t have much time. The leak will not improve on its own. Call a professional to get an answer for your specific situation, but know that replacing the unit will need to happen pretty soon.

Should I replace my 8-year-old water tank?

It may not need to be replaced yet, but it will likely need to be soon. The average lifespan of a hot water heater is 8-10 years. During an annual maintenance check, a professional plumber can inspect and present an overview of the current state of the unit, and help with decisions regarding replacing or repairing. 

What Should Be Your Home’s Ideal Humidity?

Not too dry, not too damp—have you ever considered the ideal humidity for your home? We’re here to help! We have some smart tips for increasing and decreasing home humidity levels, depending on the weather. Your sense of comfort will be in the Goldilocks zone in no time.

What is humidity?

Humidity is the amount of water vapour or moisture in the air. You can’t see humidity, but you can sure feel it when it changes. 

If you’re getting frequent nosebleeds, have a family of snorers, deal with staticky clothing, or suffer from cracked skin or allergies, dry air (from a lower humidity level) might be to blame. Humidity levels might be too high when you see moisture or ice building on the inside of your windows in the winter. Even though your home is a controlled environment, the air originates from the outdoors. Weather changes can lead to disruptions in your indoor humidity levels. Luckily, there are things you can do to stay comfortable. 

How do I measure humidity in my home?

We recommend installing a smart thermostat to monitor the humidity in your house, so you’re able to adjust as outdoor conditions impact what’s happening inside. It should be regularly inspected by a certified professional. We recommend you do this annually, at the same time as your furnace inspections

Most smart thermostats have user-friendly and simple controls, so you can adjust indoor humidity levels with a touch of a button. Our technicians can make a recommendation based on what works best for you.

What is a comfortable level of humidity? 

It might take some experimentation to find the exact level for you and your family, but we have some suggestions about where to start.

If you’re contemplating what to set the humidity at in your house in the winter, you’ll need to look at the weather forecast first.

  • If the outside temperature is lower than -20°C, your indoor humidity shouldn’t be higher than 15%.
  • If the temperature drops between -10°C and -20°C, the recommended humidity in your home is around 20%.
  • If the outside temperature is between 0°C and -10°C, you should set indoor humidity between 25% and 30%.

The ideal humidity level in the summer is 45% to 55%. Humidity levels higher than that can be pretty uncomfortable, plus that extra moisture can create a breeding ground for mould and mildew in your home. 

How do I increase the humidity?

Using a humidifier boosts humidity levels by forcing moisture into the air. You can install whole home humidifiers or buy smaller machines for a single room. A whole home humidifier is installed into your air ducts, and controlled through your thermostat. 

Individual machines are more cost-effective, and are great for putting in bedrooms. Our Always Plumbing & Heating team is happy to make product recommendations if you’d prefer to go that route. 

How do I decrease the humidity?

Air conditioners reduce the humidity level in our homes. When air cools, humidity drops. Considering Edmonton’s humidity, you might want to use an air conditioner as the weather warms to reach your ideal indoor levels. Here on the prairies, excessive humidity is really only an issue in the summer.

How can I conserve energy while keeping an optimal humidity?

The most important step when considering home humidity levels is regular maintenance. Scheduling routine assessments of your furnace, central air, and humidifier will guarantee they’re operating the way they should, without increasing your power bill.

Our expert technicians are just a phone call away! We can evaluate the conditions in your home, and work with you to discuss the perfect options for cooling, humidifying, and heating. Contact us today for more information about how we can help.

Sewer Backup Valves: Why You Need One & Their Costs

Sewage needs to get out and stay out! When waste leaves your home, it should remain outside of the house in the municipal sewer system. But, not everything always goes according to plan. Sometimes, when flooding or heavy rainfall occurs, there’s a possibility sewage could flow back to your home. The best way to avoid waste flooding inside your house is with a sewer backup valve.

What Is a Sewer Backup Valve? 

A sewer backup valve is known by a few different names. You may see it referred to as a backwater valve, backflow valve, or a sewer backflow preventer. Whatever you decide to call it—these valves have a specific design, which forces the flow of sewage in one direction, away from your home and into the municipal sewer system.

Flashing flooding and heavy rainfall can overwhelm sewer lines, and then that smelly sludge wants to move back to where it flowed from. If that happens and you don’t have the right sewer backup valve in place, you could have a real mess. Sewage could come up through sink drains, toilets, bathtubs, or showers, leaving you with a stinky disaster. While the average cost of a sewer backup varies, depending on the extent of backflow, it’s definitely less expensive than installing a valve. 

How Do Sewer Backup Valves Work?

Sewer backup valves are pretty simple, but are an important step in protecting your home. These devices have a one-way flow with a flap on it. The flap opens and allows waste matter to leave your home. If that sewage ever starts to come back toward the house, the float ball inside senses the backflow, and automatically closes the flap. When the flap is closed, it blocks the pipe, so nothing will seep back in. Backflow preventer valve to the rescue! 

How Do I Know if I Have a Backflow Valve?

It’s more likely that a newer home will have a valve in place, but it’s a good idea to check regardless of the age of your home. Better safe than sorry, right? If you have a home built before 1989, you should definitely take a peek. Backwater valves weren’t required in homes built at that time. 

These valves are usually near your sump pump, and are often installed in the floor. Head to your basement (or garage, depending on how your home is built) and look around for the valve. It may have a cover on it, also known as a backwater valve access box. If it does, be sure to temporarily take it off and familiarize yourself with the apparatus.

How Do You Perform Backflow Valve Maintenance?

The biggest key here is to keep an eye on it, especially as we head into thunderstorm season. You may want to clean it every couple of months, so there’s no build-up on the backwater valve flapper. 

To do this, put on goggles, gloves, and old clothes you’re not worried about getting dirty. Remember, sewage flows through this! Take the cap off the top and check for debris. We recommend flushing clean water through the water backflow preventer, and scrubbing if needed. When you’re done, make sure you put the cap back on securely.

When performing regular maintenance, if you find the backflow valve leaking, it will likely need to be replaced.

How Much Does It Cost to Install a Backwater Valve?

If you’re looking for backwater valve installation in Edmonton, our expert technicians can take care of the job for you! And, you may be eligible for EPCOR’s Backwater Valve Subsidy Program, which could save you up to $800 on an installation.
Contact us today to talk to one of our experts and book an installation!

PEX Pipes vs. Copper Plumbing: Which Is Right for My Home?

Is it time to pump up your plumbing game? If you’re building a new home or you need to replace leaky pipes, you may have heard that copper plumbing and PEX pipes are the top choices out there. PEX is an acronym for “cross-linked polyethylene”, a sustainable plumbing solution that has been around for about 35 years. Meanwhile, copper pipes have been used for centuries, dating all the way back to ancient Egypt.

Trying to decide if PEX plumbing is better than copper? Here’s how they stack up against each other.

PEX Pipe Advantages & Disadvantages

Pros

  • Extremely durable 
  • Resistant to hot and cold temperatures
  • Better for the environment
  • Budget-friendly
  • Simple to install
  • Quiet water flow

Cons

  • Must be kept away from flames or extreme heat
  • Can’t be exposed to direct or indirect UV light
  • Susceptible to rodent damage

With white or clear colouring, PEX pipes are highly durable and semi-unbending. Similar to an electric cable, you can snake them through your wall to install them, making them very simple to maneuver.

PEX pipes are extremely easy to cut with a steel rotational cutter. You can join them with standard plumbing materials like crimp rings and cinch clamps. PEX pipes are also much less expensive than copper ones (often a third of the price)!

Copper Pipe Advantages & Disadvantages

Pros

  • Long lifespan
  • Rust-resistant
  • Reusable and recyclable
  • Contain antimicrobial properties

Cons

  • More likely to burst in the cold
  • Intensive installation process
  • More expensive
  • Can become toxic

Made of shiny metal, copper pipes come standard in many older homes built before the 1980s. Their big advantage is that they can stand the test of time, but they are more susceptible to freezing and leaking in our cold Canadian winters. Long exposure to acidic water can also damage copper pipes.

Copper pipes are relatively simple to install. With the right tools, practiced homeowners can cut and solder the material. However, the whole process can be time-consuming and require multiple fittings.

Which Lasts Longer: PEX Pipes or Copper Pipes?

Copper pipes are the winner here, typically lasting between 50 to 70 years. PEX pipes still have a long lifespan of 30 to 70 years.

How Much Do PEX & Copper Pipes Cost?

Copper’s recyclability has increased its price in recent years. It’ll cost you about $8,000 to $10,000 to put copper pipes in the average 1,500-square-foot home with two bathrooms. Meanwhile, PEX pipes cost about $4,000 to $6,000 in a similarly sized house.

Are PEX Pipes Better than Copper Pipes?

Generally, the consensus is that PEX pipes are the better choice. The low cost and ease of installation make them a great option. Plus, they won’t corrode and are more durable against acidic water and the elements.

Should I Switch Copper Pipes with PEX Plumbing?

If your copper pipes are functioning just fine, don’t go to the lengths of replacing them with PEX plumbing. However, if you discover problematic leaks and need to install a new system, PEX pipes are a smart way to go. Contact our expert plumbers for a consultation.

Replace the Poly-B Pipes in Your Home

Installed in 700,000 Canadian houses in the 1980s and 1990s, poly-B (polybutylene) pipes are made of plastic with copper connections and elbows. They are extremely prone to cracking and bursting, so we recommend replacing them as soon as you can.

Our highly trained plumbers will undertake an extensive poly-B pipe replacement process. From preparation and installation to repair and remediation, your new PEX plumbing will be safe, durable, and reliable. Feel peace of mind and book an appointment today!

More Plumbing Resources

Replace Your Old and Recalled Poly-B Pipes

Dangers of Poly-B Plumbing

How to Prevent Frozen Pipes

How to Thaw Frozen Pipes: 6 Steps to Take When Your Pipes Freeze

How to Clean & Replace Your HRV Filter

Ahh, who doesn’t love breathing fresh air in their home? A heat recovery ventilator (HRV) system can make a world of difference in creating a balanced and energy-efficient space. As with any appliance, it’s important to maintain and clean your HRV system to ensure it’s running at its best. 

What Is a Heat Recovery Ventilator (HRV) System?

Because we spend most of our time inside, the importance of having a well-ventilated home can’t be understated. Since the 1970s, houses have become much more airtight, with strong insulation, vapour barriers, and caulking becoming standard.

Although this means homes have become more thermally efficient, it also means that stale air can linger inside! Moisture and chemicals can build up, breeding mould, bacteria, mildew, dust, and pollutants—all of which can negatively impact your health.

Thankfully, a heat recovery ventilator (HRV) system cycles out the stale and moist air in your home, and then replaces it with filtered and fresh air from the outdoors. This creates balanced ventilation throughout every room.

At the same time, an HRV system uses the stale air inside to warm up the outdoor air coming inside. In the winter months especially, we can close windows and doors with peace of mind, knowing fresh air is being cycled in without sacrificing any heat.

How to Clean Your HRV Filter 

If you already have an HRV system, keeping it clean and well-maintained is a crucial aspect of owning one. Here are the steps you need to follow:

  1. Be sure to turn off your HRV system and unplug it.
  2. Open the door by unclipping the fasteners.
  3. Remove the HRV filters by sliding them out from the middle of the unit.
  4. If the HRV filters are really dirty, vacuum out excess dust and grime.
  5. Wash the HRV filters in soap and warm water.
  6. Let them dry and reinsert them when they’re ready.
  7. Now, you can safely plug in and turn on the HRV system.

How to Clean the Filter Core of Your HRV

Sometimes, dirt and debris can build up in the HRV’s filter core. If this is the case, you can also remove it and clean it.

  1. Usually, HRV filter cores have sidetracks that you can slide out. Pull those out first.
  2. Now, you should gently and easily be able to pull the mechanism out.
  3. After that, you can wash the HRV filter core in soap and warm water.
  4. Once it’s dry, place it back in the machine, along with the sidetracks. 

How Often Should You Clean & Service Your HRV?

It’s recommended that you clean your HRV filters once every two months. This will allow you to remove any dust and grime that collects over time.

When Should You Replace Your HRV Filter?

You should change your HRV filters out once or twice a year. If they’re still mucky and dark after a good washing, that’s a sign that you should put new ones in.

How Long Does an HRV System Last?

Typically, HRV systems work for 10 to 15 years. After that, the technology has reached the end of its lifespan and it’s time to look for a newer model.

Give the HVAC Experts a Call

At Always Plumbing & Heating, we’re obsessed with making your home as comfortable as possible. If you need to maintain or install an HRV system, book an appointment with us today. Our HVAC experts will assess your home, talk about your needs, and perform the right solution for you.

More HRV System Resources

Tips for a Healthy Winter IAQ

How to Unclog a Drain with a Snake or Drain Auger

A clogged drain? What a pain! Luckily, dislodging clogged drains is inexpensive and simple using a drain snake or auger. These plumbing devices are long, flexible (some might say snake-like) metal coils that go into the drain pipe and push or pull the obstruction out. You can use them for bathroom or kitchen sinks, showers, and tubs, and they’re a much better option than using liquid drain cleaners. It’s pretty easy to do yourself! We’ve outlined the steps here:

What You’ll Need When Cleaning a Clogged Drain 

It might be obvious, but the first tool you’ll need is a drain snake or auger. In addition to that, it’s good to have a bucket to catch any water that may spill, a rag to clean up messes, and a pipe wrench or pliers for removing the trap arm (if you’re working on a sink drain).

Remove the P-Trap

The P-trap arm is the section of pipe between the sink and the wall. Use your pipe wrench or pliers to remove this. There will likely be a bit of water in it, so have your bucket and rag nearby to minimize the mess. 

Thread the Coil into the Pipe

Once the P-trap has been removed, you’ll put the end of the snake or auger into the exposed drain pipe end. If you’re working to unclog a shower or bathtub, you’ll simply insert the cable into the drain. 

Use Gentle Pressure

Some snakes and augers have a crank on the end. If yours does, you’ll begin to crank the handle and guide the cable through the pipe. If it doesn’t have a crank, you’ll push it through with your hands. You want to be gentle! If you feel the end of the tool scratching the side of the pipe, pull it out and reposition. 

You’ll probably feel a bit of resistance whenever the pipe curves. That’s normal, just push a little harder. 

Push or Pull the Obstruction

You’ll know when you’ve hit whatever is clogging the drain pipe. Sometimes, it’s a matter of pushing it through, and sometimes, it will get stuck on the end of the cable and come back when pulling the snake out. 

If the obstruction is stuck on the cable, remove it with your fingers and toss it in the garbage. Don’t attempt to put it back down the drain!

Reassemble the Pipe and Flush It Out

If you think you’ve cleared the pipe, put the P-trap back in place and run hot water down the drain for a few minutes. This will show you whether or not you were successful. If the water is still draining slowly (or not at all), you may not have removed the entire obstruction. Remove the P-trap and try again. 

Prevention Is Key

The best way to avoid clogged drains is to be careful about what goes down them. Using a hair catcher or sink strainer can prevent unwanted materials from heading down the drain pipe. 

Call the Experts 

If using an auger or snake isn’t working, you might have a more complex clog, and it’s time to call for help. Our expert technicians will take a look at the drain and pipes, assess the problem, explain what needs to be done, and then quickly address it for you. Contact us today to book our plumbing services!

Don’t Fall for These 6 Common Plumbing Myths

Oh, the stories we’ve heard. There are so many plumbing myths swirling out there! We wanted to set the record straight on some of them, so you avoid severe mechanical damage and save money on potentially costly repairs. 

Myth 1: Putting a Brick in Your Toilet Tank Will Save You Money

Rumour has it that if you put a brick in your toilet tank, it will use less water when you flush it. This is a bad idea! Placing anything in your toilet tank will impact the overall performance of it, not to mention a brick can crumble and leave sediment or damage the flapper or other plumbing mechanisms inside.

If you think you need a better performing toilet, we can help!

Myth 2: Flushable Wipes Are Perfectly Safe

You’d think you’d be able to trust something labelled as flushable, but don’t. Flushable makeup and baby wipes are big culprits for clogging pipes. Even if they do go down and are out of sight, out of mind, you could face expensive plumbing repairs later. 

Tempted to toss them in the toilet? Aim for the garbage can instead. 

Myth 3: A Noisy Water Heater Is Ready to Burst

If you’re beginning to hear rumbling or gurgling in your water heater, don’t panic. While it is an indication that something is up, you’re not in danger of witnessing an explosion. 

A noisy water heater likely just needs to be cleaned. You’ll start to hear some rumbles when there’s a build-up of sediment in the tank, which will impact the machine’s ability to make hot water. Call a plumber and we can help you sort it out, before it turns into a water heater repair issue.

Myth 4: Liquid Drain Cleaners Are the Best Way to Unclog a Sink

Wouldn’t this be nice? Liquid drain cleaners are actually harmful for your pipes! They’re chock-full of chemicals. While they eat away at whatever is causing the sink clog, they’re also eating away at the pipes which will cause expensive plumbing damage later.

Instead, you can unclog a sink by pouring boiling water down the drain. If that doesn’t work, you may need to dig for any pesky hairs with a wire coat hanger or drain snake. After that, it may be time to contact a plumber

Myth 5: If It Drains, Everything Is Fine 

If your sink or tub is draining slowly, but everything eventually goes down… you still need to deal with it. Even though you can’t see it, there’s likely a clog somewhere in the pipes. It’s best to address it before nothing drains!

Myth 6: Ice Cubes Sharpen Garbage Disposal Blades

Another popular plumbing myth but it’s definitely not true. Using ice and salt can help clean your garbage disposal, but using ice too often can dull the blades. 

The blades (which aren’t even really blades, but little teeth) don’t need to be sharpened. They’re designed to handle wear and tear. 

Dealing with Plumbing Issues?

If you think your pipes need some TLC, let us help. Our expert plumbing technicians will assess the situation, explain the problem, and then quickly find a solution. Contact us today to book plumbing services! 

How to Clean a Smelly Garbage Disposal

Do you have a stench in your sink? Blech! It happens to everyone, and the good news is there are some simple steps to eliminating the stink and preventing it in the future. Here’s how to make your garbage disposal smell as fresh as a daisy once again.

Scrub What You Can See

The first step in de-stinking your garbage disposal is to clean the visible sections. We recommend squirting dish soap onto a scrub brush or dish wand, and putting some muscle into it! Small food particles can get stuck in the grooves of the rim, and tough scrubbing can loosen up a lot of crud.

Let Your Garbage Disposal Soak

Once you’ve taken care of the outside, it’s time to focus on what’s happening inside the garbage disposal. Put in the plug, and half-fill the sink basin with water. We recommend adding some dish soap, vinegar, or your favourite natural cleaner. 

When you unplug the sink, turn the garbage disposal on, so the soapy water works its way through all the little areas that may not always get cleaned.

Use Ice and Salt

The first two steps can do a lot to deodorize your garbage disposal. But, if you still need a little more oomph, the combination of ice and salt works wonders. Pour a cup of ice cubes and a half-cup of rock or kosher salt into the garbage disposal. Turn it on, and let the blades crush the ice and salt, cleaning any residue left on the metal. 

It’s not the quietest step of the process, but it does the trick!

Prevent Future Garbage Disposal Smells

Remember making volcanoes in elementary school science class? The combination of baking soda and vinegar can be a wonderful deodorizer for your sink, too! Sprinkle a cup of baking soda into the garbage disposal, followed by a half-cup of vinegar. It will fizz and get into the nooks and crannies of the machine. Let it sit for an hour, and then turn on the garbage disposal and run cool water through it for at least a minute.

The next time you eat an orange or use a lemon in the kitchen, toss the peels into the disposal, and let them grind up. The natural citrus scent releases and naturally deodorizes, while the acid breaks down anything left behind in the disposal. 

For preventative maintenance, we recommend an enzymatic drain cleaner like BioSmart. Non-corrosive and environmentally friendly, BioSmart reduces odours by breaking down lingering bacteria in your pipes. It also keeps your drains flowing smoothly and prevents clogs. BioSmart can be used once per month for optimal performance.

Ask the Experts 

If you’ve gone through all these steps and are still dealing with stubborn smells, then it’s time to call one of our top-notch plumbers. We’ll do an assessment, identify what the issue is, and then explain the process and cost of repair. If something in your garbage disposal needs to be replaced, we’ll give you a variety of options before proceeding. Let’s take your sink from stinky to sparkling clean! Contact us today.

4 Signs It’s Time to Upgrade Your Home Heating Unit

’Tis the season to crank up that thermostat! As the weather cools, staying warm and toasty at home is a priority. When was the last time you checked your home heating unit? Here are some ways to know if your furnace needs some TLC.

1. Your Furnace Is Noticeably Noisy

If you’re playing detective on your heating unit, check its noise. Do you hear anything new or strange? Then, that’s a sign you may need an upgrade. 

The noises could be coming from a belt, fan, or the blower. Our HVAC experts can help you determine what those terrible screeches or clangs mean.

2. It’s Over a Decade Old

Typically, home heating units last for about ten years. If yours is starting to get around that age, you’ll want to start looking for a new model.

Good news: Newer units are more energy efficient. While you’ll need to fork out some cash for a new one, you’ll ultimately save on your monthly bills!

Thermostats have also seen some major improvements through the years. You might want to consider swapping your existing unit for a smart, programmable thermostat, which is another great way to save energy—and money, too.

3. The Heat Is Inconsistent

If some rooms feel much warmer than others, or one room always seems to be really chilly, that can be another sign that you’re due for an upgrade. Home heating units are developed to evenly distribute warmth through your house. 

Before you jump to conclusions, check your air ducts. They could be the culprit! While inconsistent heat can be a sign of an aging heating unit, it can be helpful to have someone take a peek at the air ducts in your home to see if they need to be resealed or cleaned first. 

4. You Keep Repairing It

Absence makes the heart grow fonder… especially when it’s your repairman. If you’ve been calling for repairs way too often, that’s a big indication it’s time to get a new unit. Hopefully, if you’ve had to call a professional a few times, they’ve already recommended this (we certainly would!). 

We recommend completing regular maintenance on your furnace to extend the lifetime of the unit. You’ll spend less money, since you’ll catch big issues before it’s too late. 

Is It Time to Replace Your Furnace?

If you’re starting to get suspicious about your heating unit’s performance, let us know! Our expert technicians will assess the unit and present options. We always offer repairs first, but sometimes, replacing is the only way to go. 

Choosing a new furnace can be an intimidating task, so our certified technicians will assess your home’s unique heating needs, and be straightforward with you about replacement options. We’ll provide you with the exact cost before the work begins. Contact us today and we’ll help you get the heat going again! 

The Best Garage Heaters for 2022

When winter hits in Edmonton, many of us want to hibernate! While that’s not an option, having a garage heater for your vehicle can make the season a little more bearable. 

Garage heaters allow you to use the space whenever you want, even when the temperature drops into a range where we’d all like to crawl back into bed. A nice and toasty garage means you can use it as a workshop or as storage without any danger. Garage heaters eliminate the need for idling, which means a decreased carbon monoxide risk and far less stress on your vehicle. They are also a far safer alternative to space heaters.

At Always Plumbing and Heating, we recommend natural gas garage heaters. They are less expensive to operate and more energy efficient. Here are our top picks:

Hot Dawg® by Modine

Gas-efficient Hot Dawg® garage heater.

We carry the Hot Dawg® Power Vented model. When it’s cold in the winter, this is an excellent choice for heating residential garages but it’s great for commercial or industrial spaces too. Hot Dawg® garage heaters come in a variety of sizes. 

One of our favourite things about this brand is that it is incredibly quiet. You get all the comfort without the noise! 

The Hot Dawg® Power Vented heater can run on natural gas or propane and puts out 30,000 to 120,000 BTU of heat, making the area balmy and pleasant. These units are quick to install, since they’re power-vented and extremely lightweight. 

Reznor® 

Safety-packed Reznor® garage heater.

We’re big fans of Reznor® and carry the UDAP and UDAS models of their V3 heater. If you have a minimally insulated garage, this could be the pick for you! We’re consistently impressed with these industry-leading units, which are available in several sizes. 

These garage heaters also run on natural gas or propane, and are controlled by a separate thermostat. We’re big fans of the safety features Reznor® has on their units. These models run on a spark igniter with no standing pilot light. 

Like the Hot Dawg®, these heaters are extremely quiet. Power venting increases the efficiency of the units, and they also boast an 82% to 83% energy-efficiency rating.

Let’s Talk About Your Garage Heater Options

If your daily weather forecast checks have you thinking about a garage heater in time for winter, give us a call! We’ll discuss our top picks for your space, answer any questions you have, and schedule an installation. Your garage doesn’t have to be a frigid, uncomfortable spot! Contact us today to book your appointment

If You Own A/C, You Need to Read This

As we enter into the dog days of summer, we are receiving more and more calls from customers looking to purchase an air conditioner. But with heat, we are also getting flooded with calls from homeowners to service or repair their existing, but much neglected, air conditioners. Sometimes, when your air conditioner is not cooling adequately, you can take care of this problem yourself by playing a little bit of detective. Taking the time to troubleshoot the problem on your own might save you some time and money, and get your family feeling cool without having to hire a professional.

Once you have tried these tips below, and if it hasn’t resolved the issue, then it is time to contact a local air conditioner service company like the experts at Always Plumbing & Heating, to provide an in-depth assessment, diagnosis, and repair of your unit.

5 Air Conditioning Trouble-Shooting Tips

1. Check Your Thermostat

As redundant as this sounds, we cannot stress how many times customers have called us with no heat or no cooling, and their only issue was the batteries in their thermostat were dead. This is the most simple and straightforward solution, so we always advise customers to check this first, prior to booking a service call. It is also important to check the settings on your thermostat. Ensure that you have switched it from Heat-only mode, to Cooling-mode, or to Auto-mode which will switch between heating and cooling as needed, to keep your home at a consistent, comfortable temperature. Also, check your fan settings. Your fan can be set to Auto, On, or Off. If your fan is set to On, it will run constantly, even when the system is not cooling, which can result in the circulation of warm air. Set your fan to Auto, and the blower will turn off until your A/C is cooling or your furnace is heating.

2. Dirty Air Filter

The second most common issue is a clogged filter air filter. As your air conditioner is cooling, the filter on your furnace is trapping dust, pollen, and airborne particles. A clogged filter will result in reduce or blocked airflow, which can cause an A/C to stop working efficiently, or stop working altogether. If the air in your home is warmer than normal, or your A/C runs for a short period then shuts down and restarts, you may have a dirty air filter. Change or clean your filter according to your furnace owner’s manual.

3. A/C Obstructions

Check your exterior A/C to see if there are plants crowding the compressor. Your air conditioner needs adequate airflow in order to cool properly. Make sure to trim back any plants so there is 2 to 3 feet between your A/C and any plant or other structures. Do not store items up against your air conditioner. And every spring, don’t forget to remove the winter storage cover before starting up your unit!

4. Check Your Circuit Breaker

If your air conditioner is not turning on, make sure to check your breaker panel. Occasionally, the breaker can trip, and it may be as simple a fix as flipping the switch back on!

5.  Low Refrigerant

Your air conditioner used refrigerant to cool your home. The solution is pumped through the internal workings of the equipment, pulling heat from your home and depositing it outside, creating a cooler, less humid indoor atmosphere inside. Signs that your refrigerant is low may include the house not staying cool enough, the system running continuously or for much longer than normal cycles, or the A/C turns on and off quickly several times in a row. You may have a leak or other issue causing the refrigerant levels to drop. If you suspect low refrigerant, you should call a service company to troubleshoot the issue for you. They will have the correct tools and knowledge to get to the bottom of the issue.

When to Contact a Professional

Understanding common air conditioner issues, and taking the above steps, may save you time and money. Keep in mind, there are several other instances that require the expertise of a professional. Every spring or summer, you should ensure your air conditioner receives the TLC of a professional A/C tuneup. This will keep your unit running efficiently all summer long, and reduce your risk of experiencing more serious and costly A/C repairs. If you are already having problems with your air conditioner, and the above steps did not solve your problems, don’t panic. Our team of cooling experts really knows their stuff! Repairs can have straightforward solutions but if left unattended, a small problem can quickly balloon into a much larger one. The HVAC pros at Always Plumbing & Heating will thoroughly assess and diagnose the problem, and provide you with straightforward pricing for your repair. Our 5 Star Superstar team will help you and your family cool off as quickly as possible, with guaranteed work that you can count on!

5 Signs Your Toilet Needs to be Replaced

Your toilet, the throne, ye ole crapper, the loo…it’s that one thing in your home you use thousands of time per year, but you often neglect! Toilets can be a sensitive subject, and most people have at least one story about a toilet experience gone array. To keep bad toilet memories a thing of the past, our plumbers have put together a guide on the top 5 things to consider when it comes to your toilets.

1. Frequent Clogs

Are you having to plunge your toilet frequently? If you find yourself plunging your toilet once per week or more, you are no stranger to the annoyance this causes. Older model, low-flush toilets often require more than one flush and are subject to frequent blockages. If you find this is happening to you, you may consider having your toilet replaced with a newer, more energy efficient model that will work much better for you and save you money (and save the headache) in the long run!

2. Too Many Repairs

Some toilet repairs are simple, routine maintenance tasks, like changing the flapper or fill valve, or replacing the toilet handle. If you find you are replacing parts more frequently, over time these costs can add up. There comes a point where you can put too much money into patching together an old toilet. If you are in this situation, you may consider replacing the entire toilet with a newer model, saving you more money in the long run.

3. Cracked Porcelain

Hairline cracks can develop in the toilet tank or bowl. These cracks can create a flood if they rupture. You should inspect your toilet tank and bowl for crack when you clean your toilet. If you notice cracks, you should replace your toilet. With cracks are left without attention, they can develop into a leak over time, causing water damage to your home.

4. High Water Bills

You can save a lot of money every year on water/septic bills by replacing your toilet. Older toilets use up to 5 gallons of water per flush! The newer low-flush models use under 2 gallons per flush. You can read more about the benefits of low-flush toilets here. With the rising costs of utilities, saving on household water usage makes sense. And as a bonus, you are helping the environment as well!

5. Badly Scratched or Stained

The porcelain on the surface of the toilet can become scratched, corroded and discoloured over time. Eventually, even with frequent cleaning, you will be unable to have a clean-looking toilet bowl. This can be an unsightly annoyance to you and your guests. If you find your toilet has become worn and corroded and is increasingly difficult to clean, it could be time to replace it.

If your toilets are giving you trouble, take special attention to decide whether to repair or replace them. Our plumbers will always offer repair options first if they are the most suitable and cost-effective. But some situations may call for replacement of your toilets. If you are experiencing any of the above concerns with your toilets, you should consider replacing them with newer, safer, and energy-efficient toilets. You can trust the expert plumbers at Always Plumbing & Heating to provide you with the most innovative and trustworthy brands of toilets, like Gerber, Toto, and Kohler, just to name a few. We can provide you with a broad selection of toilets of varying styles, colours, features, and functions. A crowd favourite is the contemporary-style toilets with a skirted base, making cleaning a breeze having no knobs, grooves, or bolts to have to clean around. If your toilets need to be replaced, give us a call…we’ll be right over!

How to Fix a Garbage Disposal

When the garbage disposal in your kitchen malfunctions, it can cause a huge headache for homeowners. In addition to the nuisance of having a fixture that isn’t working properly, leaving this in disrepair can lead to bigger problems down the line such as a blocked pipe. If your garbage disposal isn’t working properly, you should troubleshoot the problem first before you call a plumber. This may be a simple thing you can fix on your own. If you aren’t able to repair the issue after trying these tasks, then you may need to give Always Plumbing & Heating a call to help you out.

Preparation

Gather the following supplies to assist you with troubleshooting the cause of your garbage disposal issues:

  • Screwdriver
  • Allen key
  • Garbage disposal wrench
  • Bucket
  • Plunger
  • Clamp

Check Your Electrical

If your garbage disposal stops working completely and has no signs of electrical activity, check under the sink and look at your electrical connections and ensure the device is plugged in. Check underneath the unit for a red reset button and hit it to reset the electrical. Check your main breaker box to see if a breaker was tripped. If none of these solves the problem, you may actually have to replace the unit if the motor has failed.

Rotate the Blades

If your disposal makes a humming sound when you turn it on, but the blades aren’t turning, you may have a blockage preventing the blades from turning. Try the following to clear the blockage:

  • Turn off the disposal and unplug it
  • If there is any water standing in the sink, remove it with a plunger, or if a larger amount of water, bail it out with a bucket
  • Clamp your dishwasher line to prevent dirty water from back flowing into the dishwasher.
  • Insert the Allen key into the access hole at the bottom of the garbage disposal (under the sink)
  • Turn the Allen key back and forth to rotate the blades in an attempt to break up the clog, allowing the blades to move freely.

Rotate the Impeller

If that didn’t fix your issue, attempt to rotate the impeller from the top of the disposal. Ensuring your disposal is still turned off and unplugged, try the following:

  • Insert a garbage disposal wrench or the tip of a broom handle into the top go the disposal
  • Move it back and forth until the blockage breaks up
  • If there is a larger object stuck in there, like a whole potato, a banana peel, or the pit of a fruit, you can attempt to remove it by hand. Put on a glove and reach inside the disposal and try to remove it

In Conclusion

Once you have tried all of the above measures, plug the unit back in and turn it on. You may have found you were able to fix the repair on your own, give yourself a pat on the back! If you still don’t have proper operation at this point, then it is time to call a plumber. It is recommended you unplug your device again until the plumber is able to assist you with the repair. Remember, you shouldn’t put this task off as doing so could result in a blockage further down the lines, causing a more extensive repair. The expert plumbers at Always Plumbing & Heating will do a thorough assessment of your device, identity any problems, and explain to you the most straightforward and cost-effective repair. If it is determined the unit needs to be replaced, we will present you with a variety of options and install the device on the same day so your kitchen is back to normal! Having things in your home not working properly is a huge inconvenience, and we hope to lessen that for you should you need our assistance. We are here to help people like you today, tomorrow…and Always!

How to Prevent Basement Flooding

Coming home to find that your basement is now a swimming pool and your sofa is now a pool lounger is everyone’s worst nightmare. Worry not though, in this article we are going to cover what you need to check and what you can do to prevent that terrible situation from ever happening. 

Sump Pump Basics

So, in your basement you are likely to have a sump pump. What is a sump pump you ask? Let me explain. 

A sump pump is a pump that is used to remove any and all excess water that has built up in the sump basin. The sump basin essentially collects the runoff groundwater from around the home and holds it there in order for the sump pump to work its magic and remove it. 

Sump basins and pumps are usually installed if you live in low-lying areas or have a regular build-up of damp conditions which often lead to pooling and flooding. Most homes in Edmonton that have basements or crawl spaces are equipped with at least one sump pump. It’s important to keep on top of your sump pump and basin to maintain a water-free basement, particularly if your basement is below the water table or you are in an area that floods often with high rainfall. 

Sump Pump Issues

Sump pumps can sometimes get a little overworked or fail from a number of issues. Below I will describe some issues that may arise when your sump pump is having an off day. 

Overwhelmed Pump:

This is quite a simple issue to have but it can often lead to quite dramatic outcomes. An overwhelmed pump can be a big issue when snowmelt or heavy rainfall causes a sudden influx of water. The pump alone can’t handle the volume of water and can often fail to perform well under the strain. 

The fix for this is a simple one, make sure you sufficiently upgrade the pump you have to be able to handle increased water flow. This will allow the pump to work harder and more efficiently when you need it the most. 

The second fix is to buy a temporary backup pump. These can be battery operated, meaning that you can add them or take them away at a moment’s notice. 

It is also worth considering another pump that is fitted on the other side of your basement. This will split the workload of one pump and make it far more efficient at pumping out water, should the need arise.

Improper Fitting of the Pump:

If there is no water passing through the pump, there is a high likelihood that your sump pump isn’t working correctly. This can often come down to the fact that the pump is not fitted in the correct matter, or that it isn’t connected to the wastewater system. 

One of our specialists can take a look at your drainage system and tell you how you can properly fit the pump, fit the required drains and unclog any drains, if not fixing it themselves. 

Blockages: 

Basements are home to many kinds of dirt and debris, not to mention the debris that is brought in through the influx of water, should a storm hit. It’s important to regularly check your sump pump for blockages as these can cause the pumps to be put under extra strain, ultimately causing them to burn out and break. 

The pump has a float system that notifies the pump when to switch on and off. This system can get clogged with grime, causing the pump to either remain on all the time or never turn on at all. 

Always ensure that your pump is running clear, make sure that you clean your basement and the well in which the pump sits. This will prevent any dirt or grime from entering the pump area. You should also regularly clean your sump pump. You can learn more about that here.

How to Test Your Sump Pump

Testing your sump pump is a relatively easy task and should be undertaken on a regular basis, particularly after a heavy flood. 

Take a five-gallon bucket, fill it up with water and start pouring the water around the pump. Once the level of the water starts to rise, the pump should kick in and you will be able to hear and see it working. If it isn’t working, it’s time to consider some of the points above as to why it isn’t and get it fixed. 

Hose Bibs

Hose bibs are what you connect your hose line to. Predominately located outside, these little spigots can be bothersome if not properly cared for.

If the hose bib is frozen, as is often the case in colder climates, it can cause severe flooding issues, especially when you start using your garden hoses in the Spring. This is due to the bib rupturing due to the weakened state of the material not being able to handle the pressure of the water coming through it. 

A simple way to protect your hose bib is to wrap it in insulation and tape it tight. This can protect the bib from those cold winter frosts and snows, ensuring that the bib maintains its integrity when you come to use it. 

To properly protect the bib and keep it free-flowing, prepare it for winter by turning off the water supply to the bib, opening the external valve, and leaving the water to drain off. This way it eliminates the risk of freezing and the water pressure building up behind the bib, reducing the risk of ruptured pipes and flooding. 

To thaw out a frozen bib it’s recommended that you wrap it in old towels and keep pouring boiling water over the towels until the flow of water from the tap is free-flowing and without restraint. You can learn more about how to check your hose bibs in the spring in a safe manner by reading this article.

Summary

If you are having issues with your sump pump or hose bib then you can call us at 780-489-8118, we are here to fix up all your plumbing questions and needs. Don’t let flooding become a major issue for your home. Call the experts at Always Plumbing & Heating today. We will send a professionally trained plumber to your home to evaluate the situation to set you up for optimal flood protection. Keep in mind that should flooding become an issue for you, we are available 24/7 to assist with emergency repairs. The work we perform is backed by Iron-Clad guarantees that are sure to give you peace-of-mind, not just today, but Always!

Benefits of Spring Air Conditioner Service

The winter months are falling away as the new year blossoms into Spring. Thoughts turn to spring tasks such as cleaning, fixing up the garden, and prepping the house for the long summer to come.

Most homes that suffer from hot summers will have central air conditioning (A/C) for year-round home comfort. Throughout the winter and fall months, the A/C is often left unused and disregarded, only to choke back to life when the temperatures rise in the late spring. 

Giving your A/C a good service earlier in the year is the perfect way to prevent issues later in the year. In this article, we are going to cover what the benefits are to getting that early spring service in and why it could benefit you in the long run. 

Keep Those Bills Down

Nobody likes spending more money than they have to, particularly when it comes to their electricity bills. 

By servicing your air conditioner on a regular basis, particularly earlier in the year, you will find that you save yourself a fortune in the warmer months. Air conditioners that are regularly serviced tend to perform better than their un-serviced counterparts. They typically use a considerable amount of electricity to work to the capacity that you require. 

An air conditioner that has been serviced will operate in such a way that it requires minimal electricity to run, therefore, saving you a substantial amount on your electricity bills. 

Air Quality 

Air conditioners recycle the air around us, drawing in and removing the heat from the air and releasing the cool air back into the room to keep us nice and chilled. 

Air conditioners also have a secondary use, they filter the air as they cool it. There are viruses, allergens, and other pollutants in the air we breathe. The air conditioner has inbuilt filters that are used to filter the air, removing allergens and particles from the air before we breathe it back in. Handy, right?

Well, if your air filter in the air conditioner is not changed on a regular basis, these particles can slip through, meaning that the air is not as clean as you may think. If you live in a big city, this can be very important as the build-up of pollution from cars, shops and general city life can potentially have a long-term negative effect on your health.

It’s recommended to get your air conditioner serviced in order to maintain the health of the filters and in turn, your own health.  

Life Without Breakdowns

This one shouldn’t be a shock to you; however, some people are under the impression that their air conditioning will last them forever, without ever having a service or replacing basic perishable parts like filters.

Think of your air conditioner as a car, it carries air in and out of your home all day long, day in, day out. That’s tough work and parts are bound to get worn out and run out. By arranging one of our qualified technicians to come and service your air conditioner, you could potentially be saving yourself a fortune in the future.

If you are as lucky as most people, your air conditioning will break down at the hottest point of the summer. Having a broken A/C on a hot day will have you wishing you had serviced it earlier, as to avoid this situation entirely.  Read more about how A/C servicing can reduce the occurrence of sudden breakdowns here.

Efficiency

As parts of your air conditioning start to fall off, you will notice that your unit may not be producing the best quality of air cooling. This can often be down to the fact that certain parts may need replacing or topping up, such as the air filters we mentioned earlier. 

By having that annual or bi-annual service you are ensuring that your air conditioner is in top shape, ready for whatever the summer throws at you. 

Protect the Warranty 

Not what you may think of straight away, however, you will find that in most warranty guarantees it will stipulate that in order to maintain the set warranty period, you have to regularly service the air conditioner. 

This means that if something should go wrong with your air conditioning unit, and you haven’t maintained it by regular servicing, the manufacturer can then turn around and tell you they won’t be replacing it, due to the fact that it hasn’t been serviced. 

Longevity 

When you first purchase your air conditioner, it looks brand new, it works perfectly, and the idea is to keep it in that condition for as long as is practically possible. Often air conditioners will be bought and then left for years without the proper care and attention they deserve. Not good considering the amount of work they put in to keep us cool. 

With regular servicing, the air conditioner has a better chance of standing up to the harder efforts presented by long hot summers. Meaning it hopefully will last you for decades, not just years. 

Summary 

The hot months are particularly hard, the heat is a nightmare to work in and can sometimes make life impossible. The only reprieve from this is your air conditioning. It’s important to remember that as long as you regularly service your air conditioner, it will be able to perform well. As a result, your air conditioner will keep you and your family comfortable.
If you are struggling to try to find the right person to check out your air conditioning, rest assured we have experts on hand to give you all the advice you need. Our technicians are professionally trained to conduct a thorough inspection and testing of your system during a 26-point A/C tuneup. If you are looking for air conditioner repairs or routine maintenance, you have come to the right place when you contact Always Plumbing & Heating. We will always provide you with the best advice on repairs, and we will never try to sell you replacement equipment that you don’t need. If you have an old, inefficient air conditioner that has frequently been breaking down, or if you don’t yet have an air conditioner and this is the year you want to get one, we can also provide you with the best equipment for your home. As Always, it will be expertly installed and come with the best warranties. When you get your air conditioner maintained by Always Plumbing & Heating, you will understand why A/C means ALWAYS cool!

What to Do with an Ineffective Water Heater

Having a heater that is taking too long to heat is always a frustrating issue. Having these issues can cost you money in the long run. Putting your water heater under unnecessary strain causes further costs down the line with the cost of increased energy consumption, parts, and professional repairs. 

In this post, we are going to cover some ways you can give your water heater a helping hand to ensure it is operating safely and efficiently.

Trouble in the Pipes

If your water heater isn’t working the way you want, and you find your showers are more on the chilly side, you may want to consider looking to your pipes to stop yourself banging the heater with frustration. 

In the winter, sometimes heat can leak from uninsulated pipes, causing the water temperature to drop and you to suffer from tepid water temperature. This can be easily fixed by buying some insulation and wrapping those shivering pipes up. The insulation will help your pipes maintain the heat and keep the water flowing through your pipes at a consistent temperature. 

The thickness of the pipes is also something to consider. The thicker the pipes in your house, the more opportunity they have to sap heat from the water passing through them. With the installation of thinner pipes, you may be able to reduce the amount of heat lost in transition.

Having pipes that are set too far away from your main boiler is another common issue with the loss of heat through your house. The distance water has to travel is crucial to how effective the heater is. The water may leave the heater in a very hot state, but if the water has to travel through miles of pipework to get to your shower, it will inevitably lose heat. 

What’s the Fix?

A handy way to keep the water flowing in your house at a consistent temperature could be the installation of a hot water circulation pump. These pumps essentially recycle the unused hot water from the system and keep it flowing at a constant rate around your home. This will lead to the hot water coming through without having to be heated at the heater then transported, only to get cold when it reaches your shower or faucet. 

A Compromise in Water Flow

You may not think it, but your showerhead could be the solution to your water flow issues. If you are having slightly chilly showers at the moment and are trying to figure out a way to get the water from the heater to the shower faster, then switching out the fixtures may be a viable option. 

Low flow fixtures will save you money in water consumption, provided that your shower and heater system is working currently. However, this may come at a cost in the long run. You could decide to switch to a higher rate of flow fixture,  which will allow you to regulate the flow of water at a higher rate, increasing the speed at which the water is brought from the heater to the shower or faucet. This is essentially moving the water more quickly so that it doesn’t have time to lose the heat it’s carrying. 

Regular Servicing

Another way you can prevent any heat loss is to have your heater regularly serviced by a professional plumber. This maintains your heater to a high standard and the plumber will be able to point out to you if there are any issues. In the process he will recommend the fix and complete the service or repair before it becomes a problem. Always remember that these kinds of issues always happen when you least expect them. 

While the plumber is at your house, you could consider asking them to check if there is sediment in the bottom of your heater. Water is jam-packed full of minerals. Some of these minerals are too heavy and sink to the bottom of your water heater when it isn’t in use, causing a build-up of sediment in the bottom of the heater. Also, the plumber will check the flow coming from your faucets for sediment build-up. Black sediment is a trademark sign that your water heater is corroding from the inside-out, and needs to be replaced.

It’s Time

We have covered a wide range of issues in this article and some handy fixes for the various problems. That being said, sometimes your heater is simply due for being replaced. This is not going to be as bad as you imagine. Yes, the cost upfront may seem a little shocking, however, the cost of the water heater, in the long run, will far outweigh the cost of the energy and water you have spent waiting for the shower to heat up or the sink to fill. 

By spending a little extra on a new water tank or tankless water heater, you can save on repair costs, maintenance costs, and water bills, in some extreme cases it’s a no-brainer. Our experts are here to assist you with any questions and enquiries you have regarding a new boiler. 

In Conclusion

Having no hot water is a nightmare. It can be costly and make a lot of us very unhappy if it’s not fixed in a timely manner. The professional plumbers at Always Plumbing & Heating are here to help with all of your water heater maintenance, repairs, and replacements. For more information on water heaters, go to our website or contact us for friendly expert advice.

9 Ways to Raise Humidity in Your Home

The long winters in Alberta often find us cranking up the furnaces in our home. On the face of it are a warm house, nice fires, and cozy nights. However, the furnace running 24/7 can cause very dry air inside our homes due to extremely low humidity.

In this blog, we are going to cover some of the ways in which you can raise the humidity levels of your house. Methods to combat those aforementioned issues before they start. 

What Are the Risks? 

Having a low humidity level is not as great as you might expect, often leading to unforeseen issues caused as a result of the humidity falling to unmanageable levels. One issue that can be caused as a result of low humidity is the simple drying of the skin. As humans, our bodies don’t react well to dry environments, whether that be in the Sahara Desert or at home on our sofa. The effects of dry skin can sometimes be irritating and painful, cracks and sore spots appearing on our bodies, particularly our faces, heads, and hands. Low humidity can also dry out our eyes and inside our nose, leading us to be more susceptible to viral illnesses.

In addition to the negative health effects of low humidity, there are also ways that dry air can impact the contents of your home, and your home itself. Low humidity is especially hard on wood furniture and flooring, as it causes the boards to dry out, and possibly crack or separate. Too high of humidity can lead to issues like mold, mildew, and condensation on your windows. It’s best to find a nice balance between low and high humidity. The average household should be between 30%-50% humidity at any one time. Any less and we can run into the issues mentioned above. 

9 Ways to Improve Humidity

House Plants

We will start with the ever-humble house plant. House plants are an excellent and environmentally healthy way to introduce moisture to your home. They work through a process called transpiration, essentially meaning they absorb water through their roots. As it travels up the plant it will be released back into the air, creating a slightly more humid climate, just don’t forget to water them frequently.

Showering 

It may sound like the simplest solution, but it works. When you are having your shower or bath, there is always a level of moisture built up from the heat and water that condenses on the walls of your bathroom, so why limit it? When you hop in the shower, leave the bathroom door open and allow the moisture to circulate around the house. 

Similar to the shower, if you are wanting to have a nice hot bath, it may be an idea to leave your bath water to cool on its own before pulling the plug. The water vapor created by the bath cooling is enough to give your home a little boost at the very least. 

Drying Laundry

If you have a tumble dryer, it’s time to stop using it and invest in a drying rack. By hanging your washing next to the radiators, you are using the wet washing to essentially act as a humidifier, without the humidifier. As the washing dries the water will evaporate into the air, causing the air to become more humid, a great solution to two problems you could say.

Water-Based Oil diffusers 

So, these are kind of similar to normal diffusers. They essentially work by mixing a couple of drops of essential oils in a base mix of water. There is an element inside the diffuser which, well, diffuses the water into vapor. The advantage of these is that you are releasing the vapor directly into the room, giving the room a fantastic amount of humidity whilst it also smells amazing. Most certainly an option to try. 

Buckets on Heaters

Well, not literally buckets, however, you can go ahead and place bowls, cups, mugs, and glasses on radiators and other heat sources. This will cause the water in the vessels to evaporate into the air, leading to the humidity in the room rising.

Bear in mind that in order to make this effective, the more containers you put out, the more the humidity will rise. 

Flowers in Windows

This is a slow burn method and should only be used in conjunction with other methods on the list. Placing water in vases on windowsills can act as a double benefit. The flowers you place in them will release water from their leaves and the water will eventually evaporate from the glass vase, helping to keep your house suitably humid.  

Cook More

If you have ever boiled a pan of potatoes, you will know how much time you spend afterward wiping down the surfaces and walls, trying to get the condensation dried up. Well, in this case, the condensation may be the remedy you have been looking for. 

Instead of popping the lid on the pan, it may be best to leave it off and let the evaporating and boiling water be released into the air of your kitchen. 

Use Your Dishwasher

If you are using a dishwasher at home, you could be surprised at the level of humidity it kicks out. Once the wash has run its cycle, try opening up after the wash cycle and allowing your dishes to air dry. 

Humidifier

This almost goes without saying as the most effective method, if you want to get extra humidity in your house, get a humidifier.  You may consider small, portable humidifiers for single rooms, but you will find they use a lot of energy and you will be constantly filling the water compartment to sustain the level of humidity that your home requires. The most effective humidifier is one that is tied into your furnace itself, so the humidity circulates throughout the entire home as long as the fan is running on your furnace. 

There are many available humidifiers, and our specialists can help you choose the right one for your home size and the level of humidity it requires. 

Summary

We have gone over a number of different methods that you can use in order to improve the amount of humidity in your house. It’s important to consider your indoor humidity levels and the risks you take by not correcting these. 
If you face air that is too dry or too damp, our professional plumbers will conduct an indoor humidity test and evaluate the current equipment you have in your home. Sometimes all that is needed is a simple repair or adjustment to the settings on your existing humidifier. Other times you may require a humidifier replacement. Give the experts at Always Plumbing & Heating a call, and we will be sure to help you find the best solution to your indoor humidity problems.

Request Service

Close x

Fill out the service request form below and an Always Plumbing team member will be in touch to confirm your request.

Exit mobile version