Your Post-Holiday Home Checklist: Ring in the New Year with HVAC and Plumbing Maintenance Tips

The holiday festivities are over, and as you pack away the decorations, it’s the perfect time to turn your attention to your home’s essential systems—HVAC and plumbing. A proactive approach to maintenance ensures a smooth start to the new year, preventing unexpected issues and promoting efficient operation. We have included a comprehensive post-holiday checklist to keep your home running seamlessly.

Below are some of our best tips for keeping your heating and cooling system, as well as your plumbing system, running like a well-oiled clock. 

January HVAC Checklist 

1. Adjust Your HVAC System Settings

January marks one of the coldest months of the year for many homeowners. To optimize energy usage and reduce bills, consider adjusting your thermostat settings. Lowering the temperature a few degrees when you’re away or asleep can make a significant impact. This not only saves energy but also minimizes wear and tear on your heating system.

2. Replace HVAC Filters

The holiday season may have left behind dust and debris. A clean HVAC filter is essential for efficient operation. Replace your filter to enhance air quality and decrease energy consumption. This simple step goes a long way in maintaining a healthy indoor environment.

3. Wipe Down HVAC Registers and Vents

As you transition out of the holidays, take a moment to wipe down all vents and registers. Clearing these areas prevents the circulation of dust and ensures optimal airflow. Confirm that no furniture or objects block the vents, allowing your HVAC system to distribute heat evenly.

4. Schedule Professional HVAC Maintenance

Make professional HVAC maintenance a priority in the new year. Schedule a technician to inspect your system thoroughly. This proactive step can identify potential issues, enhance efficiency, and prolong the lifespan of your HVAC equipment.

HVAC Safety Checklist

1. Inspect Electrical Components

Start with a visual inspection of your HVAC system’s electrical components. Look for signs of wear, fraying, or discoloration in wires. Any anomalies should be addressed promptly by a qualified technician to prevent electrical hazards.

2. Check for Gas Leaks

For homes with gas-powered HVAC systems, it’s crucial to check for gas leaks. If you detect a gas odor or suspect a leak, evacuate the premises immediately and contact your gas provider. Gas leaks pose a severe safety risk and require immediate attention.

3. Ensure Proper Ventilation

Check that all vents and exhaust outlets are unobstructed. Proper ventilation is essential for the safe operation of your HVAC system. Blocked vents can lead to carbon monoxide buildup, a potentially lethal threat.

What is the Schedule for HVAC Maintenance?

Regular Check-ups:

Scheduling regular check-ups for your HVAC system is crucial. Ideally, aim for biannual maintenance—once before the heating season and once before the cooling season. These check-ups involve thorough inspections, cleaning, and necessary adjustments.

Seasonal HVAC Maintenance Tasks:

*1. Spring:

– Check air conditioning units

– Clean or replace air filters

– Inspect thermostat settings

*2. Fall:

– Inspect and clean heating systems

– Check for leaks in gas-powered systems

– Verify carbon monoxide detectors are operational

*3. Year-Round:

– Monitor thermostat accuracy

– Ensure proper insulation in your home

– Clean vents and registers regularly

Post-Holiday Plumbing Maintenance Checklist 

Checking plumbing systems after the holiday season is a crucial step in ensuring the continued functionality and efficiency of your home’s water infrastructure. The festive season often puts a strain on plumbing, with increased usage due to gatherings, cooking, and additional guests. 

Post-holiday, it’s common for drains to accumulate residues from cooking oils, food particles, and other debris, potentially leading to clogs. Leaky faucets and toilets may have gone unnoticed during the busy period, causing water wastage and potential water damage. 

By conducting a thorough inspection of plumbing systems after the holidays, homeowners can address these issues promptly, preventing more significant problems down the line. This proactive approach not only helps maintain a smoothly running household but also contributes to water conservation and the long-term durability of plumbing components.

Post-holiday plumbing maintenance involves a comprehensive examination of various key components to ensure the continued functionality of the system. Inspecting drains is a fundamental task, given the increased usage during the festive season. Residues from cooking and other activities can accumulate, leading to potential clogs. By assessing the drains, homeowners can identify and address any blockages, ensuring a smooth flow of water. 

Checking for leaks is equally important, as even minor leaks can result in water wastage and damage to the property. This includes scrutinizing faucets, pipes, and connections for any signs of water seepage. Additionally, other plumbing essentials, such as assessing the water heater’s performance and examining the pressure relief valve, contribute to a thorough post-holiday plumbing check. 

By addressing these tasks promptly, homeowners can mitigate the risk of more significant issues and maintain the efficiency of their plumbing systems throughout the year.

Post-Holiday Plumbing Care Checklist:

Inspect Drains:

Don’t neglect your plumbing system in the post-holiday cleanup. Clear kitchen and bathroom drains using natural solutions like white vinegar and baking soda. Inspect fixtures for leaks and address any issues promptly to avoid water damage.

Check for Leaks:

Regularly inspecting faucets, pipes, and connections for visible leaks is crucial for maintaining a leak-free plumbing system. Take a close look at the areas under sinks and around the base of toilets, as these are common locations for hidden leaks.

Clean Garbage Disposal:

Keep your garbage disposal in top condition by running ice cubes through it to effectively clean the blades. The ice helps remove built-up debris and maintains optimal performance. Additionally, pour a cup of white vinegar into the disposal, allowing it to sit before flushing it with hot water.

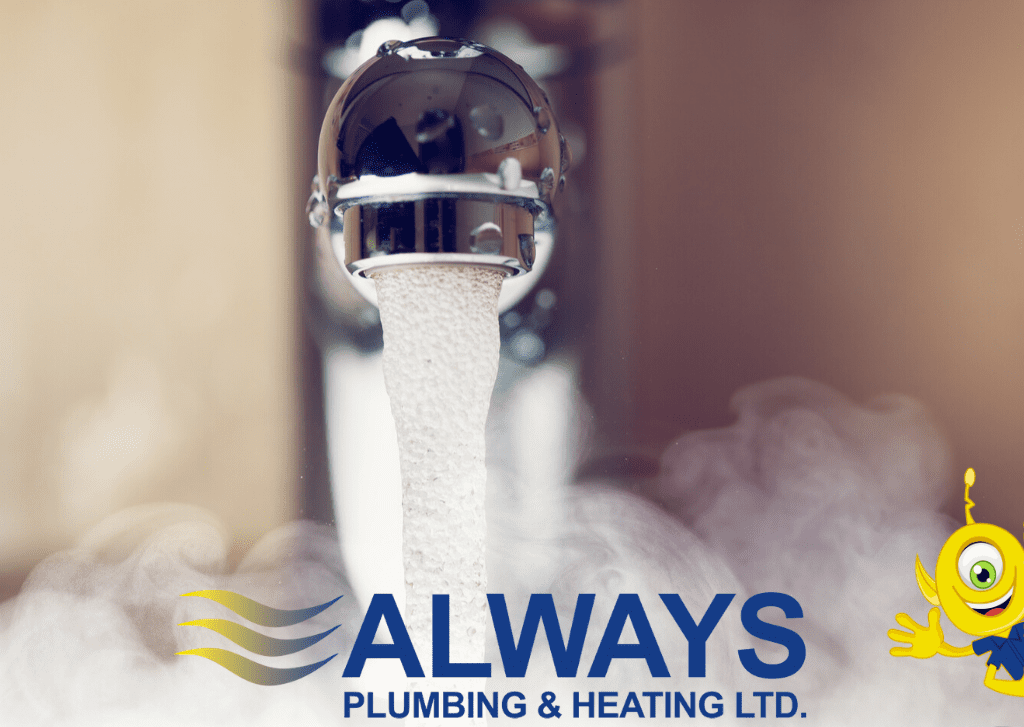
Inspect Water Heater:

Check for any unusual noises or leaks, which could indicate potential issues that require attention. Additionally, verify the proper functioning of the pressure relief valve to maintain the safety and efficiency of your water heating system.

Check Toilet Functionality:

Test each toilet to identify any issues promptly, such as slow flushing or potential clogs. You can also enhance plumbing efficiency by placing a garbage can in each bathroom for non-flushable items. This simple practice helps prevent plumbing issues caused by the improper disposal of items that can lead to blockages. 

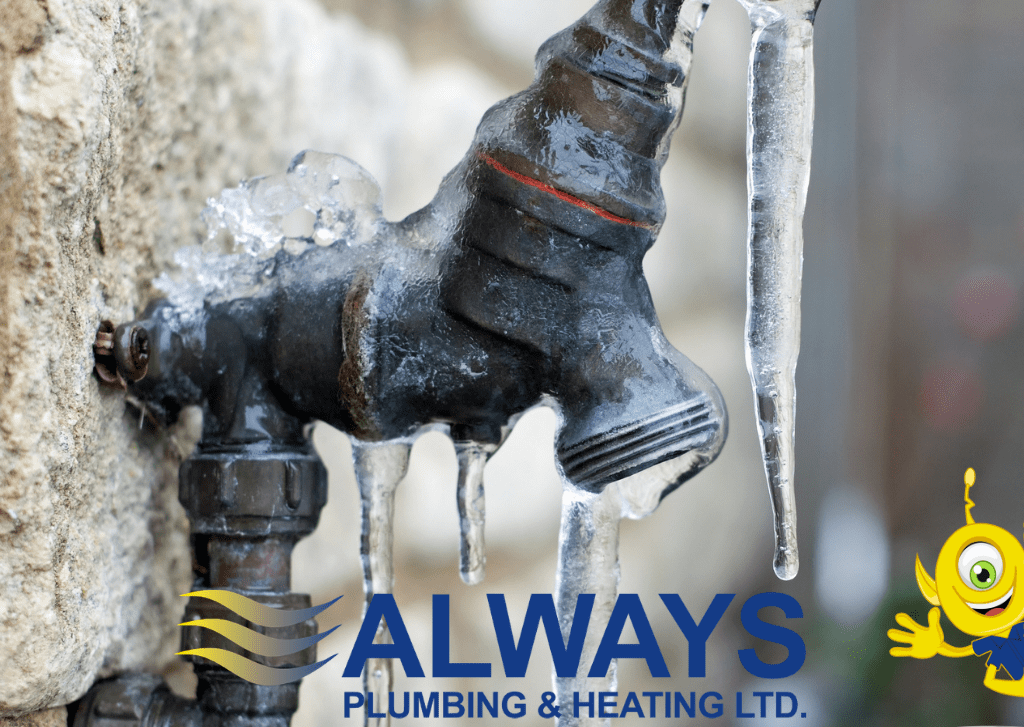
Inspect Outdoor Plumbing:

Inspect outdoor faucets and hoses for any signs of leaks. Check for dripping faucets or water pooling around the connection points. Also, ensure that any exposed pipes are adequately insulated to prevent freezing during colder weather.

Schedule Professional Inspection:

For a thorough post-holiday inspection and to guarantee the optimal performance of your plumbing system, consider hiring a professional plumber. Professional maintenance goes beyond surface-level checks, allowing experts to identify hidden issues that may not be apparent during routine inspections.

By following this winter plumbing maintenance checklist, homeowners can systematically address common post-holiday plumbing concerns and promote the optimal functioning of their plumbing systems.

FAQs

Q: What temperature should I set my thermostat during the winter months for optimal energy savings?

A: The U.S. Department of Energy suggests keeping your thermostat at 20°C (68°F) when you’re awake and active, and lowering it when you’re asleep or away from home. By reducing the temperature by a few degrees for eight hours, you can save about 5-15% on your heating bill. Investing in a programmable thermostat can make this process more convenient.

Q: What steps can I take to prevent frozen pipes during the winter months, especially post-holidays?

A: Preventing frozen pipes during the winter, especially post-holidays, is crucial to avoid potential water damage and plumbing issues. Here are essential steps to safeguard your pipes:

  • Insulate pipes
  • Seal air leaks
  • Maintain temperatures
  • Keep faucets dripping
  • Know where your shut-off valve is

Q: Part of my New Year’s Resolution is to be more eco-friendly. Are there plumbing practices I can adopt for a more sustainable home?

A: Certainly, adopting eco-friendly plumbing practices is a great way to contribute to a more sustainable home. Here are some environmentally conscious plumbing practices you can implement:

  • Install water-saving fixtures: Replace older faucets, showerheads, and toilets with WaterSense-labeled fixtures.
  • Fix leaks: Repair any leaks in faucets, pipes, or fixtures promptly.
  • Harvest rainwater: Install a rainwater harvesting system to collect rainwater for non-potable uses such as watering plants and gardens.
  • Upgrade your water heater: Consider replacing traditional water heaters with tankless (on-demand) water heaters.
  • Save your kitchen scraps: Compost kitchen waste instead of relying on a garbage disposal.
  • Add an aerator: Install aerators on faucets to reduce water flow while maintaining adequate pressure.

As you say “goodbye” to the holiday season, embrace the new year with a home that operates at its best. Incorporating these HVAC and plumbing maintenance tips into your post-holiday checklist ensures a comfortable, efficient, and safe living space. Don’t forget, that a little proactive care now can save you from significant headaches later. Contact Always Plumbing & Heating for all your heating, cooling, and plumbing needs. 

Here’s to a year of warmth, reliability, and worry-free home maintenance!

How to Clean & Replace Your HRV Filter

Ahh, who doesn’t love breathing fresh air in their home? A heat recovery ventilator (HRV) system can make a world of difference in creating a balanced and energy-efficient space. As with any appliance, it’s important to maintain and clean your HRV system to ensure it’s running at its best. 

What Is a Heat Recovery Ventilator (HRV) System?

Because we spend most of our time inside, the importance of having a well-ventilated home can’t be understated. Since the 1970s, houses have become much more airtight, with strong insulation, vapour barriers, and caulking becoming standard.

Although this means homes have become more thermally efficient, it also means that stale air can linger inside! Moisture and chemicals can build up, breeding mould, bacteria, mildew, dust, and pollutants—all of which can negatively impact your health.

Thankfully, a heat recovery ventilator (HRV) system cycles out the stale and moist air in your home, and then replaces it with filtered and fresh air from the outdoors. This creates balanced ventilation throughout every room.

At the same time, an HRV system uses the stale air inside to warm up the outdoor air coming inside. In the winter months especially, we can close windows and doors with peace of mind, knowing fresh air is being cycled in without sacrificing any heat.

How to Clean Your HRV Filter 

If you already have an HRV system, keeping it clean and well-maintained is a crucial aspect of owning one. Here are the steps you need to follow:

  1. Be sure to turn off your HRV system and unplug it.
  2. Open the door by unclipping the fasteners.
  3. Remove the HRV filters by sliding them out from the middle of the unit.
  4. If the HRV filters are really dirty, vacuum out excess dust and grime.
  5. Wash the HRV filters in soap and warm water.
  6. Let them dry and reinsert them when they’re ready.
  7. Now, you can safely plug in and turn on the HRV system.

How to Clean the Filter Core of Your HRV

Sometimes, dirt and debris can build up in the HRV’s filter core. If this is the case, you can also remove it and clean it.

  1. Usually, HRV filter cores have sidetracks that you can slide out. Pull those out first.
  2. Now, you should gently and easily be able to pull the mechanism out.
  3. After that, you can wash the HRV filter core in soap and warm water.
  4. Once it’s dry, place it back in the machine, along with the sidetracks. 

How Often Should You Clean & Service Your HRV?

It’s recommended that you clean your HRV filters once every two months. This will allow you to remove any dust and grime that collects over time.

When Should You Replace Your HRV Filter?

You should change your HRV filters out once or twice a year. If they’re still mucky and dark after a good washing, that’s a sign that you should put new ones in.

How Long Does an HRV System Last?

Typically, HRV systems work for 10 to 15 years. After that, the technology has reached the end of its lifespan and it’s time to look for a newer model.

Give the HVAC Experts a Call

At Always Plumbing & Heating, we’re obsessed with making your home as comfortable as possible. If you need to maintain or install an HRV system, book an appointment with us today. Our HVAC experts will assess your home, talk about your needs, and perform the right solution for you.

More HRV System Resources

Tips for a Healthy Winter IAQ

How to Clean a Smelly Garbage Disposal

Do you have a stench in your sink? Blech! It happens to everyone, and the good news is there are some simple steps to eliminating the stink and preventing it in the future. Here’s how to make your garbage disposal smell as fresh as a daisy once again.

Scrub What You Can See

The first step in de-stinking your garbage disposal is to clean the visible sections. We recommend squirting dish soap onto a scrub brush or dish wand, and putting some muscle into it! Small food particles can get stuck in the grooves of the rim, and tough scrubbing can loosen up a lot of crud.

Let Your Garbage Disposal Soak

Once you’ve taken care of the outside, it’s time to focus on what’s happening inside the garbage disposal. Put in the plug, and half-fill the sink basin with water. We recommend adding some dish soap, vinegar, or your favourite natural cleaner. 

When you unplug the sink, turn the garbage disposal on, so the soapy water works its way through all the little areas that may not always get cleaned.

Use Ice and Salt

The first two steps can do a lot to deodorize your garbage disposal. But, if you still need a little more oomph, the combination of ice and salt works wonders. Pour a cup of ice cubes and a half-cup of rock or kosher salt into the garbage disposal. Turn it on, and let the blades crush the ice and salt, cleaning any residue left on the metal. 

It’s not the quietest step of the process, but it does the trick!

Prevent Future Garbage Disposal Smells

Remember making volcanoes in elementary school science class? The combination of baking soda and vinegar can be a wonderful deodorizer for your sink, too! Sprinkle a cup of baking soda into the garbage disposal, followed by a half-cup of vinegar. It will fizz and get into the nooks and crannies of the machine. Let it sit for an hour, and then turn on the garbage disposal and run cool water through it for at least a minute.

The next time you eat an orange or use a lemon in the kitchen, toss the peels into the disposal, and let them grind up. The natural citrus scent releases and naturally deodorizes, while the acid breaks down anything left behind in the disposal. 

For preventative maintenance, we recommend an enzymatic drain cleaner like BioSmart. Non-corrosive and environmentally friendly, BioSmart reduces odours by breaking down lingering bacteria in your pipes. It also keeps your drains flowing smoothly and prevents clogs. BioSmart can be used once per month for optimal performance.

Ask the Experts 

If you’ve gone through all these steps and are still dealing with stubborn smells, then it’s time to call one of our top-notch plumbers. We’ll do an assessment, identify what the issue is, and then explain the process and cost of repair. If something in your garbage disposal needs to be replaced, we’ll give you a variety of options before proceeding. Let’s take your sink from stinky to sparkling clean! Contact us today.

How to Keep Your Hose Bibs from Freezing

Are you ready for another winter? Did you get your furnace up and running? Put away your summer clothes and bring out your winter gear? How about put snow tires on your car? Did you drain your hose bibs?

As winter approaches, there is a risk of your hose bibs freezing. Your hose bibs are the pipes that come out of your house where you would attach your garden hoses. Protecting your hose bibs from freezing is one of the last winter tasks that many homeowners perform, but it’s certainly a crucial one. If you neglect to do this important task, ice will form in the spigot, which can lead to cracked pipes. Cracked hose bibs can cause a plumbing disaster in your home’s basement. Taking a few minutes to do this task each fall can save you hundreds in repair bills from the damages caused by neglecting your hose bibs.

How to Drain Hose Bibs

  •   Locate your hose bibs on the outside of your house
  •   Find the shut-off valve inside of your house (if there is one) that leads to each hose bib
  •   Turn the indoor shutoff valve until you feel it close
  •   Go back outside and test the outdoor tap to ensure it is truly shut off
  •   Remove your garden hoses and drain them of water, then place them into storage for the winter
  •   Drain any remaining water from the hose bibs
  •   Ensure any exposed pipes are properly insulated
  •   Place an insulated hose bib cover over the exterior spigots
  •   For optimal plumbing protection and peace of mind, consider replacing standard hose bibs with frost-proof hose bibs

Completing the above steps before the temperature falls below zero will help prevent cracked hose bibs when the temperatures warm up in the spring. All it takes is a small amount of leftover water in the pipe to freeze. Frozen pipes may burst due to the immense pressure. If this happens, your home could experience indoor flooding and costly repairs when you turn on your faucets in the spring and summer.

The last thing you need to worry about is a flood caused by neglected pipes. Whether you need help fixing a drip or you are interested in frost-proofing your hose bibs, Always Plumbing & Heating is here to help. Our trained and licensed plumbers can help you install frost-proof bibs on all of your outdoor faucets.

Call us at 780-489-8118 or book online today.

How To Improve Your Water Pressure

Have you ever noticed sluggish water flow coming from one or more faucets in your home? If you have, this is a situation that you must investigate and tend to promptly. Low water pressure can be caused by many things. It could be something as simple as a shut-off valve that has been closed or a faucet that is plugged, to something more complex like a failing water tank or a plumbing leak. You should do a whole home plumbing inspection when you notice low water pressure, as the cause can be coming from more than one area.

Step One: Check Your Water Pressure

  •   Test all faucets inside and on the exterior of your home.
  •   Run water on each faucet to determine if one or more areas have low water pressure.
  •   Run both hot and then cold water through each faucet. Sometimes water pressure is only low when the hot water is on, indicating a problem with the water heater.

Step Two: Check the Affected Faucet

  •   If you only have low water pressure in one area, inspect the affected fixture for clogs.
  •   Remove the end of the faucet and check for clogs such as calcification and limescale buildup.
  •   If the aerator needs to be cleaned, you can soak it in vinegar, or use a limescale remover.
  •   Before you reapply the cleaned aerator, turn the faucet on, and see if there is sluggish flow even without the aerator. That would indicate the problem is of another cause.
  •   Note that you can also replace your aerator with one that has a higher flow rate.

Step Three: Check Other Potential Sources

  •   Check the shutoff valve in your home. If it is even turned a small amount, it can drastically reduce your water pressure.
  •   Look for water leaks. A running toilet is a common cause of an ongoing plumbing leak. This wastes a ton of water but also can cause water pressure issues to other fixtures in your home.
  •   Check your water heater. If you have low water pressure when running hot water only, check to see if the hot water shutoff valve been turned off.
  •   Make sure the sprinkler outside your home has been turned off. If you have a built-in irrigation system, consider having it tested. A small leak in this system can cause continual water loss and water pressure issues.

Step Four: Contact a Plumbing Company

  •   If you still haven’t been able to locate and correct the cause of low water pressure, consider contacting a professional plumbing company. They will conduct a thorough analysis of all water lines in your home to determine the source of the problem.
  •   One serious cause of low water pressure would be if your home has polybutylene (poly-B) pipes. They can become corroded over time and cause many disastrous plumbing leaks. The replacement of this type of plumbing is best left to the professionals. Read more about determining if you have poly-B piping.

Step Five: Get a Water Softener

  •   If you noticed a lot of mineral buildup inside your faucet aerators, it may be time to consider having a water softener added to your home.
  •   While we have excellent drinking water, Edmonton is known to have moderately hard water. Mineral deposits can build up and cause plumbing problems, as well as shorten the lifespan of your hot water tank and humidifier. It is also hard on your clothes and skin.
  •   Learn more about how a water softener can eliminate your hard water problems.

When you experience water pressure issues that you cannot fix yourself, contact the professional plumbers at Always Plumbing & Heating to take this daunting task off your hands. We would be happy to conduct a thorough whole-home plumbing inspection to locate any existing problems, as well as recommendations to prevent issues in the future. At Always Plumbing our customers come first which is why all of our work is backed up with the “Always Plumbing & Heating Fixed Right or It’s Free” Guarantee. We do Upfront StraightForward Pricing® which means you will never get a surprise bill or extra costs tacked on to your final invoice. All pricing is discussed and agreed upon before work even begins.

All of our technicians are certified and receive the best training available in the industry. You can trust us to be there on time, there when you need us 24/7 with the right tools for the job – Always! Call us 780-489-8118 or book online today.

Getting Your Hose Bibs Ready for Spring

As Spring has begun, and warm weather is just around the corner, you may find yourself spending more time outdoors these days. If you’re doing some spring cleaning, you will likely need to turn on your garden hose at some point.

Harsh Alberta winters with extremely low temperatures can sometimes cause hairline fractures in your hose bibs. If you fail to notice the leak right away, when you turn on your tap you could end up with a flooded basement if you aren’t taking the right precautions before using it.

Steps For Testing If You Have A Fracture In Your Hose Bib

Before turning your water on, follow these steps:

1. Place your thumb over the spigot to cover the whole opening.

2. Turn on the water.

3. If you can hold the water in with your thumb, that means there is a fracture somewhere that the water is going. If this happens, turn the water off immediately.

4. Have a family member go into your basement near where the hose bib is located, and repeat step 3. If there are removable ceiling panels, move them from that area, so you can clearly see the extent of the leak without causing too much damage.

5. Repeat all of these steps to each of your hose bibs.

6. If a leak is located, call a plumber for a repair, including the installation of frost-free hose bibs to prevent this from happening in the future.

How to Prevent Hose Bib Leaks In The Future

Each fall ensure that you remove your garden hoses from each hose bib, and if possible, turn the water off to the hose bib and drain the line. Not all hose bibs are outfitted with shutoff valves.

If you suspect broken hose bibs or want to prevent them entirely, give us a call to diagnose the problem and provide you with the best solution to repair or prevent frozen hose bibs. Failing to repair this issue promptly can lead to disastrous flooding in your basement if someone inadvertently turns on your garden hose. 

Giving your hose bib the attention it deserves is invaluable. Ensuring that your home’s plumbing is properly maintained and up to code with a professional inspection, including installation of frost-free taps, will provide you with total peace-of-mind when the job is handled by a professional. 

Always Plumbing & Heating is here to help you along the way. Our licensed plumbers will take care of this job for you, from start to finish, and we fully guarantee our work and equipment. So give us a call, and go ahead and kick your feet up and relax, in no time you will be safely running your sprinklers and filling up the kiddie-pool for your little ones!

Request Service

Close x

Fill out the service request form below and an Always Plumbing team member will be in touch to confirm your request.

Exit mobile version