Blog

A Homeowner’s Guide to Understanding and Preventing Clogs

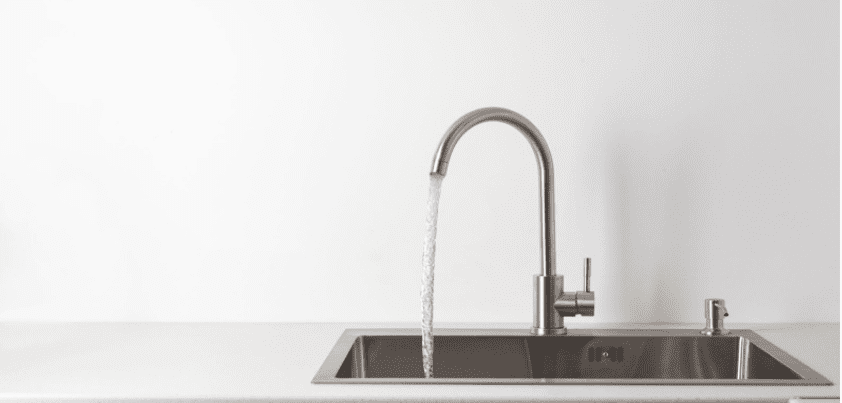
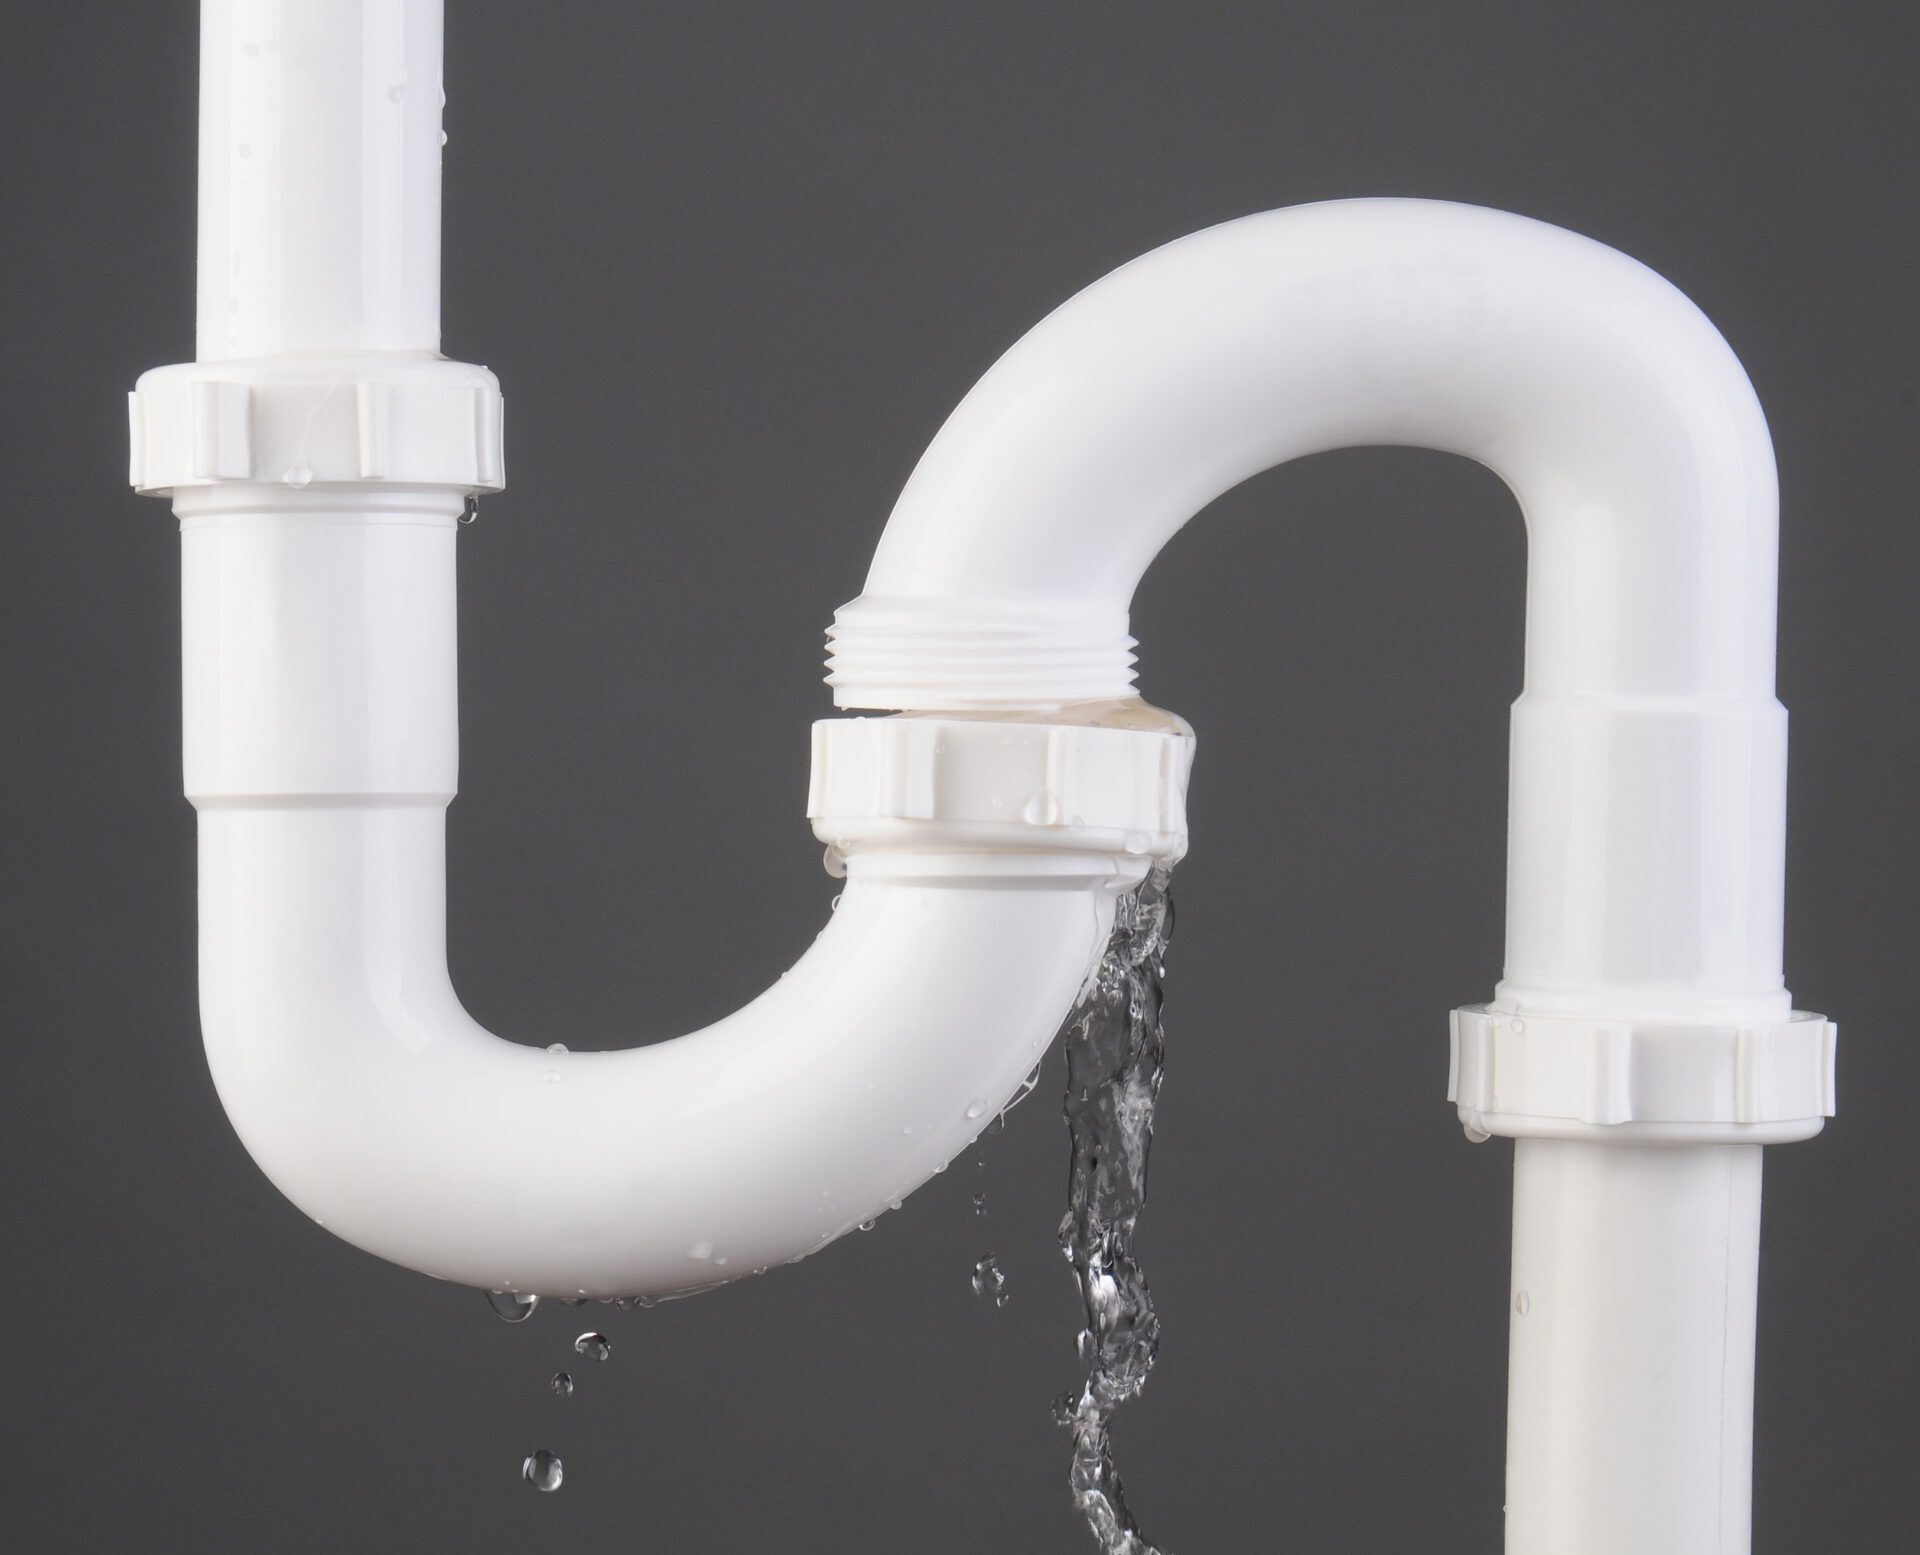
Homeownership brings many joys and responsibilities, and one common woe that can dampen the spirits is dealing with clogged drains. Let’s embark on a journey to unravel the mysteries, understand the causes, and equip you with the tools to keep your drains in top-notch condition.

Identifying Common Culprits

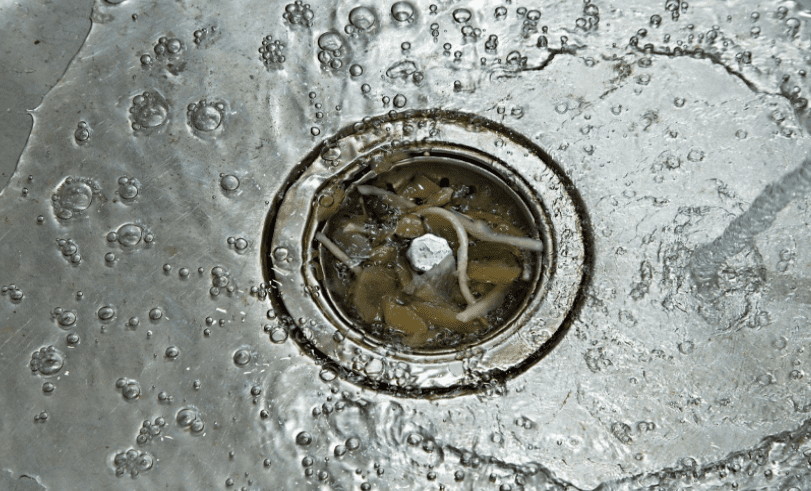
The usual suspects behind clogged drains are often hiding in plain sight. Hair, soap scum, food waste, mineral buildup, and the notorious toilet paper (or tissue!) monster can wreak havoc. Dive into each culprit, understanding their role in creating drain blockades.

1. Hair 

Hair is a major player in drain clogs. Strands easily intertwine, creating a mesh that traps other debris and slows down the water flow.

2. Soap Scum 

The residue from soap and body wash can accumulate over time, forming a stubborn layer known as soap scum. It not only looks unpleasant but can contribute to drainage issues.

3. Food Waste 

In the kitchen, food particles are frequent troublemakers. From grease to small food scraps, these can stick to the pipe walls, causing blockages.

4. Mineral Buildup

Minerals present in hard water can accumulate in pipes, leading to mineral buildup. Over time, this buildup can narrow the pipe diameter, restricting water flow.

5. Toilet Paper 

While toilet paper is designed to break down easily, excessive use or the introduction of tissues can create a mess in your plumbing. These materials don’t dissolve as easily, leading to potential clogs.

6. Invading Tree Roots

Nature can be an unexpected intruder. Tree roots, seeking moisture, may find their way into your pipes, causing serious blockages.

7. Jewelry, Toys, and Bobby Pins

Small objects like jewelry, toys, Q-tips, and bobby pins have a knack for finding their way into drains. They can lodge in pipes, creating obstacles for water flow.

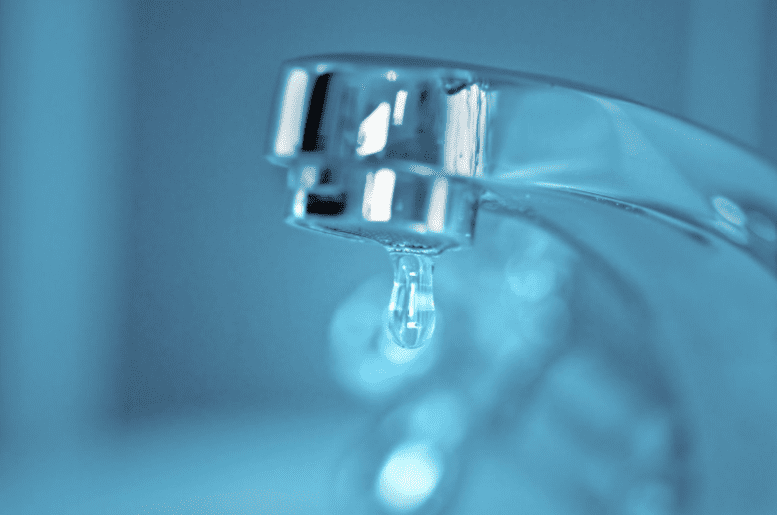
Body Wash Woes: Does It Clog Drains?

We all love a good lather, but could your favorite body wash be silently contributing to drain issues? Body wash, with its luxurious lather and enticing fragrances, is a staple in our daily hygiene routine. However, the very ingredients that make it a shower-time favorite can sometimes pose challenges for your drains.

Ingredients to Watch Out For:

  • Oils and Emollients: Body wash often contains oils and emollients to moisturize the skin. While fantastic for your skin, these substances can leave a residue on pipes, contributing to the formation of soap scum.
  • Thickening Agents: Some body washes use thickening agents to enhance their consistency. These agents can add to the viscosity of wastewater, potentially slowing down its journey through the pipes.

Soap Scum Buildup:

The combination of oils, emollients, and thickening agents can lead to the creation of soap scum. This stubborn residue accumulates on the inner surfaces of pipes, reducing their diameter and impeding water flow.

While body wash can contribute to drain issues over time, being mindful of its ingredients and adopting preventive measures can keep your drains flowing smoothly. 

3. Prevention Strategies: Keeping Clogs at Bay

Prevention is the key to a hassle-free drainage system. Discover practical and effective strategies to prevent clogs, from regular maintenance routines to simple everyday habits that can make a significant difference.

4. What NOT to Use: A Cautionary Tale

In the quest to unclog drains, some substances can do more harm than good. Learn about the villains in this story – sodium hydroxide, hydrochloric acid, sulfuric acid, nitric acid, potassium hydroxide, and the risky mix of bleach and vinegar. Uncover safer alternatives for a DIY drain rescue.

5. Hygiene Practices Impact: Teeth Brushing and Bath Bombs

Ever wondered if your morning routine could be contributing to drain issues? Find out the impact of brushing your teeth in the shower and whether those indulgent bath bombs are friends or foes to your drains.

6. Beauty Products and the Drain Dilemma

Bid farewell to old beauty products responsibly. Understand why the drain is not their final destination and discover eco-friendly alternatives for disposal.

7. Seeking Professional Help: When DIY Isn’t Enough

Sometimes, despite our best efforts, drains need professional attention. Learn when to call in the experts, ensuring your plumbing stays in top shape.

Preventing Clogs

Preventing clogs in your plumbing system is a homeowner’s dream. Let’s explore some practical prevention strategies to ensure your drains stay clear and your pipes flow freely.

1. Regular Maintenance Routine:

Just like any other part of your home, your plumbing needs regular attention. Incorporate a maintenance routine that includes checking for early signs of clogs and addressing them promptly. Prevention is often more effective than a cure.

2. Mesh Screens for Drains:

Invest in mesh screens for your drains, especially in the kitchen and bathroom. These screens act as filters, trapping hair, food particles, and other debris before they have a chance to journey down your pipes.

3. Mindful Disposal in the Kitchen:

In the kitchen, be mindful of what goes down the drain. Avoid pouring grease or large food scraps down the sink. Dispose of cooking oil in a separate container for proper disposal, preventing it from solidifying in your pipes.

4. Hot Water Flush:

Regularly flush your drains with hot water. This simple yet effective practice helps break down soap scum, grease, and other substances that may be clinging to the inner surfaces of your pipes.

5. DIY Natural Cleaners:

Consider using DIY natural cleaners to keep your drains fresh and clear. A mixture of baking soda and vinegar can work wonders. Pour it down the drain, let it sit, and follow up with hot water to help break down the buildup.

6. Watch What Goes Down the Toilet:

Toilets can be sensitive to what gets flushed. Educate household members about what can and cannot be flushed. Items like cotton swabs, wipes, and certain hygiene products can contribute to clogs.

7. Professional Drain Cleaning:

Schedule periodic professional drain cleaning. A plumber can use specialized tools to clear out any stubborn buildup that may be lurking in your pipes, ensuring everything is flowing smoothly.

8. Tree Root Inspection:

If you have trees on your property, schedule regular inspections for intrusive roots. A proactive approach can prevent root-related pipe damage before it becomes a major issue.

9. Educate Household Members:

Share knowledge about drain-friendly practices with everyone in your household. From proper disposal habits to understanding the impact of certain activities on drains, awareness goes a long way in preventing issues.

10. Act Promptly on Warning Signs:

If you notice slow drainage or hear gurgling sounds, don’t ignore them. These could be early warnings of potential clogs. Addressing issues promptly can prevent them from escalating into more significant problems.

By incorporating these prevention strategies into your homeowner routine, you’ll be taking proactive steps to keep your plumbing in excellent condition. 

Can some cleaners make the situation worse or damage pipes? Yes, certain cleaners, if used improperly or excessively, can contribute to clogs or damage drains. You should never use products that contain sodium hydroxide or hydrochloric acid. They are caustic and can eat through pipes and can cause severe skin and eye irritation from the fumes.

Always Plumbing and Heating uses an eco-friendly solution known as Bio Smart. We never use any type of harsh chemicals because they are dangerous to people and their pets. If you are experiencing problems from a clogged pipe, give us a call. We have over 20 years of experience dealing with all types of plumbing issues. If you need plumbing repair or preventative maintenance, our friendly staff are happy to help.

Battling the Winter Blues: Community Giving Beyond the Holidays

Did you know that January and February are the coldest months in Edmonton and the surrounding area? As the holiday decorations come down and the winter chill sets in, it’s the perfect time to warm hearts through community giving. Many charitable organizations could use a few more donations or volunteers to make it a season of giving.

Donation Timing Matters

While many think of donating before Christmas, the reality is that post-holiday is when many families need help the most. Families often stretch their budgets during the holidays, leaving them financially strained afterward. The aftermath sees a surge in individuals seeking assistance to meet basic needs.

Many holiday-specific aid programs conclude with the festivities. Once the decorations are packed away, there’s a void in ongoing support, making post-holiday donations essential for bridging this gap.

In colder regions like Edmonton, the winter season persists well into January and February. These prolonged cold spells increased the demand for warm clothing, shelter, and nourishment, amplifying the necessity for community assistance.

How We Support The Community

Embracing our role in the vibrant tapestry of Edmonton, we take great pride in contributing to our community. A cornerstone of our commitment is our annual employee Christmas raffle, where we rally together to raise funds. A significant portion of these proceeds finds its purpose in supporting local initiatives like the Mustard Seed and YESS, amplifying our impact where it matters most.

At the heart of our corporate culture is a deep-seated belief in giving back. Actively championing volunteerism and charitable endeavors, our employees enthusiastically participate in various community initiatives. Always Plumbing and Heating supports the Mustard Seeds golf fundraising events. Beyond the financial contributions directed to local charities, you’ll often find Glenn and our dedicated crew lending a helping hand to bring food as well as serve at the Mustard Seed kitchen, preparing breakfast for families at Ronald McDonald House, and steadfastly sponsoring a multitude of charity events.

Our Local Heroes

Let’s spotlight the unsung heroes in our community—local charities, shelters, and kitchens that tirelessly need support throughout the year. These organizations embody the spirit of compassion, and it’s time to shine a light on their invaluable work, inspiring our readers to step forward and make a difference.

1. Edmonton Food Bank

A pillar of support, the Edmonton Food Bank works relentlessly to alleviate hunger in our community. They graciously accept donations of both food and non-perishables, ensuring that no one goes to bed hungry.

2. Local Fire Stations

Beyond their heroic firefighting duties, local fire stations actively engage in community service. They welcome donations of food and non-perishables, contributing to their commitment to serving and protecting the community in multiple ways.

3. The Christmas Bureau of Edmonton

The Christmas Bureau of Edmonton is a nonprofit organization dedicated to spreading holiday joy and providing assistance to individuals and families in need during the Christmas season. Established to ensure that everyone in the Edmonton community can experience the warmth and generosity of the holidays, the bureau focuses on delivering food hampers, toys, and other festive essentials to those facing economic challenges.

4. Goodwill

Goodwill is a non-profit organization that accepts donations of clothing, household items, and furniture. It also provides support for the community with food, non-perishable items, and vouchers for shelter, help with utilities when funds are available. 

5. Habitat for Humanity Canada

Habitat for Humanity Canada’s efforts align with its vision of a world where everyone has a safe and decent place to live. Through its innovative approach and community collaboration, the organization addresses housing challenges and helps families build a foundation for a brighter future.

6. CanadaHelps

CanadaHelps is a nonprofit organization based in Canada that operates an online platform designed to facilitate charitable giving and support for various charitable causes. Established in 2000, CanadaHelps aims to make donating to Canadian charities accessible, efficient, and secure through digital channels.

Volunteer Opportunities

Beyond financial contributions, giving back through volunteering is a powerful way to make a meaningful impact in your community. Here are various ways individuals can dedicate their time and skills to create positive change:

1. Community Events

Participate in or organize local events such as clean-up drives, festivals, or fundraisers. Your involvement can help strengthen community bonds and contribute to the overall well-being.

2. Mentorship Programs

Offer your expertise to mentor individuals in need, whether it’s career guidance, academic support, or personal development. Your time and guidance can make a lasting difference in someone’s life.

3. Elderly Care

Volunteer at local senior centers, and nursing homes, or offer assistance to elderly neighbors. Simple acts like companionship, running errands, or helping with household tasks can greatly enhance the quality of life for seniors.

4. Food Banks and Shelters

Contribute your time to local food banks or shelters. Help with sorting and distributing food, serving meals, or organizing donation drives to ensure those in need receive essential support.

5. Environmental Initiatives

Get involved in environmental projects such as tree planting, park clean-ups, or community gardens. Your efforts can contribute to a cleaner and more sustainable local environment.

6. Educational Support

Volunteer at schools or community centers to assist with tutoring, after-school programs, or literacy initiatives. Your involvement can positively impact the educational journey of young learners.

7. Healthcare Volunteerism

Offer your time at local hospitals, clinics, or healthcare facilities. Tasks may include assisting patients, providing companionship, or supporting administrative tasks.

8. Animal Shelters

Volunteer at animal shelters to help care for and socialize with animals. Your time can improve the well-being of sheltered animals awaiting adoption.

9. Crisis Helplines

Volunteer for crisis helplines or support services. Your compassionate listening and assistance can provide crucial support to individuals going through challenging times.

10. Arts and Culture

Contribute to the local arts scene by volunteering at museums, galleries, or cultural events. Your involvement helps preserve and promote the cultural richness of your community.

Much-Needed Items for Shelters

As the chill of January and February settles in, shelters and soup kitchens face increased demands. To ensure donations have a direct and positive impact, here’s a practical guide highlighting the top things these organizations need during the coldest months:

1. Warm Clothing:

  • Coats, jackets, and thermal layers
  • Hats, scarves, and gloves
  • Socks and insulated footwear

2. Bedding and Blankets:

  • Sleeping bags and thermal blankets
  • Warm comforters and blankets for beds

3. Non-Perishable Food Items:

  • Canned soups, stews, and chili
  • Instant noodles and pasta
  • Nutritious, easy-to-prepare meals

4. Hot Beverages:

  • Coffee, tea, and hot chocolate
  • Instant soup packets and warm beverage mixes

5. Hygiene and Personal Care Items:

  • Hand warmers and heating pads
  • Moisturizers and lip balm for protection against the cold
  • Hygiene kits with essentials like toothpaste, toothbrushes, and sanitary products

6. Winter Accessories:

  • Thermal underwear
  • Ear muffs and earmuffs
  • Hand and foot warmers

7. Medical Supplies:

  • Cold and flu medications
  • First aid kits and supplies
  • Tissues and cough drops

8. Heat Sources:

  • Portable heaters (if safe and permitted)
  • Warm blankets and throws
  • Insulated sleeping mats

9. Monetary Donations:

  • Contributions to cover heating costs
  • Funds for emergency medical expenses
  • Financial support for additional staff during peak cold periods

10. Volunteer Time:

  • Assistance with serving meals
  • Help with organizing and distributing donated items
  • Support in maintaining a warm and welcoming environment

By focusing on these items, donors can make a direct impact on the well-being of individuals seeking refuge from the harsh winter conditions. This practical guide ensures that the generosity of the community aligns with the specific needs of shelters and soup kitchens during the coldest months.

Furry Friends Matter Too

And let’s not forget our beloved four-legged friends who also need assistance during the winter months. Including them adds a heartwarming touch to our community-giving efforts.

11. Pet Supplies:

  • Pet food, especially for dogs and cats
  • Insulated pet shelters or beds
  • Coats or sweaters for pets to stay warm

12. Veterinary Care:

  • Contributions toward veterinary expenses
  • Donations for pet vaccinations and check-ups

13. Adoption Support:

  • Supplies for animal shelters, including bedding and toys
  • Financial contributions to support adoption initiatives

Our furry companions bring joy and companionship, and ensuring they have warmth and care in the winter months is a compassionate extension of our community support. Including these items in our giving efforts adds a heartwarming touch to our collective endeavor.

As we navigate the post-holiday blues, let’s come together as a community. At Always Plumbing and Heating, we encourage our friends and neighbors to help each other before and after the holidays. Whether through donations or volunteering, every small effort makes a big difference. Let’s make this winter a season of warmth and kindness.

Thawing Wisdom- A Guide for Edmonton Homeowners With Frozen Pipes

Chill in the air, frost on the windows, and a surprise – frozen pipes! The Northern lights and winter in Edmonton may be amazing, but when your home’s plumbing starts to play its own icy symphony, it’s time to take action. Do you have a game plan? Do you know how to thaw frozen pipes? Let’s thaw out the mystery together and navigate the chilly waters of home plumbing solutions!

Common Signs of Frozen Pipes 

The first step in tackling frozen pipes is recognizing the signs. Recognizing the subtle cues that hint at plumbing troubles is crucial for timely intervention and avoiding potential damage. Here are some common signs of frozen pipes in Edmonton that homeowners should be on the lookout for:

Reduced Water Flow: One of the early signs is a noticeable decrease in water flow from faucets and showerheads. If you suddenly experience weaker water pressure, it could be an indication of frozen pipes.

Strange Noises: Gurgling or clanking sounds coming from the plumbing system can be a signal of trapped air due to frozen pipes. Pay attention to any unusual noises when using water fixtures.

Frost on Exposed Pipes: Inspect visible pipes, especially in areas like basements, crawl spaces, or garages. Frost on the exterior of pipes is a clear sign that they are exposed to freezing temperatures.

Unpleasant Odors: Frozen pipes can sometimes lead to blockages, causing water to back up. This can result in unpleasant smells emanating from drains or faucets due to trapped debris.

Difficulty in Flushing Toilets: If you notice difficulty in flushing toilets or slow drainage in sinks and tubs, it could be an indication of frozen pipes affecting the wastewater flow.

Visible Condensation: Condensation on the exterior of pipes may seem counterintuitive in freezing temperatures, but it can occur when the interior of the pipe is frozen, and the exterior is exposed to warmer air.

Water Temperature Fluctuations: Inconsistent water temperatures, particularly water coming out much colder than usual, can be a sign that pipes are frozen and restricting the flow of hot water.

Peculiar Smells from Faucets: If water from faucets has a strange or different odor, it could be a result of stagnant water due to frozen pipes impeding normal water flow.

Keeping an eye out for these signs can help homeowners identify and address frozen pipes before they lead to more significant issues. If you spot any of these indicators, taking prompt action is crucial to prevent further damage.

How to Detect and Find Frozen Pipes in Your House

Locating exposed pipes in key areas, using a pipe thermometer for temperature assessment, and checking for bulging or frost on the exterior are effective ways to detect and find frozen pipes in your house. Small sections of pipe will thaw fairly quickly, but if you have a larger area or multiple pipes, you may need to call a plumber. 

Thawing Frozen Pipes

Prompt action is crucial. Locate the main water supply and turn it off. Open faucets to relieve the pressure, and use a safe heat source for thawing. Waiting for pipes to thaw on their own may lead to further complications. Follow these easy steps to thaw frozen pipes. 

1. Identify the Frozen Section

Begin by determining which section of the pipe is frozen. This may be evident from reduced water flow, frost on the exterior, or by following the exposed pipes in colder areas of your home.

2. Turn Off the Water Supply

Locate and turn off the main water supply to prevent further water from entering the frozen pipe. This minimizes the risk of burst pipes when thawing begins.

3. Open Faucets

Open the affected faucets both hot and cold to allow water to flow through the pipes once thawing begins. This relieves pressure in the system.

4. Apply Heat Safely

Safely apply heat to the frozen section. Use a hairdryer, heat lamp, or electric heating pad. Start from the end nearest the faucet and move towards the blockage. Never use an open flame.

5. Use Warm Towels

Wrap warm towels around the frozen pipe. Soak the towels in hot water and replace them as needed. This provides consistent heat to the pipe.

6. Utilize a Space Heater

If the frozen pipe is accessible and there’s enough space, use a space heater to gently warm the area. Keep it a safe distance from flammable materials.

7. Thawing with Hot Water

Carefully pour hot water over rags wrapped around the frozen pipe. Continue until the ice inside the pipe has melted and water flows freely.

8. Check for Thawing

Periodically check the faucets for water flow as you apply heat. Once the water starts flowing steadily, the pipe is thawed. Keep the faucets open for a few minutes to ensure complete thawing.

9. Insulate Pipes

After thawing, consider insulating pipes in vulnerable areas to prevent future freezing. This is especially important for pipes in basements, crawl spaces, and exterior walls.

10. Seek Professional Help if Needed

If you’re unable to locate the frozen section or if the situation is beyond your control, it’s advisable to call a professional plumber for assistance.

Remember, safety is paramount during this process. Avoid using excessive heat, open flames, or tools that can damage the pipes. Thawing should be a gradual process to minimize the risk of pipe bursting.

FAQ

 Will Frozen Pipes Thaw on Their Own?

Understanding why waiting might not be the best option and the risks associated with allowing pipes to thaw naturally. While it’s tempting to hope that frozen pipes will thaw as temperatures rise, it’s not a guaranteed solution. The severity of the freeze, the length of exposure, and the insulation around the pipes all play crucial roles in determining whether pipes will naturally thaw.

How Long Can Pipes Be Frozen Before They Bust?

The duration that pipes can remain frozen before the risk of bursting depends on several factors. The severity of the freeze is a crucial factor. In extremely cold temperatures, pipes are more susceptible to freezing quickly. Warmer freezes may allow pipes to withstand the cold for a longer duration.

What Do Plumbers Do to Unfreeze Pipes?

Plumbers employ a range of professional techniques to efficiently and safely unfreeze pipes. We begin by assessing the extent of the frozen pipes and identifying the location of the blockage. Advanced tools, such as infrared thermometers, may be used to pinpoint the frozen pipe.

Methods used frequently include a heat gun, heated blankets, and other devices that heat metal slowly to prevent the pipe from breaking as it thaws out. 

Winter plumbing challenges are a part of life in Edmonton, but armed with the right knowledge, you can thaw out the inconvenience. Whether it’s detecting the subtle signs or understanding the do’s and don’ts of thawing, our guide has you covered. Embrace the winter wonderland without letting it freeze your pipes!

Always Plumbing and Heating is a premier plumbing and heating company serving the Edmonton area. If you need help with frozen pipes, we’re just a call away. We’ll use our knowledge and expertise to solve all of your plumbing or heating needs. 

Your Post-Holiday Home Checklist: Ring in the New Year with HVAC and Plumbing Maintenance Tips

The holiday festivities are over, and as you pack away the decorations, it’s the perfect time to turn your attention to your home’s essential systems—HVAC and plumbing. A proactive approach to maintenance ensures a smooth start to the new year, preventing unexpected issues and promoting efficient operation. We have included a comprehensive post-holiday checklist to keep your home running seamlessly.

Below are some of our best tips for keeping your heating and cooling system, as well as your plumbing system, running like a well-oiled clock. 

January HVAC Checklist 

1. Adjust Your HVAC System Settings

January marks one of the coldest months of the year for many homeowners. To optimize energy usage and reduce bills, consider adjusting your thermostat settings. Lowering the temperature a few degrees when you’re away or asleep can make a significant impact. This not only saves energy but also minimizes wear and tear on your heating system.

2. Replace HVAC Filters

The holiday season may have left behind dust and debris. A clean HVAC filter is essential for efficient operation. Replace your filter to enhance air quality and decrease energy consumption. This simple step goes a long way in maintaining a healthy indoor environment.

3. Wipe Down HVAC Registers and Vents

As you transition out of the holidays, take a moment to wipe down all vents and registers. Clearing these areas prevents the circulation of dust and ensures optimal airflow. Confirm that no furniture or objects block the vents, allowing your HVAC system to distribute heat evenly.

4. Schedule Professional HVAC Maintenance

Make professional HVAC maintenance a priority in the new year. Schedule a technician to inspect your system thoroughly. This proactive step can identify potential issues, enhance efficiency, and prolong the lifespan of your HVAC equipment.

HVAC Safety Checklist

1. Inspect Electrical Components

Start with a visual inspection of your HVAC system’s electrical components. Look for signs of wear, fraying, or discoloration in wires. Any anomalies should be addressed promptly by a qualified technician to prevent electrical hazards.

2. Check for Gas Leaks

For homes with gas-powered HVAC systems, it’s crucial to check for gas leaks. If you detect a gas odor or suspect a leak, evacuate the premises immediately and contact your gas provider. Gas leaks pose a severe safety risk and require immediate attention.

3. Ensure Proper Ventilation

Check that all vents and exhaust outlets are unobstructed. Proper ventilation is essential for the safe operation of your HVAC system. Blocked vents can lead to carbon monoxide buildup, a potentially lethal threat.

What is the Schedule for HVAC Maintenance?

Regular Check-ups:

Scheduling regular check-ups for your HVAC system is crucial. Ideally, aim for biannual maintenance—once before the heating season and once before the cooling season. These check-ups involve thorough inspections, cleaning, and necessary adjustments.

Seasonal HVAC Maintenance Tasks:

*1. Spring:

– Check air conditioning units

– Clean or replace air filters

– Inspect thermostat settings

*2. Fall:

– Inspect and clean heating systems

– Check for leaks in gas-powered systems

– Verify carbon monoxide detectors are operational

*3. Year-Round:

– Monitor thermostat accuracy

– Ensure proper insulation in your home

– Clean vents and registers regularly

Post-Holiday Plumbing Maintenance Checklist 

Checking plumbing systems after the holiday season is a crucial step in ensuring the continued functionality and efficiency of your home’s water infrastructure. The festive season often puts a strain on plumbing, with increased usage due to gatherings, cooking, and additional guests. 

Post-holiday, it’s common for drains to accumulate residues from cooking oils, food particles, and other debris, potentially leading to clogs. Leaky faucets and toilets may have gone unnoticed during the busy period, causing water wastage and potential water damage. 

By conducting a thorough inspection of plumbing systems after the holidays, homeowners can address these issues promptly, preventing more significant problems down the line. This proactive approach not only helps maintain a smoothly running household but also contributes to water conservation and the long-term durability of plumbing components.

Post-holiday plumbing maintenance involves a comprehensive examination of various key components to ensure the continued functionality of the system. Inspecting drains is a fundamental task, given the increased usage during the festive season. Residues from cooking and other activities can accumulate, leading to potential clogs. By assessing the drains, homeowners can identify and address any blockages, ensuring a smooth flow of water. 

Checking for leaks is equally important, as even minor leaks can result in water wastage and damage to the property. This includes scrutinizing faucets, pipes, and connections for any signs of water seepage. Additionally, other plumbing essentials, such as assessing the water heater’s performance and examining the pressure relief valve, contribute to a thorough post-holiday plumbing check. 

By addressing these tasks promptly, homeowners can mitigate the risk of more significant issues and maintain the efficiency of their plumbing systems throughout the year.

Post-Holiday Plumbing Care Checklist:

Inspect Drains:

Don’t neglect your plumbing system in the post-holiday cleanup. Clear kitchen and bathroom drains using natural solutions like white vinegar and baking soda. Inspect fixtures for leaks and address any issues promptly to avoid water damage.

Check for Leaks:

Regularly inspecting faucets, pipes, and connections for visible leaks is crucial for maintaining a leak-free plumbing system. Take a close look at the areas under sinks and around the base of toilets, as these are common locations for hidden leaks.

Clean Garbage Disposal:

Keep your garbage disposal in top condition by running ice cubes through it to effectively clean the blades. The ice helps remove built-up debris and maintains optimal performance. Additionally, pour a cup of white vinegar into the disposal, allowing it to sit before flushing it with hot water.

Inspect Water Heater:

Check for any unusual noises or leaks, which could indicate potential issues that require attention. Additionally, verify the proper functioning of the pressure relief valve to maintain the safety and efficiency of your water heating system.

Check Toilet Functionality:

Test each toilet to identify any issues promptly, such as slow flushing or potential clogs. You can also enhance plumbing efficiency by placing a garbage can in each bathroom for non-flushable items. This simple practice helps prevent plumbing issues caused by the improper disposal of items that can lead to blockages. 

Inspect Outdoor Plumbing:

Inspect outdoor faucets and hoses for any signs of leaks. Check for dripping faucets or water pooling around the connection points. Also, ensure that any exposed pipes are adequately insulated to prevent freezing during colder weather.

Schedule Professional Inspection:

For a thorough post-holiday inspection and to guarantee the optimal performance of your plumbing system, consider hiring a professional plumber. Professional maintenance goes beyond surface-level checks, allowing experts to identify hidden issues that may not be apparent during routine inspections.

By following this winter plumbing maintenance checklist, homeowners can systematically address common post-holiday plumbing concerns and promote the optimal functioning of their plumbing systems.

FAQs

Q: What temperature should I set my thermostat during the winter months for optimal energy savings?

A: The U.S. Department of Energy suggests keeping your thermostat at 20°C (68°F) when you’re awake and active, and lowering it when you’re asleep or away from home. By reducing the temperature by a few degrees for eight hours, you can save about 5-15% on your heating bill. Investing in a programmable thermostat can make this process more convenient.

Q: What steps can I take to prevent frozen pipes during the winter months, especially post-holidays?

A: Preventing frozen pipes during the winter, especially post-holidays, is crucial to avoid potential water damage and plumbing issues. Here are essential steps to safeguard your pipes:

  • Insulate pipes
  • Seal air leaks
  • Maintain temperatures
  • Keep faucets dripping
  • Know where your shut-off valve is

Q: Part of my New Year’s Resolution is to be more eco-friendly. Are there plumbing practices I can adopt for a more sustainable home?

A: Certainly, adopting eco-friendly plumbing practices is a great way to contribute to a more sustainable home. Here are some environmentally conscious plumbing practices you can implement:

  • Install water-saving fixtures: Replace older faucets, showerheads, and toilets with WaterSense-labeled fixtures.
  • Fix leaks: Repair any leaks in faucets, pipes, or fixtures promptly.
  • Harvest rainwater: Install a rainwater harvesting system to collect rainwater for non-potable uses such as watering plants and gardens.
  • Upgrade your water heater: Consider replacing traditional water heaters with tankless (on-demand) water heaters.
  • Save your kitchen scraps: Compost kitchen waste instead of relying on a garbage disposal.
  • Add an aerator: Install aerators on faucets to reduce water flow while maintaining adequate pressure.

As you say “goodbye” to the holiday season, embrace the new year with a home that operates at its best. Incorporating these HVAC and plumbing maintenance tips into your post-holiday checklist ensures a comfortable, efficient, and safe living space. Don’t forget, that a little proactive care now can save you from significant headaches later. Contact Always Plumbing & Heating for all your heating, cooling, and plumbing needs. 

Here’s to a year of warmth, reliability, and worry-free home maintenance!

What Are Low-Flow Faucets: Top Things You Need to Know

It becomes crucial to choose faucets carefully when every drop matters. Low-flow faucets have emerged as eco-friendly solutions, but what makes them stand out? Well, they typically have a flow rate of around 1.5 gallons per minute, compared to the 2.2 gallons per minute of standard faucets. This can result in significant water savings over time, making them a cost-effective and eco-friendly option for homeowners.

Let’s talk about what you need to know about low-flow faucets and why you should consider upgrading.

The Water Conservation Challenge

In a world where water is an invaluable resource, the need for conservation has never been more critical. The Water Conservation Challenge is rooted in the alarming amount of water we unknowingly waste daily. Traditional faucets, once thought of as innocuous fixtures, are revealed to be significant contributors to this challenge.

Every time we turn on the tap without a second thought, gallons of water flow away, and the impact is far-reaching. From local communities grappling with water scarcity to the strain on global ecosystems, the consequences of our water habits are profound. Understanding the gravity of this challenge is the first step toward finding sustainable solutions.

The Rise of Low-Flow Faucets

Amidst this challenge, a beacon of hope emerges in the form of water efficient faucets. These innovative fixtures represent a paradigm shift in how we interact with water. The conventional mindset of water as an endless commodity is challenged by the rise of these eco-friendly alternatives.

These faucets are designed to address the water conservation challenge head-on. By incorporating advanced flow restriction mechanisms, they redefine the way we use water without compromising the functionality we expect from our faucets. It’s a subtle yet powerful revolution in our daily lives, where conscious choices lead to significant environmental benefits.

As we delve deeper, we uncover a fascinating world of technology aimed at preserving one of our planet’s most precious resources. The aerators, a key component in these faucets, play a pivotal role in the delicate balance between water efficiency and user experience. These devices, by mixing air with water, create a steady stream that not only saves water but enhances the overall efficiency of the faucet.

The Water Conservation Challenge, once daunting and seemingly insurmountable, becomes an opportunity for positive change with the adoption of low-flow faucets. These fixtures offer a tangible way for individuals to actively participate in water conservation efforts, turning a daily routine into an environmentally conscious choice.

In the next sections, we’ll explore how water efficient faucets work, the benefits they bring, and dispel common misconceptions surrounding them. The journey toward sustainable water usage begins with understanding the challenge at hand and embracing solutions that empower us to make a difference.

How Do Low-Flow Faucets Work?

Restricting Flow Without Sacrificing Performance

These faucets operate on a simple yet ingenious principle: to reduce water consumption without compromising the performance we expect from our faucets. The magic lies in the advanced flow restriction mechanisms that these fixtures employ.

These mechanisms are designed to regulate the amount of water that flows through the faucet, ensuring that it aligns with the desired water-saving goals. The key here is balance—maintaining water pressure while significantly reducing the volume of water used. This delicate equilibrium is achieved through a combination of innovative engineering and smart design.

A Closer Look at Aerators

At the heart of low-flow faucets lies a small but crucial component—the aerator. This unassuming device plays a pivotal role in transforming how water is delivered. As water passes through the faucet, the aerator introduces air into the stream, creating a well-balanced and controlled flow.

Imagine the aerator as a maestro orchestrating a symphony, harmonizing the elements of water and air to produce a stream that feels just as robust and satisfying as its water-guzzling counterparts. This not only enhances the user experience but also ensures that every drop of water is utilized efficiently.

The aerator’s role goes beyond water conservation; it contributes to the longevity of the faucet itself. By minimizing splashing and preventing excessive water usage, the aerator extends the life of the fixture while maintaining its optimal performance.

The Technological Marvel

While the concept of reducing water flow might seem straightforward, the technology behind low-flow faucets is nothing short of a marvel. Engineers and designers continually innovate to strike the perfect balance between efficiency and user satisfaction.

Some low-flow faucets even come equipped with adjustable settings, allowing users to customize the flow based on their specific needs. This adaptability ensures that whether you’re filling a glass, washing your hands, or rinsing dishes, the faucet provides just the right amount of water.

Low-flow faucets are not merely tools for water conservation; they are a testament to human ingenuity and the commitment to creating sustainable solutions. As we explore the benefits of embracing these faucets, it becomes clear that the synergy of technology and environmental consciousness can redefine the way we interact with a fundamental resource—water.

Benefits of Upgrading to Low-Flow Faucets

Environmental Impact

Make a positive environmental impact by reducing your water footprint. Low-flow faucets are a tangible way to contribute to water conservation efforts, promoting sustainability.

Economic Savings

Beyond environmental benefits, low-flow faucets translate to economic savings. With reduced water usage, you’ll see a noticeable decrease in your water bills, making it a win-win for your wallet and the planet.

Common Misconceptions About Low-Flow Faucets

Mythbusting Water Pressure Concerns

One common misconception is that low flow means low pressure. In reality, technological advancements ensure that low-flow faucets deliver a satisfying stream, proving that you can have both efficiency and performance.

Installation Hassles

Some are hesitant to upgrade fearing complex installations. Swapping your existing faucet with a low-flow alternative is often a straightforward process, making it accessible for all.

FAQs

Do low-flow faucets really save that much water?

Absolutely! Low-flow faucets can save up to 30% or more water compared to traditional ones.

What is considered a low-flow faucet?

A low-flow faucet is a water-efficient fixture designed to minimize water consumption during everyday use. Typically, these faucets have a flow rate of 1.5 gallons per minute (GPM) or lower. They achieve water savings through innovative technologies like aerators and flow restrictors, ensuring a reduced environmental impact without compromising performance.

What is the difference between a low-flow faucet and a standard faucet?

The primary difference lies in water consumption. Low-flow faucets are engineered to use significantly less water than standard faucets while maintaining comparable performance. The inclusion of aerators and flow restriction mechanisms sets low-flow faucets apart, ensuring they contribute to water conservation efforts without sacrificing user experience.

What are the benefits of a low-flow faucet?

  • Environmental Impact: Low-flow faucets help conserve water, reducing the overall strain on water resources and ecosystems.
  • Economic Savings: Users experience lower water bills due to reduced water consumption.
  • Performance: Despite using less water, these faucets maintain satisfactory water pressure and functionality.
  • Longevity: The technology behind low-flow faucets often extends the life of the fixture, contributing to sustainable practices.

Are all bathroom faucets low-flow?

No, not all bathroom faucets are low-flow. Standard faucets may have higher flow rates, contributing to increased water usage. It’s essential to check product specifications and labels to identify whether a faucet is classified as low-flow. WaterSense certification is a reliable indicator of a faucet’s water efficiency.

Will low-flow faucets lower my bills?

Yes, low-flow faucets can lower your water bills. By using less water, these fixtures contribute to reduced consumption, translating into economic savings over time. The financial benefit adds to the appeal of adopting water-efficient solutions in homes and businesses.

Should I be using low-flow plumbing fixtures?

Yes, using low-flow plumbing fixtures, including faucets, is advisable for several reasons. These fixtures promote water conservation, reduce environmental impact, and lead to economic savings. As part of a broader commitment to sustainability, incorporating low-flow plumbing fixtures aligns with responsible water management practices.

What are ultra low-flow faucets?

Ultra low-flow faucets take water conservation to the next level by having an even lower flow rate, often below 1.0 GPM. These faucets are designed for maximum efficiency, ensuring minimal water usage without compromising functionality. They are ideal for those seeking the highest level of water conservation in their daily activities.

Choosing the Right Low-Flow Faucet for You

Style and Functionality

Low-flow faucets come in various styles and functionalities, ensuring there’s an option for every taste and need. From modern designs to traditional fixtures, you can seamlessly integrate water-efficient solutions into your space.

Reading Labels for Efficiency

Understanding efficiency labels is crucial when selecting a low-flow faucet. Look for WaterSense certification, indicating that the faucet meets strict water efficiency and performance criteria.
As sustainability becomes more important, switching to low-flow faucets makes sense. Save water, save money, and contribute to a greener future by making this simple switch. If you would like more information on low-flow faucets, contact Always Plumbing and Heating. We can help you choose new plumbing fixtures and even install them for you. Contact us today!

How Your Home’s Temperature Can Affect Your Health

Did you know that the temperature of your home can significantly impact your health? Whether it’s the biting chill of winter or the sweltering heat of summer, finding the right balance is crucial for your well-being. Here, we explore the effects of both extremes and discuss the ideal temperature range for a healthy home.

The Goldilocks Zone: Finding the Perfect Temperature

Maintaining a comfortable temperature at home is essential for your well-being. The ideal temperature for your home depends on several factors, including your age, health, and personal preferences. During the summer months, the ideal temperature for your home is around 25.5°C (78°F). However, this temperature can vary depending on your personal preferences and the climate in your region. You can also use air conditioning, insulation, certain building materials, wall thickness, shading from direct sunlight, natural ventilation, and increased air motion (fans) to cool indoor temperatures and protect yourself against heat and heat-related illnesses.

It’s important to note that an indoor temperature of less than 16°C increases the risk of asthma and other respiratory conditions while going below 12°C puts the cardiovascular system under stress. A cold home can also increase your risk of depression and confusion. If you are living with chronic pain, it can make conditions much worse. Therefore, it’s crucial to maintain a comfortable and healthy temperature in your home to avoid these risks.

Therefore, maintaining an ideal temperature in your home is crucial for your health and comfort. The ideal temperature can vary based on personal preferences and the climate in your region, but it’s recommended to set your thermostat to 20°C (68°F) during the winter months and around 25.5°C (78°F) during the summer months.

Factors That Can Affect Indoor Temperature

Maintaining a comfortable indoor temperature is essential for your health and well-being. The temperature inside your home can be affected by various factors, including:

1. Insulation

Poor insulation can lead to significant heat loss, making it difficult to maintain a comfortable temperature indoors. If your home is not well insulated, you may need to use more energy to heat or cool your home, which can increase your energy bills.

2. Building Materials

The materials used to construct your home can also affect its temperature. For instance, homes made of brick or stone tend to retain heat better than those made of wood. Additionally, the thickness of your walls can also impact your home’s temperature.

3. Sunlight

Direct sunlight can significantly increase the temperature inside your home, especially during the summer months. Shading your windows or using curtains can help block out the sun’s rays and keep your home cooler.

4. Airflow

Proper ventilation is crucial for maintaining a comfortable indoor temperature. Airflow can be improved by opening windows, using fans, or installing an air conditioning system. Increased air motion can also help cool indoor temperatures.

5. Outdoor Temperature

The temperature outside your home can also affect the temperature inside. During the winter months, colder temperatures outside can lead to lower indoor temperatures, while during the summer, hotter temperatures outside can cause your home to become warmer.

By understanding the factors that affect indoor temperature, you can take steps to maintain a comfortable temperature inside your home, which can help improve your health and well-being.

Temperature’s Impact on Sleep Quality

Maintaining the right temperature in your bedroom is crucial for a good night’s sleep. According to the Sleep Foundation, the ideal temperature for sleep is between 60-68°F. Your body’s temperature naturally drops as you sleep, so a cooler room makes it easier to fall and stay asleep.

On the flip side, sleeping in a room that is too warm or too cold can disrupt your sleep. When you are too warm, your body struggles to cool down, leading to restlessness and discomfort. According to the Cleveland Clinic, sleeping too cold can also have its downsides. When you are too cold, your body kicks into high gear to try and get you warm again, leading to restlessness and discomfort.

Being in a comfortable environment is essential for healthy sleep. Keeping your sleeping quarters at a temperature near 18.3°C (65°F), give or take a few degrees, is ideal, according to Healthline. Your body temperature naturally fluctuates throughout the night, so a slightly cooler room can help regulate your body temperature and promote restful sleep.

A good night’s sleep is dependent on maintaining the right bedroom temperature. Sleeping in a room that is too warm or too cold can disrupt your sleep and lead to restlessness and discomfort. Keeping your sleeping quarters at a temperature near 18.3°C (65°F) is ideal for promoting restful sleep.

FAQs

Is it Healthier to Keep Your House Cold or Warm?

Striking the right temperature balance is like finding the Goldilocks zone for your health. While personal preferences vary, experts generally agree that maintaining a moderate temperature is key. Extreme cold or heat can strain your body, affecting everything from sleep quality to overall comfort.

What is the Healthiest Temperature to Keep in Your House?

The sweet spot for indoor temperature is typically around 20-22 degrees Celsius (68-72 degrees Fahrenheit). This range promotes better sleep, aids concentration, and supports overall physical comfort. Straying too far from this range may lead to health issues.

What are the Benefits of Living in a Cold House?

Surprisingly, there are some advantages to living in a cooler environment. Cold temperatures can boost your metabolism, potentially aiding weight loss. Additionally, a cooler home may contribute to better sleep quality, as your body naturally prefers a slightly colder environment when winding down.

What are the Disadvantages of a Cold House?

While there are benefits, it’s essential to consider the downsides of a cold home. Exposure to low temperatures for extended periods can strain your cardiovascular system, potentially leading to health issues. Cold indoor environments might also contribute to discomfort and increase the risk of respiratory problems.

What Temperature is Too Cold for a House?

Experts suggest avoiding indoor temperatures below 15 degrees Celsius (60 degrees Fahrenheit) for extended periods. Prolonged exposure to colder temperatures can lead to health issues, including increased vulnerability to respiratory infections.

How to Keep Consistent Temperatures

Invest in a Programmable Thermostat: Installing a programmable thermostat allows you to set specific temperatures for different times of the day. This not only ensures comfort but also helps you optimize energy usage, saving on utility bills.

Seal Leaks and Insulate: Identify and seal any gaps or leaks in windows, doors, and walls. Proper insulation is key to preventing heat loss in the winter and maintaining a cool interior during the summer. Consider upgrading insulation in attics and walls for better temperature control.

Regular HVAC Maintenance: Schedule routine maintenance for your heating, ventilation, and air conditioning (HVAC) system. This includes cleaning or replacing filters, checking for leaks, and ensuring all components function efficiently. A well-maintained HVAC system contributes to consistent temperature regulation.

Use Curtains and Blinds Strategically: Curtains and blinds are more than just decorative; they play a crucial role in temperature control. Close them during the hottest parts of the day to block out sunlight and heat and open them on cooler days to let in natural warmth. Consider using thermal curtains for added insulation.

Consider Zoning Systems: Zoning systems allow you to control the temperature of different areas or rooms independently. This is particularly useful for larger homes or multi-story residences, ensuring that each space is heated or cooled according to its specific needs.

Adjustable Vent Covers: Invest in adjustable vent covers to control the airflow in each room. This allows you to redirect warm or cool air where it’s needed most, promoting a more even distribution of temperature throughout your home.

By implementing these practical steps, you can create a home environment that maintains a consistent and comfortable temperature throughout the year. Take proactive measures to optimize your heating and cooling systems, seal any drafts, and strategically use accessories like curtains and fans. For personalized advice on enhancing your home’s temperature control, consider reaching out to Always Plumbing and Heating.

Strive for Balance

Now you know your home’s temperature plays a significant role in your overall health. Striving for a balanced and comfortable environment is essential for quality sleep, mental well-being, and immune system support. 
Ready to achieve temperature stability in your home? Contact us for expert guidance on optimizing your HVAC system and maintaining a comfortable living space. Subscribe to our newsletter for more tips on creating a consistent and cozy home environment.

Unclog Your Drains Without Tools – Here’s How!

Addressing a clogged drain can be frustrating, especially without the right tools. However, there are several methods you can try to unclog your drain without the need for specialized tools. Whether it’s a sink, bathtub, or shower giving you trouble, these DIY methods can help you get the water flowing again in no time.

This guide will walk you through eco-friendly and effective ways to unclog drains naturally, saving you both time and money.

Understanding the Clog

When you encounter a clogged drain, the first step is to understand what is causing the blockage. This will help you to determine the best method to unclog the drain without using any tools.

The most common cause of clogged drains is a buildup of hair, soap scum, and other debris in the drainpipe. This can be particularly problematic in bathroom sinks and showers. In kitchen sinks, clogs are often caused by a buildup of grease and food particles.

To determine the cause of the clog, start by removing any visible debris from the drain. You can use a pair of gloves or a paper towel to do this. Then, run hot water down the drain for a few minutes. If the water drains slowly, this is a sign that there is a clog deeper in the drainpipe.

Another way to determine the cause of the clog is to listen for gurgling sounds coming from the drain. This is a sign that air is trapped in the drainpipe, which can be caused by a clog. Once you have determined the cause of the clog, you can use one of the methods we will discuss to unclog the drain without using any tools.

Homemade DIY Drain Cleaners

Baking Soda and Vinegar Magic

One common method for unclogging drains without tools is to use a mixture of baking soda and vinegar. Simply pour a cup of baking soda down the drain, followed by a cup of vinegar. Let the mixture sit for about 30 minutes, then flush the drain with hot water. This natural and non-toxic solution can help break up the clog and clear the drain without the need for harsh chemicals or expensive tools.

Boiling Water

Another effective method involves using hot water. Simply boil a pot of water and pour it down the drain. This can help break up any grease or debris that is causing the clog. Regular hot water flushes act as a proactive measure, swiftly addressing minor accumulations before they evolve into stubborn clogs.

Salt Water

If that doesn’t bring results you can try using a salt water solution. Dissolve a couple of tablespoons of salt in water and pour it down the drain. Let it sit for 30-40 minutes to give it some time to work on breaking down any grease or debris. Then, pour hot water down the drain to flush it out. These methods are effective for unclogging drains and can save you time and money.

Dish Detergent Method

A simple and effective method to unclog a drain without tools is by using dish detergent. This method is effective for minor clogs caused by grease or oil buildup.

Start by removing any standing water from the sink and the drain. Then, pour a liberal amount of liquid dish soap down the drain. Let the soap sit for a few minutes so it can reach the clog.

Next, boil a kettle of water and carefully pour it down the drain to flush out the clog. The hot water helps to break down the grease and soap buildup, allowing it to flow freely through the drain.

If the clog is still present, you can repeat the process by pouring the dish detergent into the drain first and letting it sit for about 20-30 minutes. Then, pour the hot water down the drain to flush it out.

It’s important to note that this method may not work for severe clogs or blockages caused by objects. In those cases, it may be necessary to call a professional plumber or use a plumbing snake or plunger.

Improvised Plunger

Necessity is the mother of invention. Although you might not have the usual tools like a plunger, drain snake, and pipe wrench on hand, you probably have household items that can be used in place of a plunger. A plastic water bottle filled with water and inverted in the drain can serve as a plunger in a pinch. 

Simply push the bottom of the bottle as hard as you can into the drain (crushing motion). You want the water inside the bottle to be expelled forcefully. You may need to repeat this a couple of times for a stubborn clog.

If you don’t have any water bottles around, you may be able to substitute a plastic cup if you have one that will fit inside the drain opening. But, instead of crushing the water out of it, use it like a plunger to create suction. Use the same motion (up & down) for a few seconds, and then check for results.

What About Chemical Drain Cleaners?

Most professional plumbers will tell you, that using chemical drain cleaners like Drano is risky for your safety and the stability of your pipes. Chemical drain cleaners work by reacting to the electrons in the makeup of the clog.  During this reaction, gas and heat are produced. The idea behind these cleaners is that the heat and gas will clear out the blockage and fix your drain clog. However, these types of cleaners can be harmful to your pipes and the environment. They can corrode your pipes and cause long-term damage and they can be dangerous if not handled properly.

Preventive Measures for Future Clogs

You can prevent many plumbing problems by making a few simple changes to your daily routine. Taking a few extra steps to avoid more clogs will save you time and money on repairs. 

1. Mindful Disposal

Adopt the golden rule of drain care – avoid disposing of grease, oil, or coffee grounds down the drain. These substances can solidify and create stubborn clogs over time.

2. Scrape Before Rinsing

Scrape plates and cookware into the trash before rinsing them in the sink to minimize the amount of food debris entering the drain.

3. Daily Flushing

Flush drains with hot water daily to keep them flowing freely. 

4. Install Screens

Invest in hair catchers or screens for your shower and bathroom drains. These simple devices prevent hair and soap scum from causing blockages.

In the battle against clogged drains, arming yourself with simple yet effective techniques can save the day. By using common household items, you not only save on the cost of professional help but also gain a sense of empowerment over household hiccups.

FAQs:

Q: Can I use the hot water method for any type of clog?

A: Hot water is effective for minor clogs caused by grease or soap buildup. For more stubborn clogs, consider other methods.

Q: What can dissolve hair in a drain?

A: Hair clogs can be particularly difficult to clear. Chemical solutions are not recommended because they can damage pipes due to their caustic nature. Besides being bad for your pipes, this stuff can cause burns on the skin and is highly toxic to animals and children. There are gentler, safer ways to unclog drains.

This method may work well for those stubborn clogs:

Try using a combo of soda, baking soda & vinegar. Some people have reported success with a solution of ½ a 2-liter of Coke + ½ pack baking soda + 500ml vinegar. Pour the Coke into the drain first, followed by the baking soda (it will fizz a little, that’s okay), and then add the vinegar. Let it sit for 15 – 30 minutes. Follow this by running hot water down the drain to remove any residue left in the pipes. 

Q: How often should I clean my drains with DIY solutions?

A: A monthly treatment is usually sufficient for preventive maintenance. Adjust the frequency based on usage and the specific needs of your household.

Q: What if these methods don’t work?

A: If DIY methods prove ineffective, it’s advisable to seek professional assistance to avoid potential plumbing issues. Call a local plumber and let them know what you have tried already so they can devise the best plan of attack.

Always Plumbing and Heating LTD is your Edmonton plumbing expert. We use state-of-the-art technology to clear and repair drains. Our technicians analyze your drains from the inside without having to excavate them using HDD Drain Vision Cameras. 

Once the obstruction is located, they use BIO Smart to blast it away. Bio Smart is backed by the EPA as an environmentally friendly drain cleaner. This biodegradable, pathogen-free solution is a natural approach that eliminates organic waste build-up, oil, grease, and fat through biological digestion without damaging your pipes. 

Contact us and ask about our drain cleaning, root removal, and sewer line replacement services to protect your pipes, or call 780-489-8118 to book a service. Subscribe to our blog for more plumbing tips and tricks. Share this guide with friends and family to keep their drains flowing smoothly.

Got A Leaky Faucet? 5 Reasons Why And How To Fix It Yourself

Has that persistent “drip, drip, drip” from a dripping faucet got you teetering on the brink of madness? Dripping faucets are not only annoying, but they can also be a sign of something more serious. Here are five possible causes of your leaky faucet and how to fix it yourself.

What Are the Common Causes of a Dripping Faucet?

A dripping faucet can be a persistent annoyance, but understanding its common causes is the key to regaining control. Often, the culprit lies in worn-out washers or seals, those small yet vital components that endure constant use. These wear down over time, allowing water to seep through and manifest as that familiar drip.

In addition to washers and seals, the O-ring, another diminutive yet significant part, can be a source of trouble. If loose or damaged, this tiny ring fails to maintain a watertight seal, contributing to the nagging leaks. Going deeper, the corrosion of valve seats, and the often-overlooked connectors between the faucet and spout, can lead to insidious leaks that may go unnoticed until damage becomes evident.

Sometimes, it’s not the faucet components at fault but the water pressure. Excessive water pressure, beyond the recommended range, can cause faucets to drip intermittently or persistently. Understanding and addressing this pressure imbalance can significantly contribute to resolving the issue.

Lastly, loose or broken parts within the faucet assembly can disrupt its functionality, causing instability and leaks. Tightening or replacing these components is crucial in restoring your faucet’s integrity. By identifying these common causes, you empower yourself to navigate the path to a drip-free faucet with confidence.

How Serious is a Dripping Faucet?

While a dripping faucet might seem like a minor inconvenience, its consequences can extend beyond mere annoyance. One of the most immediate concerns is the wastage of water—every droplet counts, and those seemingly harmless drips accumulate over time, contributing to a significant loss. In fact, a single leaky faucet can waste anywhere from three to 30 gallons of water daily, impacting both the environment and your utility bills.

Beyond the financial and environmental implications, persistent leaks can lead to more serious issues within your home. Continuous exposure to moisture can foster the growth of mold, potentially causing health problems and compromising the structural integrity of your surroundings. Additionally, water stains and damage to fixtures and surfaces may occur, diminishing the aesthetic appeal of your living spaces.

Moreover, the constant dripping can escalate into a larger plumbing problem if left unaddressed. Over time, it may contribute to the deterioration of faucet components, requiring more extensive repairs or even a complete replacement. The longer you ignore a dripping faucet, the more profound its impact becomes. Therefore, taking prompt action not only conserves water and saves on bills but also safeguards your home from potential complications down the line.

Common Faucet Types

Cartridge Faucets

Cartridge faucets are like the superheroes of the faucet world. They come in both single-handle and double-handle varieties. The magic lies in the cartridge—a cylindrical piece that controls water flow. They’re reliable and often easy to repair. If you’re into simplicity and durability, cartridge faucets are your go-to.

Disc Faucets

Meet the disc faucet, a modern wonder. They use a pair of ceramic discs to regulate water flow and temperature. Smooth and precise, these discs move gracefully, offering a level of control that’s hard to beat. Disc faucets are not only efficient but also tend to be low-maintenance. If you’re a fan of sleek design and efficiency, disc faucets might be your style.

Ball Faucets

Ball faucets are the acrobats of the faucet family, often found in kitchens. They use a ball bearing to control water flow and temperature. The single handle attached to that ball allows for a wide range of motion. While they provide excellent control, their design complexity might mean more opportunities for issues. If you like a faucet with a bit of flair and flexibility, the ball faucet could be your pick.

Compression Washer Faucets

Old school charm? That’s the compression washer faucet. Traditional and reliable, these faucets use a rubber washer to control water flow. Turning the handle compresses the washer, stopping the water. While they’re classic, they’re also more prone to leaks over time. If you appreciate the classics and don’t mind a bit of DIY maintenance, a compression washer faucet might be your style.

Understanding these faucet types is like having a toolkit for your plumbing adventures. It helps you troubleshoot issues and pick the right faucet for your needs.

How Do I Stop My Faucet from Dripping?

Dealing with a dripping faucet doesn’t have to be a daunting task. In fact, with a few simple steps, you can often fix the issue yourself. Here’s a straightforward guide:

1. Shut Off the Water: Before you start, turn off the water supply to the sink. Locate the individual shut-off valves under the sink—one for hot and one for cold. If these valves aren’t present, you may need to shut off the main water supply for the entire house.

2. Prepare the Workspace: Cover the sink drain with a plug or a towel to prevent small parts from falling down the drain. This ensures that you won’t lose anything important while working.

3. Remove the Faucet Handle: Depending on your faucet type, find and remove the handle. This could involve unscrewing a set screw behind the handle or prying off a top screw cover and loosening the screw underneath. Take your time to do this carefully.

4. Access the Cartridge or Stem: After removing the handle, you’ll find the cartridge or stem, the culprit behind the dripping. Use a wrench to loosen the packing nut in the handle assembly and then gently pull the part straight up and out.

5. Identify and Replace the Problematic Part: Inspect the cartridge or stem for any visible damage. If you notice worn-out washers, O-rings, or seals, replace them with new ones. Make sure to bring the old parts to the store to ensure you purchase the right replacements.

6. Clean and Reassemble: Clean the area around the handle and all parts thoroughly. If you’ve replaced any parts, insert the new cartridge or stem, ensuring proper alignment. Reattach the faucet handle securely.

7. Turn On the Water: Once everything is back in place, turn the water supply back on. Run both hot and cold water through the faucet for a few minutes to ensure everything is working correctly.

By following these simple steps, you can often save yourself from the annoyance of a dripping faucet and the potential issues it might cause in the long run.

DIY Plumbing Safety Tips

1. Locate the Main Shutoff Valve: Before you even think about grabbing a wrench, locate and shut off the water supply. You don’t want an unexpected shower while fixing that leaky pipe. The main shut-off valve is usually near the water meter or where the main line enters your home. Twist it clockwise, and you’re in control.

2. Gather the Right Tools: Having the right tools is like having a superhero utility belt. Wrenches, pliers, pipe cutters—equip yourself properly. Using the correct tools not only makes the job easier but also safer. Don’t go MacGyver on your plumbing—leave the paperclips and chewing gum to the movies.

3. Know Your Limits: DIY is awesome, but it’s crucial to recognize when to call in the professionals. If your plumbing project starts feeling like a scene from a disaster movie, it’s time to dial that plumber’s number. Some things are best left to the experts, and there’s no shame in that.

4. Protect Yourself: No superhero heads into battle without armor. Similarly, you shouldn’t tackle plumbing without protection. Safety glasses are your sidekick against unexpected splashes. Gloves shield your hands from sharp edges and nasty surprises. It’s not just about fixing pipes; it’s about keeping yourself intact.

5. Take It Slow: Rome wasn’t built in a day, and neither should your plumbing repairs. Rushing can lead to mistakes and, more importantly, accidents. Take your time, follow the steps carefully, and don’t skip any. A slow and steady approach wins the DIY plumbing race.

6. Ventilate the Area: Some plumbing tasks involve substances with less-than-pleasant odors. Ventilate the area well to avoid inhaling anything harmful. Open the windows, use fans—whatever it takes to keep the air fresh. Your nose will thank you.

Remember, safety isn’t just a suggestion; it’s the golden rule of DIY plumbing. Follow these tips, and you’ll be the DIY plumbing superhero in your home.

If you don’t feel that you’re making any headway, don’t hesitate to ask for help. If you need assistance with a leaky faucet, Always Plumbing and Heating LTD offers a wide range of services, including plumbing repair, maintenance, and new installations. Our team of trained professionals can help you with any plumbing issue you may have. Contact us to schedule an appointment or to learn more about our services.

Home Safety Tips to Keep the Season Merry This Holiday Season

The holiday season is upon us, bringing warmth, joy, and festivities into our homes. As you prepare to celebrate with loved ones and create beautiful memories, it’s essential to ensure that your home is not only cozy but also safe. In this article, we’ll explore some crucial home safety tips that will help you maintain a merry and accident-free holiday season.

Plug-in Heater Safety

Heaters are a lifesaver during the chilly winter months, but they can also pose safety hazards if not used correctly. To keep your home warm and secure, here are some tips on using heaters safely.

Keep Heaters Away from Flammable Objects: Whether you’re using electric space heaters or a fireplace, make sure they are at a safe distance from curtains, furniture, and other flammable items. Heaters generate high temperatures, and if they are too close to flammable materials, there is a significant risk of these materials catching fire. 

Curtains, in particular, can be highly flammable and can quickly ignite if they touch a heater. Once a flammable object catches fire, it can lead to a rapid spread of flames, which can engulf the room or even the entire house within minutes.

Use Heaters with Safety Features: Opt for heaters that have built-in safety features such as tip-over switches and overheat protection. These features can prevent accidents in case your heater malfunctions. This is especially important when using heaters in bedrooms or other areas where you may not be able to constantly monitor their operation.

Your safety and the safety of your loved ones are paramount, and investing in a heater with safety features is a smart way to ensure a cozy and secure home during the holiday season and beyond.

Electrical Safety for Christmas Tree Lights

As you adorn your home with the warm glow of holiday lights, it’s crucial to prioritize electrical safety. Here are some guidelines for safely plugging in Christmas tree lights and other decorations:

Inspect Lights and Cords: Before plugging in your lights, carefully inspect them for any frayed wires, broken bulbs, or other visible damage. Discard and replace damaged lights promptly to prevent electrical hazards.

Use UL-Listed or Safety-Approved Lights: Choose lights that have been tested and certified for safety by organizations like Underwriters Laboratories (UL). This ensures they meet specific safety standards.

Avoid Overloading Outlets: Distribute the load of your holiday lights and decorations across multiple outlets or circuits. Overloading a single outlet can lead to overheating and electrical fires.

Use Extension Cords Safely: If you need extension cords for your lights, ensure they are rated for outdoor use if placed outdoors. Indoor cords should be used indoors only. Never daisy-chain multiple extension cords, as this can create electrical hazards.

Don’t Pinch Cords: Avoid pinching cords between doors, windows, or heavy objects. Pinched cords can become damaged over time, exposing wires and posing a safety risk.

Unplug When Not in Use: When you’re not enjoying your holiday lights, unplug them. This not only conserves energy but also reduces the risk of electrical issues or overheating while you’re away from home.

Outdoor Light Safety: If using lights outdoors, ensure they are rated for outdoor use. Keep connectors above ground to prevent water damage. Secure outdoor lights and extension cords to prevent tripping hazards.

Timer Use: Consider using timers to automate your lights. This not only saves energy but also ensures the lights turn on and off at appropriate times without overloading circuits.

By following these electrical safety precautions, you can enjoy the festive ambiance of holiday lights without compromising the safety of your home and loved ones. Electrical safety is key to ensuring a joyful and worry-free holiday season.

Christmas Tree Safety

When it comes to Christmas tree safety, a few key precautions can make all the difference during the holiday season. If you’re opting for a live tree, choose one with vibrant, green needles that don’t easily fall off when touched. 

Ensure the tree’s trunk is freshly cut, which helps it absorb water more effectively. Place your live tree in a sturdy stand and keep it well-watered throughout the season. Regularly checking and replenishing the water level in the stand not only prolongs the tree’s freshness but also significantly reduces fire risks. 

When positioning your tree, make sure it’s away from heat sources like fireplaces, radiators, or candles, and avoid overcrowded areas that can lead to tripping hazards. 

These simple steps ensure your Christmas tree remains a beautiful and safe centerpiece for your holiday celebrations.

Garbage Disposal Safety

During the holiday season, your kitchen often becomes a bustling hub of activity. With all the delicious meals being prepared, it’s essential to keep your garbage disposal unit safe and efficient.

Avoid Overloading: Don’t stuff too much food waste into the disposal at once. Overloading it can lead to clogs and potential damage. Large amounts of food can become compacted, making it harder for the blades to break down the waste into small particles. This inefficiency may lead to food chunks or bits getting stuck in the disposal or pipes.

Run Cold Water: Cold water helps to keep fats, oils, and greases (FOGs) in a solid state. When FOGs enter the disposal in a liquid form due to hot water, they can easily coat the blades, trap food particles, and accumulate in the pipes. Over time, this can lead to clogs and blockages.

Avoid Hard and Fibrous Materials: Keep items like bones, fruit pits, and fibrous vegetables away from the disposal. They can damage the blades and cause jams. Fibrous foods like celery, corn husks, or onion skins can become tangled around the disposal’s blades, impeding their movement. This not only affects the disposal’s efficiency but can also lead to clogs in the pipes.

Regular Cleaning: Clean your disposal regularly by grinding ice cubes and lemon or orange peels. Food residue can build up in the disposal, leading to unpleasant odors. Regular cleaning helps remove these residues and keeps your kitchen smelling fresh.

Plumbing Safety

Your plumbing system is integral to your daily life, from providing clean water and sanitation to supporting various household appliances and systems. This

 is vital, especially when you have guests over. Here are some plumbing safety tips to ensure a hassle-free holiday season.

Watch What You Flush: Avoid flushing items like cotton balls, paper towels, or feminine hygiene products down the toilet. Feminine hygiene products are designed to be highly absorbent to manage menstrual flow. When flushed, they can absorb water and expand, which can lead to blockages in the plumbing pipes. This can result in clogs and sewage backups.

Keep an Eye on Water Pressure: High water pressure can strain your pipes and fixtures. Consider installing a pressure regulator to solve this issue. Water pressure regulators help to reduce sudden and high water pressure surges in your plumbing system. Water hammers, caused by these surges, can damage pipes, appliances, and fixtures. 

Check for Leaks: Inspect your pipes for any leaks or drips. Even a small leak can lead to significant water damage if left unaddressed. Leaking pipes, faucets, or appliances can lead to extensive damage to walls, ceilings, floors, and belongings. Catching leaks early can save you from costly repairs and restoration.

Additional Tips

Avoid DIY Plumbing Projects: While DIY can be fun, it’s best to leave plumbing repairs to the professionals. Plumbing involves working with water, pipes, and sometimes gas lines. Incorrectly handling these elements can lead to accidents, injuries, or even fatal incidents. A professional plumber is trained to work safely in such environments, while DIYers may not fully understand the risks involved.

Regular Maintenance: Make sure your heating equipment is well-maintained. Clean or replace filters as needed, and schedule professional maintenance to keep your heating system in top shape.

Book a Free Estimate with APH: If you find yourself relying on plug-in heaters to keep your home warm, it might be time to consider a more efficient solution. APH offers free estimates to assess your heating needs. Our technicians can recommend a furnace that will keep your entire home toasty without the need for space heaters.

Keeping your home safe during the holiday season is essential for enjoying the festivities without any worries. From safe heater usage to garbage disposal and plumbing safety, taking these precautions will ensure that you have a joyful and accident-free holiday season.

Get Help from a Pro

For prompt and reliable furnace repair in Edmonton, look no further than Always Plumbing and Heating. Our skilled technicians are ready to address your heating concerns, ensuring your home is cozy and warm in no time. With our expertise, you can enjoy the safety and comfort of a professionally maintained heating system. 

Wishing you a safe and Merry Holiday Season!

Guide to DIY Washing Machine Installation and Common FAQs

Installing a new washing machine in your home may seem like a challenging task, but with the right guidance, it can be a manageable DIY project. Whether you’re replacing an old unit or setting up a washing machine for the first time, this step-by-step guide will help you through the process. We’ll also address common questions about washing machine installation to ensure a smooth and trouble-free setup.

How to Install a New Washing Machine in Your Home

Tools and Materials You’ll Need

Before you begin, gather the necessary tools and materials for the job:

  • New washing machine
  • Washer hoses (usually included with the machine*)
  • Adjustable wrench
  • Screwdriver
  • Level
  • Pipe tape
  • Drain hose clamp
  • Drain hose holder
  • Bucket or towel (for water cleanup)
  • Safety goggles

*Using a corrugated steel tube piping is recommended instead of the included rubber-based tubes that come with the machine as they are prone to rupture. Insurance companies say this is one of the biggest claims, as these rubber pipes burst for no apparent reason.

You may already have many of these items around your house or garage. If you’re missing any of them, make a quick trip to your local hardware store. Pipe tape, hose clamps, and a level are absolutely essential for a leak-free installation. Once you have everything you need to begin the job, follow the steps outlined below. 

Step 1: Choose the Location

Select a suitable location for your washing machine. Ensure it’s on a level surface, as this is essential for proper operation. Leave enough space around the unit for ventilation and easy access to hoses and connections. Check the manufacturer’s recommendations for specific clearance requirements.

Step 2: Prepare the Area

Clear the area and clean it thoroughly. This will help you spot any potential issues or leaks more easily. If you’re replacing an old washing machine, disconnect and remove it from the space. Be prepared for some water spillage during this step, so keep a bucket or towel handy.

Step 3: Install the Washer Hoses

Connect the hot and cold water supply hoses to the back of the washing machine. Typically, the hot water supply is marked in red, and the cold water supply is marked in blue. Make sure to attach them to the correct water source.

Use an adjustable wrench to tighten the hose connections. Be careful not to overtighten, as this can damage the threads.

Step 4: Attach the Drain Hose

Connect the washing machine’s drain hose to the drain pipe. Ensure the drain hose is securely fastened to the pipe to prevent leaks. You can use a drain hose clamp for added security.

Place a drain hose holder over the edge of the laundry tub or standpipe. This prevents the hose from moving out of place during the wash cycle.

Step 5: Level the Machine

To avoid vibrations and noise during operation, it’s crucial to level the washing machine. Place a level on top of the unit and adjust the legs until the bubble is centered in the level’s indicator.

Once you’ve leveled the machine, give it a gentle push to ensure it doesn’t wobble or move easily. A stable machine won’t shift during the wash and spin cycles, preventing potential accidents and damage.

Step 6: Plug In the Machine

1. Pre-Plug Inspection: Before you proceed, take a moment to carefully inspect the electrical plug. Look for any cuts, fraying, or signs of wear on the cord. If you detect any damage to the cord or plug, do not connect it to the outlet. Contact the manufacturer or the store where you purchased the washer for a replacement.

2. Secure Connection: Once you’ve confirmed that the plug is in good condition, connect the washing machine to a nearby electrical outlet. Ensure that the outlet is easily accessible, and there are no obstacles obstructing the plug’s insertion.

3. Grounding: Grounding your washing machine is a critical safety measure. Ensure that it’s connected to a properly grounded electrical outlet. A grounded outlet reduces the risk of electrical shocks and ensures safe operation.

If everything looks good at this point, continue to the next step. You can plug in your washing machine with confidence, knowing that you’ve prioritized safety and a secure electrical connection. This sets the stage for a trouble-free laundry experience.

Step 7: Test the Machine

Before you start a full load of laundry, run a test cycle with an empty machine. This helps ensure that there are no leaks and that the washing machine is functioning correctly.

Common Questions and Tips:

1. Do I need a plumber to install a washing machine?

In most cases, you don’t need a plumber to install a washing machine. If you have basic plumbing skills and follow the manufacturer’s instructions, you can typically handle the installation yourself. However, if you’re uncomfortable with plumbing tasks or face complex issues, it’s wise to consult a professional plumber.

2. How should a washing machine drain pipe be?

The washing machine’s drain pipe should be properly connected to a standpipe or a laundry tub. The standpipe should be at least 2 inches in diameter and located no more than 96 inches above the floor. Ensure the drain hose is securely attached to prevent water leaks during the machine’s operation.

3. What is the code for a washing machine drain?

Washing machine drain codes may vary by location, so it’s essential to check your local plumbing codes and regulations. These codes typically address issues like proper drainpipe size, venting, and drainage capacity. Complying with local codes is crucial to ensure a safe and effective installation.

4. How much space do you need behind a washing machine for the pipes?

You’ll need approximately 4 to 6 inches of space behind the washing machine to accommodate the water supply hoses and drain hose. Be sure to measure and provide enough clearance for the connections to fit comfortably.

5. Do you connect a washing machine to hot or cold water?

Most washing machines allow you to connect to both hot and cold water supplies. However, many modern machines are designed to be more energy-efficient and primarily use cold water. Always check the manufacturer’s instructions to determine the recommended water temperature settings for your specific machine.

6. Does a washing machine need a floor drain?

A floor drain is not mandatory for a washing machine, but it can be a valuable addition. A floor drain can help manage any accidental water leaks or overflows, preventing water damage to your home. It’s a good safety feature, especially if your laundry area is on an upper floor.

Seeking Professional Assistance

Not everyone is a natural when it comes to home improvements, and that’s perfectly fine. Installing a washing machine may seem straightforward, but it can still be a challenging task for some. If you’re uncertain about any aspect of the installation or if you encounter unexpected difficulties, it’s always a wise choice to reach out to a licensed professional plumber.

Licensed plumbers have the experience and expertise to handle a wide range of plumbing tasks, including washing machine installations. They are well-versed in local plumbing codes and regulations, ensuring that the installation complies with all necessary standards.

If any of these scenarios apply to your situation, contacting a professional plumber is a good idea:

Complex Plumbing Systems: If your home has a complex plumbing system, you may need the insight of a professional plumber to navigate and make the necessary connections correctly.

Limited DIY Skills: Not everyone feels comfortable working with plumbing fixtures and connections. If you lack experience or confidence in your DIY skills, hiring a professional can give you peace of mind. Every home is different and even if you’ve done it before, you can still experience problems that you may not be able to handle on your own.

Custom Installations: If your washing machine installation requires custom modifications or unique solutions, a licensed plumber can provide the expertise needed to tackle these challenges.

Unexpected Issues: Sometimes, you may encounter unforeseen issues during the installation, such as hidden leaks or damaged plumbing. A professional plumber can quickly identify and address these problems.

Safety Concerns: If you’re concerned about safety risks related to plumbing tasks, especially in older homes with outdated systems, professional plumbers have the knowledge and equipment to work safely.

Remember that there’s no shame in asking for help, especially when it comes to complex tasks like plumbing. Contacting a licensed professional plumber ensures that your washing machine installation is done correctly, efficiently, and in compliance with all relevant codes. It’s a smart investment in your home’s functionality and your peace of mind.

At Always Plumbing and Heating in Edmonton, your comfort and safety are our top priority. If you need help with a plumbing installation, repair, or advice on new fixtures for your bathroom faucet, we can help. Our plumbers are experts when it comes to installing and repairing all types of plumbing systems. We guarantee customer satisfaction and strive to provide you with the best service possible. Contact us today to learn more.

Top Safety Tips for Your Furnace: How to Keep Your Home Toasty All Winter Long

Winter is a magical season when we enjoy cozy evenings by the fireplace, warm blankets, and hot cocoa. However, to make your home truly toasty during the coldest months, you need a reliable furnace. To ensure your furnace operates safely and efficiently, we’ve compiled a comprehensive guide of top safety tips. Read on to discover how to keep your home warm and secure throughout the winter.

1. Regular Furnace Maintenance

The first step to a warm and safe home is regular furnace maintenance. Your furnace should be inspected, cleaned, and serviced at least once a year. This ensures it operates efficiently and reduces the risk of unexpected breakdowns. A well-maintained furnace will also consume less energy, saving you money on your utility bills.

2. Change or Clean Filters

Your furnace’s filters play a crucial role in maintaining air quality and preventing dust and debris from clogging the system. Depending on the type of filter you have, you should either replace it or clean it every one to three months. This not only enhances air quality but also improves the furnace’s efficiency.

3. Check for Carbon Monoxide Leaks

Carbon monoxide is a colorless, odorless gas that can be produced by a malfunctioning furnace. Install carbon monoxide detectors in your home to ensure safety. Check these detectors regularly to make sure they are functioning correctly. If they ever sound an alarm, evacuate your home immediately and contact a professional.

4. Ensure Proper Ventilation

A well-ventilated furnace is essential for your safety. Clear any obstructions around the furnace, such as storage items or debris, to ensure proper airflow. Also, check that the furnace’s exhaust pipe is clear of any blockages, as this is crucial for the safe removal of combustion gases.

A safe furnace is not just about comfort; it’s about the well-being of your family. Carbon monoxide leaks, gas leaks, or furnace malfunctions can pose serious health risks, including carbon monoxide poisoning and fire hazards. Therefore, taking the time to maintain your furnace and follow these safety tips is essential for a warm and secure winter.

5. Keep Flammable Materials Away

This may seem obvious, but it’s worth emphasizing. Keep all flammable materials, such as paper, fabric, or cleaning products, well away from the furnace. Your furnace can get extremely hot, and any accidental contact with flammable materials could result in a fire.

6. Maintain a Clear Area

In addition to keeping flammable materials away, ensure that the area around your furnace is clear of clutter. This will not only prevent fire hazards but also make it easier to access your furnace for maintenance or in case of an emergency.

7. Ensure Proper Insulation

Proper insulation is crucial for keeping your home toasty and your furnace efficient. Insulate your walls, attic, and crawl spaces to prevent heat loss. Insulation not only maintains a comfortable temperature but also reduces the workload on your furnace, helping it run more effectively and extending its longevity.

8. Have an Emergency Plan

No matter how well-maintained your furnace is, emergencies can still happen. Prepare for unexpected situations by having a clear emergency plan. This plan should include knowing how to shut off your furnace, where your fire extinguisher is located, and how to exit your home safely.

9. Invest in a Smart Thermostat

Consider installing a programmable thermostat to help you maintain a comfortable and energy-efficient home. These devices allow you to set schedules for your furnace, reducing energy consumption when you’re away or sleeping and ensuring warmth when you need it most. This not only saves you money but also reduces the wear and tear on your furnace, extending its lifespan.

Programmable scheduling, Geofencing, and compatibility with other smart home devices make it a wise investment and cost-effective choice.

How do smart thermostats help save on energy costs?

Smart thermostats optimize your heating and cooling based on your preferences and daily routines. They can adjust the temperature when you’re not at home or in unoccupied rooms, preventing energy waste and reducing your utility bills.

Are smart thermostats compatible with voice assistants like Alexa and Google Assistant?

Yes, many smart thermostats integrate with popular voice assistants, allowing you to control your thermostat with voice commands for added convenience.

Can I use a smart thermostat if I don’t have a smartphone or Wi-Fi?

While Wi-Fi connectivity enhances the features of smart thermostats, many models still offer local control via the thermostat’s interface. However, some advanced features, like remote control and learning capabilities, require an internet connection.

10. Obtain a Generator

Consider having an emergency power source, such as a generator, to ensure your furnace continues to function during power outages. Losing heat during a winter storm can be dangerous, so having a backup power solution in place can keep your home warm and safe when the electricity is down.

11. Have Alternative Heat Sources

In an emergency, having alternative sources of heat is crucial to staying warm and safe. Here are five alternative sources of heat:

Portable Propane Heaters: Portable propane heaters are efficient and easy to use. They provide a direct source of heat and can be used indoors with proper ventilation. Propane heaters are a popular choice for emergency heating.

Kerosene Heaters: Kerosene heaters are another reliable option. They burn kerosene fuel to generate heat and are suitable for both indoor and outdoor use. However, proper ventilation is essential to prevent carbon monoxide buildup.

Wood-Burning Stoves: If you have access to firewood, a wood-burning stove can provide an excellent source of heat. They are efficient and can be used to cook as well. Ensure your stove is properly installed and maintained.

Body Heat and Insulation: In emergency situations, your own body heat is a valuable source of warmth. Using blankets, sleeping bags, and insulation materials can help trap and conserve heat. Huddling together with others can also provide additional warmth. It’s not uncommon for families to gather in one room to maximize the heat in that area.

A well-maintained furnace not only provides warmth but also peace of mind throughout the cold months. Always Plumbing and Heating is your best ally when it comes to maintaining a warm, comfortable home. We’re experts in furnace repair, installation, and maintenance.

Whether you need emergency furnace repair, furnace maintenance, or are considering installing a new smart thermostat, Always Plumbing & Heating stands ready to meet your needs. Our friendly and supportive staff can answer any questions you may have about your heating system and advise you on the best equipment for your home.

Contact us today, and experience the peace of mind that comes from having trusted professionals by your side for all your heating and cooling requirements. Your comfort and satisfaction are our top priorities, and we’re just a call away!

During fall and winter, we offer a special furnace tune-up coupon to help you save when the time for your annual appointment rolls around. To increase your savings, you can always join our Diamond Club to enjoy both AC and furnace maintenance every year, as well as additional discounts on service calls, new appliances, and installations.

Winter-Proofing Your House Plumbing: 10 Tips to Prevent Burst Pipes

Winter brings with it a picturesque blanket of snow, cozy nights by the fire, and the holiday spirit. However, it also comes with a potential menace – burst pipes.  Icy cold temperatures can wreak havoc on your plumbing system, causing expensive and frustrating damage. But fear not, for we’ve got you covered with 10 essential tips to winter-proof your house plumbing and ensure a stress-free season.

10 Essential Tips to Winter-Proof Your House Plumbing

1. Insulate Your Pipes

During the winter, cold temperatures can cause the water inside your pipes to freeze. When water freezes, it expands, which can put immense pressure on your plumbing system. If this pressure becomes too much, it can lead to burst pipes, flooding, and significant damage to your home. To prevent this from happening, insulating your pipes is essential. 

Wrap the insulation around the pipes, ensuring it covers the entire length. Use duct tape or special adhesive to secure it in place. Pay special attention to areas where pipes are exposed to the cold, such as those running through unheated spaces like basements, attics, and crawlspaces.

2. Seal Cracks and Leaks

Inspect your home for any gaps, cracks, or leaks that could allow cold air to penetrate. For smaller cracks, you can use caulk, while expanding foam is more suitable for larger gaps. Weatherstripping around doors and windows helps keep drafts at bay.

The integrity of your home’s building envelope plays a significant role in maintaining a warm and energy-efficient indoor environment during the winter. Any openings around your home’s structure, no matter how small, can allow cold air to infiltrate, causing drafts, making your heating system work harder, and increasing energy costs.

Why Sealing Matters:

Energy Efficiency: A well-sealed home retains heat better, reducing the workload on your heating system and helping you save on energy bills.

Comfort: By sealing cracks and gaps, you’ll eliminate drafts and cold spots in your home, making it more comfortable for you and your family.

3. Disconnect and Drain Outdoor Hoses

Before the first frost, disconnect and drain your garden hoses. Leaving them connected can lead to water backing up into the pipes inside your home. Follow these simple steps to get it done:

How to Disconnect and Drain Outdoor Hoses:

1. Shut Off the Water Supply: Begin by turning off the water supply to the outdoor faucet. This is typically done through an indoor shutoff valve. Make sure the valve is fully closed.

2. Detach the Hose: Disconnect the hose from the outdoor faucet by unscrewing it counterclockwise. Ensure the hose is fully removed.

3. Drain the Hose: To prevent water from freezing inside the hose, hold one end of the hose higher than the other, allowing gravity to assist in draining all the water out.

4. Store the Hose: Once drained, coil the hose neatly and store it in a sheltered area like a garage or shed. If you lack indoor storage space, consider covering the coiled hose with an insulating material or a hose cover to protect it from the cold.

Additional Tips:

If you have a frost-free outdoor faucet, it’s still essential to disconnect and drain hoses. These faucets can still be vulnerable to freezing if hoses are attached.

Check for any leaks or damage to the hoses before storing them. Repair or replace damaged hoses to ensure they function properly next spring.

4. Drip Your Faucets

When the temperature drops significantly, allow your faucets to drip slightly. This keeps water moving, preventing freezing. Allowing your faucets to drip, even just slightly, creates a continuous flow of water through the pipes. This flow helps release the pressure that builds up as the water freezes, lowering the risk of pipe damage.

5. Open Cabinet Doors

On exceptionally cold nights, open cabinet doors under sinks to allow warm air to circulate around pipes. By allowing warm air from your home to circulate within the cabinet, you ensure that the temperature inside the cabinet remains closer to room temperature. This prevents the pipes from being exposed to extreme cold, reducing the risk of freezing.

6. Maintain a Constant Temperature

Consistency is key. Keep your home at a steady temperature day and night. Lowering the thermostat too much at night can put your pipes at risk. Keeping a steady indoor temperature reduces the need for your heating system to work harder when trying to raise the temperature from a much lower point. This results in energy savings and lower heating bills.

7. Service Your Heating System

Ensure your heating system is in top-notch condition. Regular maintenance can prevent breakdowns during the coldest months. Over time, heating systems can accumulate dust, debris, and wear and tear, causing a decrease in their efficiency. Regular servicing ensures that the system operates at its best, which can lead to lower energy bills and reduced energy consumption.

8. Install a Smart Thermostat

A smart thermostat allows you to monitor and control your home’s temperature remotely, helping you keep an eye on your heating system. Smart thermostats provide remote control and customization through smartphone apps and smart home systems. This means you can adjust your home’s temperature from anywhere, offering a high level of convenience.

9. Insulate Your Attic

A well-insulated attic not only conserves heat but also helps prevent drafts that can freeze your pipes. During the winter, warm air rises and can easily escape through the roof. Proper attic insulation acts as a barrier, preventing this heat loss and helping to retain a comfortable indoor temperature. 

Here are some common types of insulation used in attics, choose the one that works best for you and your budget.

There are several types of attic insulation materials available, each with its own advantages and considerations. The choice of insulation material depends on factors like your climate, budget, and specific insulation needs. Here are some common types of attic insulation:

Fiberglass Insulation: This is one of the most common types of insulation. It consists of fine glass fibers and is available as batts, rolls, or loose-fill. Fiberglass insulation is known for its cost-effectiveness and resistance to moisture. It’s typically installed between the joists or rafters.

Cellulose Insulation: Cellulose insulation is made from recycled paper products and treated with fire-retardant chemicals. It can be installed as loose-fill insulation, and blown into the attic space. Cellulose is an environmentally friendly option and provides good thermal performance.

Spray Foam Insulation: Spray foam insulation is a high-performance insulation material that expands and hardens upon application. It creates an airtight seal, providing excellent thermal resistance. There are two types of spray foam insulation: open-cell and closed-cell. Open-cell foam is less dense and is often used in walls and ceilings, while closed-cell foam is denser and more suitable for attics, offering a higher R-value.

Rigid Foam Board Insulation: Rigid foam boards are made from various materials, including polystyrene, polyurethane, and polyisocyanate. These boards offer high insulation values and can be used in conjunction with other insulation types to provide additional thermal resistance. They are typically installed on the interior or exterior of the attic, depending on the specific application.

10. Prevent Drafts

Drafts allow cold air to infiltrate your home and warm air to escape. This forces your heating system to work harder to maintain a comfortable temperature, resulting in increased energy consumption and higher heating bills. Use door draft stoppers and seal gaps around windows to keep your home cozy and energy-efficient.

Winter-proofing your plumbing is a crucial task for homeowners. Taking the time to prepare your home for the colder months can save you money, stress, and the inconvenience of dealing with burst pipes. By following these 10 tips, you’ll be well on your way to enjoying a cozy, worry-free winter.

Remember, if you need assistance with any HVAC-related issues or have concerns about your plumbing, our team of experts is here to help. Don’t hesitate to reach out to Always Plumbing for all your winter home maintenance needs.

Stay warm and worry-free this winter!

Preparing Your HVAC System for an Extended Vacation

Planning a well-deserved extended vacation is exciting, but before you jet off to your dream destination, there’s one essential task you shouldn’t overlook: preparing your HVAC (Heating, Ventilation, and Air Conditioning) system. Taking care of your HVAC system before you leave can lead to energy savings, maintain indoor air quality, and ensure the longevity of your equipment. In this guide, we’ll walk you through everything you need to know to get your HVAC system vacation-ready.

Seasonal Temperature Settings

When it comes to preparing your HVAC system for an extended vacation, your thermostat plays a crucial role. It’s the commander-in-chief of your heating and cooling system. Here’s what you need to do:

Your thermostat, the commander-in-chief of your heating and cooling system, plays a pivotal role in optimizing your HVAC system before your vacation. To achieve energy savings without compromising your home’s safety and comfort, it’s advisable to make some adjustments.

During winter getaways, setting your thermostat to a lower temperature is a wise move to conserve energy. However, be cautious not to set it too low to prevent frozen pipes. A temperature that ensures safety and avoids energy waste is ideal (13 to 16 degrees). Conversely, for summer vacations, slightly raising the thermostat’s temperature (26 to 28 degrees) can lead to savings on cooling costs while keeping your indoor environment pleasant.

If you have a programmable or smart thermostat, take full advantage of its capabilities. These innovative devices allow you to create a vacation schedule that automatically adjusts the temperature based on your preferences. Not only does this save you energy and money, but it also adds a layer of convenience to your preparations.

Maintaining Air Quality

Before you take off, it’s important to ensure that your HVAC system’s air filters are clean and ready to do their job. Dirty filters can restrict airflow and put unnecessary strain on your system. Here’s what to do:

Before your departure, it’s crucial to ensure that your HVAC system’s air filters are in optimal condition. Dirty filters can hinder airflow and place undue stress on your system, potentially leading to inefficiency. To maintain the air quality in your home, follow these steps:

Inspect your air filters and clean or replace them if they are dirty. Clean filters are essential for maintaining proper airflow and ensuring good indoor air quality. Consult your HVAC system’s manual or manufacturer’s recommendations for guidance on filter maintenance and replacement.

Sealing and Insulating Your Home

To keep your home comfortable and energy-efficient in your absence, you’ll want to address any gaps or insulation issues:

Check your doors and windows for gaps that might let in drafts. Weatherstripping or caulking can be used to seal these gaps effectively, preventing temperature fluctuations inside your home. 

Additionally, ensure that your home is adequately insulated, as proper insulation is instrumental in maintaining a consistent indoor temperature. Consider adding or upgrading insulation in areas where it may be lacking.

Checking Vents and Ducts

Your HVAC system’s vents and ducts play a vital role in maintaining indoor comfort. Here’s what you should do:

Inspecting your vents and ducts is a crucial step in ensuring your HVAC system’s efficiency. Check to make sure they are free from obstructions and damage, as these issues can hinder proper airflow, impacting both heating and cooling. Maintaining the right humidity levels in your home is equally important for your comfort and overall health. 

If you have a humidifier, it’s a good idea to turn it off or adjust it to lower settings before your vacation. Excessively high humidity levels can promote the growth of mold and mildew. Alternatively, if your home tends to become overly humid, you may want to consider using a dehumidifier to maintain an optimal humidity level.

Water Heater Settings

Managing your water heater before your vacation can lead to significant energy savings. If your water heater has a vacation mode, activate it. This specialized mode ensures your water heater operates efficiently during your absence. However, if your water heater doesn’t have a dedicated vacation mode, you can manually lower the temperature to reduce energy consumption.

You should also consider insulating your water heater and its pipes to prevent heat loss while you’re away. Proper insulation helps maintain the water temperature more effectively, ensuring that your water heater doesn’t work harder than necessary during your vacation. These steps will not only save you money but also contribute to a more energy-efficient home.

Testing Safety Systems

Prioritizing safety is essential, even when you’re away from home. It’s crucial to ensure that your safety systems are in excellent working order before your vacation. Take the following steps:

Start by testing your smoke and carbon monoxide detectors to confirm that they are functioning correctly. These devices are your first line of defense in the event of an emergency, so their proper operation is paramount. Don’t forget to replace batteries if needed to ensure continuous and reliable performance. Ensuring the functionality of these critical safety devices provides peace of mind during your absence, knowing that your home remains protected.

Scheduling HVAC Maintenance

Before you depart for your vacation, it’s a wise decision to arrange for professional HVAC maintenance. Here’s why it’s essential:

Professional HVAC maintenance offers several benefits. One of the most significant advantages is its ability to identify potential issues early on, ensuring that your HVAC system operates at peak efficiency. This proactive approach can prevent unexpected breakdowns, saving you from potential discomfort and costly repairs.

To ensure that your HVAC system receives the necessary attention, it’s advisable to schedule your maintenance appointment well in advance of your vacation. This proactive planning ensures that everything is in top shape, contributing to a worry-free vacation knowing that your HVAC system is in optimal condition.

Securing Your Home

Securing your home is a critical step while you’re away on vacation. Here’s what you should do:

Start by ensuring that all doors and windows are securely locked before you leave. This simple yet essential measure adds an extra layer of protection to your home, deterring potential intruders and ensuring your peace of mind.

If you don’t already have a security system in place, it’s worth considering installing one. A security system provides advanced security features, enhancing the safety of your home during your absence. Alternatively, you can opt to inform a trusted neighbor or friend about your vacation plans, requesting their assistance in keeping an eye on your property. These precautions contribute to a secure and worry-free vacation experience.

Utilizing Smart Thermostats

Smart thermostats offer convenience and efficiency when it comes to vacation preparation. Here’s how they can make your life easier:

Firstly, smart thermostats provide the advantage of remote control. Using a smartphone app, you can easily monitor and adjust your home’s temperature from anywhere. This capability allows you to make real-time adjustments if necessary, ensuring that your home remains comfortable while you’re away.

Additionally, smart thermostats often come equipped with a vacation mode feature. Activating this mode ensures optimal energy savings during your absence. It automatically adjusts the temperature settings to an energy-efficient level, helping you save on utility bills without compromising your home’s comfort. Incorporating a smart thermostat into your vacation preparations enhances both convenience and energy efficiency.

Considering Home Watch Services

For extended vacations, the idea of a home watch service can offer valuable benefits:

Home watch services play a crucial role in periodically checking on your home to ensure everything remains in order. This added layer of attention provides significant peace of mind, especially for longer trips when you might be away for an extended period.

When considering a home watch service, it’s essential to find a reputable provider. Conduct thorough research to select a service known for its reliability and trustworthiness. By choosing a reputable provider, you can rest assured that your home is in capable hands during your absence, allowing you to enjoy your vacation with confidence.

As you embark on your vacation with the assurance of a well-prepared home, remember that Always Plumbing and Heating is here to support you every step of the way. Whether you need additional tips, have questions, or want to schedule your yearly HVAC maintenance service, our dedicated team is just a call away. Your comfort and peace of mind are our top priorities, so reach out to us today and ensure a worry-free vacation knowing your HVAC system is in expert hands. 

To increase your savings, you can always join our Diamond Club to enjoy both AC and furnace maintenance every year, as well as additional discounts on service calls, new appliances, and installations.

Choosing the Right Thermostat for Your Edmonton Home

Have you given much thought to your HVAC system’s thermostat? The importance of thermostats in Edmonton’s home heating and cooling systems cannot be overstated. They are an essential component of your home’s heating and cooling system, designated for regulating indoor temperatures.

This is especially relevant to homes in Edmonton because winters are bitterly cold while summers are hot and humid. These electronic devices are not just a convenience, but a downright necessity. In this article, we will look at the types of thermostats available and how to choose the best one for your home.

Understanding the Basics of Thermostats

First things first – what’s a thermostat? Well, a thermostat is like the boss of your heating and cooling system. It tells your furnace or air conditioner when to kick in and when to take a break. So, it’s a big deal!

When it comes to thermostats, two things matter a lot: accuracy and control. Accuracy means your thermostat knows exactly what temperature it is. Control means you get to decide how warm or cool your home should be. You want both for maximum comfort and energy savings.

In the world of thermostats, the types are programmable and non-programmable, as well as Smart thermostats and those that use WiFi. What benefits does one have over another? Let’s look at both and compare:

Types of Thermostats on the Market

Traditional Manual Thermostats: Manual thermostats have a dial, slider, or buttons that allow you to set your desired indoor temperature. This is usually done by turning the dial to the left for cooler temperatures or to the right for warmer temperatures. Unlike programmable or smart thermostats, manual thermostats do not have the ability to follow preset schedules or adjust themselves automatically based on your habits. They require manual input for any temperature changes. These tend to be the most cost-effective option for those on a tight budget.

Programmable Thermostats: You can set different temperature settings for various times of the day and days of the week. For example, you can program it to be cooler when you’re away at work and warmer when you’re at home in the evenings. Like manual thermostats, programmable thermostats also have a temperature sensor that continuously measures the indoor temperature and turns on and off to maintain the set temperature. Not only is this energy-efficient, but saves money on utilities as well.

Smart Thermostats: Smart thermostats are equipped with sensors that monitor not only temperature but also factors like humidity and occupancy. They also have Wi-Fi or Bluetooth connectivity, allowing them to connect to your home network.

Many smart thermostats have a learning capability. They can learn your temperature preferences and daily routines by monitoring when you adjust the temperature settings and your occupancy patterns. They have the ability to integrate with other smart home devices like lights, locks, and security systems. 

For example, when you set your security system to “Away,” the thermostat can automatically adjust to an energy-saving mode. They also have advanced features such as geofencing and voice control.

Wi-Fi Thermostats: Think of these as the ‘stay connected’ thermostats. They work with your Wi-Fi, so you can adjust them using your smartphone, even if you’re far from home.

The Wi-Fi thermostat works in a similar way to the programmable thermostat in that it allows you to program your HVAC (Heating, Ventilation, and Air Conditioning) system according to your schedule. You can set different temperatures for different times of the day or week, optimizing comfort and energy efficiency. As with other new technologies, these devices also feature geofencing and voice controls. Some popular choices include Google Nest, Ecobee, and Honeywell.

Factors to Consider When Choosing a Thermostat

Now, let’s get into the nitty-gritty of choosing the right thermostat for your Edmonton home:

Climate and Seasonal Changes in Edmonton: Edmonton experiences a wide range of temperatures throughout the year. Winters can be exceptionally cold, with temperatures dropping well below freezing, while summers can bring periods of intense heat. This means that your home’s heating and cooling systems need to work efficiently to keep you comfortable in both extreme cold and heat.

Energy Efficiency and Cost Savings: Just as in winter, energy efficiency is important in the summer months. A good thermostat can help you avoid overcooling your home, saving energy and reducing cooling costs.

Compatibility with HVAC Systems: Compatibility ensures that your thermostat can effectively communicate with your HVAC system. This means your system will operate efficiently, responding accurately to temperature changes. An incompatible thermostat can lead to system malfunctions, inefficiency, or even damage.

User-Friendliness: We get it; not everyone’s a tech whiz. You won’t have to navigate complex menus or deal with confusing settings. It’s like using your TV remote or adjusting your car’s climate control – simple and hassle-free.

Budget Considerations: The largest budget consideration is the initial cost of the thermostat. Different types of thermostats come at various price points. Manual thermostats are typically the most budget-friendly, while smart thermostats tend to cost more due to their advanced features.

Installation and Maintenance Tips: It’s essential to factor in the cost of installation. Some thermostats may require professional installation, which can add to the overall expense. However, programmable and smart thermostats, which offer energy savings, can often offset these installation costs in the long run.

Some thermostat models may require more maintenance or be prone to technical issues that could result in repair costs. Factor in the long-term maintenance and repair expenses when making your decision.

Long-Term Savings: Look beyond the initial investment and consider the long-term savings associated with your thermostat choice. Programmable and smart thermostats can learn your habits and adjust settings to minimize energy usage, potentially paying for themselves over time.

FAQs

1. What is the best thermostat to buy for your home?

The best thermostat for your home depends on your specific needs and preferences. If you prefer simplicity and don’t require advanced features, a manual thermostat might be sufficient. If you want energy savings and convenience, consider a programmable or smart thermostat. Smart thermostats offer the most advanced features, including remote control and learning capabilities. Assess your priorities and budget to determine the best fit.

2. Can I replace my thermostat with any thermostat?

Not necessarily. The compatibility of a thermostat with your HVAC system is crucial. Different thermostats are designed to work with specific types of heating and cooling systems. Check your HVAC system’s compatibility before purchasing a thermostat. Additionally, some smart thermostats may require a C-wire for power, so ensure your home’s wiring can support the chosen thermostat.

3. How long does a thermostat last?

The lifespan of a thermostat can vary depending on the type and brand. Generally, manual thermostats can last for several decades, as they have fewer components. Programmable and smart thermostats typically have a lifespan of 10 to 15 years or more. However, it’s essential to regularly maintain and update your thermostat to maximize its longevity.

4. How do you know if a thermostat is bad?

There are several signs that may indicate a faulty thermostat:

  • Inconsistent Temperature: If your thermostat consistently fails to maintain the desired temperature or if you notice significant temperature swings, it could be malfunctioning.
  • Unresponsive: If the thermostat doesn’t respond to changes in settings or doesn’t turn your heating or cooling system on or off as expected, it may be defective.
  • No Display: A blank or unresponsive display on a digital thermostat can signal an issue with the thermostat itself or its power source.
  • Constant Running: If your HVAC system runs continuously, even when it shouldn’t, the thermostat may not be correctly controlling it.
  • Incorrect Readings: If the thermostat displays inaccurate temperature readings, it could be malfunctioning. You can check this by comparing its readings to a reliable thermometer.

If you suspect your thermostat is faulty, it’s a good idea to consult with a professional HVAC technician to diagnose the problem and determine whether a replacement is necessary.

Thank You!

Thank you for taking the time to explore our guide on choosing the right thermostat for your home. At Always Plumbing and Heating, we’re dedicated to helping homeowners like you achieve optimal comfort and energy efficiency.

If you have any questions, need expert advice, or would like to schedule a consultation regarding thermostat installation or HVAC services in Edmonton, Alberta, please don’t hesitate to reach out to us. Our experienced team is here to assist you every step of the way. Call us today at 780-489-8118 or request a quote to get started today!

We look forward to serving your heating and cooling needs and ensuring your home remains a comfortable and energy-efficient oasis. Thank you for considering Always Plumbing and Heating as your trusted HVAC partner.

Breathe Easy: A Guide to Improving Indoor Air Quality

Did you know that the air we breathe indoors can be up to five times more polluted than outdoor air? It’s a startling fact that often goes unnoticed, yet it has a profound impact on our well-being. The purpose of this article is to provide you with information about improving indoor air quality (IAQ). By the end, you’ll be armed with knowledge about electronic filters, UV lights, and ozone – the triumvirate of technologies that can transform your living spaces into havens of fresh, clean air.

Understanding the Significance of Indoor Air Quality

Before we delve into the details of electronic filters, UV lights, and ozone, it’s important to understand the critical significance of indoor air quality. We spend a considerable amount of time indoors, whether at home or in our workplaces. The quality of the air we breathe inside has a significant impact on our overall well-being. Poor indoor air quality can cause various health problems, including allergies, respiratory issues, and even long-term diseases.

The First Line of Defense – Electronic Filters

What Are Electronic Filters?

Electronic filters, often referred to as electronic air cleaners or electrostatic precipitators, are powerful devices designed to capture and remove airborne particles from the indoor air. These filters utilize electrostatic attraction to trap particles like dust, pollen, pet dander, and even some bacteria and viruses.

How Do They Work?

Electronic filters work on a simple yet effective principle. As air passes through the filter, it encounters charged plates. These plates create an electrostatic field that attracts and captures particles, preventing them from circulating in the air. The cleaned air is then recirculated into the room, providing occupants with fresher, purer air to breathe.

Advantages of Electronic Filters

  • High Efficiency: Electronic filters are incredibly efficient at removing even microscopic particles from the air, making them a top choice for those with allergies or respiratory issues.
  • Low Maintenance: These filters are washable and reusable, reducing the ongoing cost of replacements.
  • Quiet Operation: Electronic filters operate quietly, ensuring minimal disruption to your indoor environment.

The Germicidal Guardians – UV Lights

Harnessing the Power of UV-C Light

Ultraviolet germicidal irradiation, or UV-C light, has long been recognized for its ability to neutralize harmful microorganisms, including viruses and bacteria. UV-C light works by damaging the DNA and RNA of these pathogens, rendering them unable to replicate or cause harm.

UV Lights in IAQ Enhancement

In the realm of IAQ, UV lights are used primarily to disinfect the air and surfaces within HVAC systems. By installing UV lights in your HVAC system, you can effectively eliminate mold, bacteria, and viruses, ensuring the air that circulates throughout your home or office is virtually germ-free.

Benefits of UV Lights

  • Enhanced Health: UV lights contribute to a healthier indoor environment by reducing the risk of illness associated with airborne pathogens.
  • Improved HVAC Efficiency: By keeping your HVAC system clean, UV lights can enhance its efficiency and extend its lifespan.
  • Eco-Friendly: UV lights are environmentally friendly, as they do not rely on chemical agents to disinfect the air.

Nature’s Purifier – Ozone

The Ozone Layer

Ozone, often associated with the Earth’s protective ozone layer, plays a significant role in filtering out harmful ultraviolet (UV) rays from the sun. However, when harnessed appropriately, ozone can also serve as a potent indoor air purifier.

Ozone Generators

Ozone generators produce ozone gas, which can be strategically introduced into indoor spaces to purify the air. Ozone works by oxidizing and breaking down pollutants, effectively neutralizing odors and eliminating contaminants.

The Ozone Debate

It’s important to note that the use of ozone generators can be a topic of debate within the IAQ community. While ozone can be highly effective at purifying the air, it must be used with caution. Excessive ozone levels can be harmful to human health, so it’s crucial to follow manufacturer guidelines and consult with IAQ experts when considering ozone as an air purification option.

Importance of IAQ Testing

Testing for indoor air quality (IAQ) plays a pivotal role in identifying specific pollutants and contaminants present in an indoor environment. This process is essential for understanding the quality of the air you and your family breathe and taking targeted actions to improve it. Here’s how IAQ testing can help:

Identifying Pollutants

IAQ testing allows individuals to pinpoint the presence of various pollutants that might be detrimental to health and comfort. It goes beyond a general sense of “poor air quality” and provides concrete data on specific contaminants.

Allergens

Testing can detect common allergens such as dust mites, pollen, pet dander, and mold spores. This is especially valuable for individuals with allergies or asthma, as it helps identify the sources of their symptoms.

Chemical Pollutants

IAQ tests can identify volatile organic compounds (VOCs) that emanate from household products like paints, cleaning agents, and furniture. VOCs can have short-term and long-term health effects, and testing can reveal their concentrations.

Radon Gas

Radon is a naturally occurring radioactive gas that can seep into buildings through the ground. Long-term exposure to high levels of radon is a known cause of lung cancer. Radon testing can determine if this gas is present in significant amounts.

Carbon Monoxide (CO):

CO is a colorless, odorless gas that can be produced by malfunctioning appliances or heating systems. High levels of CO can be lethal. Testing can alert individuals to unsafe CO levels in their homes.

Particulate Matter

Particulate matter (PM) consists of tiny particles suspended in the air, including dust, soot, and allergens. IAQ tests can measure PM levels, which are crucial for respiratory health.

Additional Tips to Improve IAQ

In addition to electronic filters, UV lights, and ozone, there are several other solutions to improve indoor air quality (IAQ). These solutions address different aspects of IAQ and can work synergistically to create a healthier indoor environment. They include such things as:

1. Air Purifiers

They come equipped with HEPA filters, which are excellent at capturing pesky airborne particles such as dust, pollen, and pet dander. Some models even feature activated carbon filters to tackle odors and volatile organic compounds (VOCs). Air purifiers are fantastic companions to electronic filters and UV lights, adding an extra layer of protection against particles and odors. They are especially beneficial if you or your loved ones have allergies or asthma.

2. Humidity Control Devices

Controlling indoor humidity is a game-changer for your IAQ. Dehumidifiers are your go-to for removing excess moisture from the air, while humidifiers step in to add moisture when the air is too dry. Maintaining indoor humidity between 30% and 50% is the sweet spot for better IAQ. These devices not only prevent mold growth, which can thrive in high humidity, but they also provide relief to those with respiratory issues who may struggle with dry air.

3. Regular HVAC Maintenance

Your HVAC system deserves some TLC too. Regular maintenance, like cleaning and replacing filters, checking for leaks, and optimizing airflow, ensures that your system works efficiently. This maintenance routine is essential to support the performance of electronic filters and UV lights. Clean filters and a well-maintained HVAC system contribute to improved air circulation and filtration throughout your home.

4. Natural Ventilation

Sometimes, the simplest solutions are the most effective. Opening windows and doors to let outdoor air naturally flow in can make a significant difference in your IAQ. This method is particularly handy when outdoor air quality surpasses that indoors. Natural ventilation is like a breath of fresh air for your IAQ, diluting indoor pollutants and bringing in that invigorating outdoor breeze.

5. House Plants

Bringing a touch of nature indoors not only adds aesthetic appeal but also helps cleanse your air. Certain indoor plants, such as snake plants and peace lilies, have a knack for absorbing airborne pollutants and releasing oxygen. They work hand in hand with electronic filters, UV lights, and ozone by providing a natural means to reduce specific pollutants.

By combining these IAQ improvement solutions with advanced technologies like electronic filters, UV lights, and ozone, you can create a well-rounded strategy to maintain clean and healthy indoor air. Depending on your specific IAQ concerns and the environment you live in, a combination of these solutions can be the most effective way to ensure your indoor air quality is at its best.

Get Expert Advice

Your home is your sanctuary from the world outside. If you’re concerned about your indoor air quality, consider reaching out to us at Always Plumbing and Heating for an indoor air quality assessment. Our experts can help you choose the right solutions, whether it’s electronic filters, UV lights, or ozone, to create a healthier and more comfortable living environment for you and your family. 

So, why wait? Take that first step towards breathing easier today! Call Always Plumbing & Heating at 780-489-8118, or request a quote right away!

Stop the Drip: Identifying and Resolving Toilet Leaks in Your Bathroom

Have you noticed a suspicious puddle near the base of your toilet? Chalk it up to condensation or wet feet after a shower, you dry it up but it comes right back. Water puddles and the faint sounds of water running are subtle signs that can indicate a leak in your toilet. In this article, we’ll show you how to become a detective in your own bathroom, teaching you to identify those elusive leaks and how to fix them.

A leaking toilet can waste water, lead to higher water bills, and potentially cause damage to your bathroom. Here are some common signs to look for if you suspect your toilet is leaking:

1. Visible Water Around the Base

Water pooling on the floor around the base of the toilet is one of the most common signs of a toilet leak. This is most likely caused by a faulty wax ring seal between the toilet and the floor flange. The job of the wax ring is to maintain a watertight seal between the toilet and the sewer pipe below. If that seal is broken, then water can leak out onto the floor.

2. Persistent Dampness or Water Stains

Check for dampness or water stains on the floor near the toilet. These can appear as discolored or buckled flooring materials and may indicate a slow, ongoing leak. If the leak has been there for a while, it may cause the wood underneath to get soft or have some “give” when you press it with your foot. You want to prevent it from progressing this far (water damage) through early detection.

3. Bubbling or Peeling Paint or Wallpaper

If the wall behind or near the toilet shows signs of bubbling, peeling paint, or wallpaper, it may be due to water damage caused by a hidden leak. A crack in the back of the tank can remain hidden until it becomes necessary to remove the toilet.

4. Sewer Odor

If the wax ring seal is compromised, sewer gases can escape into the bathroom creating a “stinky” situation. This is a definite sign that your toilet has a leak. This can cause health issues and should be dealt with as soon as possible. A professional plumber should be contacted to repair the leak.

5. Water Meter Activity

To check for a silent leak, turn off all water sources in your home and monitor your water meter. If it continues to register water usage, there may be a leak in your toilet or plumbing system.

6. Constantly Running Toilet

If you grew up being told to “jiggle the handle”, you’ll know what this means. If your toilet tank constantly refills and doesn’t stop running, it could indicate an internal leak. This may be due to a faulty fill valve, flapper, or flush valve that is not sealing properly. 

7. Dripping Sounds

Sometimes, you may hear a faint dripping sound in the toilet bowl even when the toilet is not in use. This can indicate a slow leak in the tank that is causing water to drip into the bowl.

8. High Water Bills

A sudden increase in your water bills without an obvious explanation could be a sign of a toilet leak or other plumbing issue. This is most often due to water dripping onto the floor or running continuously from a leak in the tank.

9. Toilet Bowl Water Level

Does the water in the bowl look higher one time and lower the next? If the water level in the toilet bowl is constantly changing without flushing, it may be due to a leak in the tank or the flush valve not sealing properly.

10. Visible Cracks or Damage

Inspect the toilet tank and bowl for visible cracks, rust, or other damage that could lead to leaks.

If you see any of these signs of a toilet leak, it’s important to act quickly. This helps you save water and stops any possible damage from getting worse. Depending on what’s wrong, you might have to change things like the wax ring seal, fill valve, or flapper. And if things seem too tricky, don’t hesitate to call a plumber for more complicated fixes. 

Remember, taking care of your toilet regularly can stop leaks and make your toilet last longer. So, a little maintenance goes a long way!

Types of Water Leaks

There are two types of toilet leaks: internal and external leaks. External leaks are the most obvious ones marked by the presence of water puddles. Internal leaks are leaks between the tank and bowl sections of your toilet, most often caused by a faulty flapper. This means that your toilet is having trouble retaining water in the bowl. While this type often causes no external damage, it does increase your water bill since the water is running continuously trying to keep the tank full.

Steps to Fixing a Leaky Toilet

Fixing a leaking toilet typically involves identifying the source of the leak and then taking appropriate steps to address the issue. Here are the general steps to follow to fix a leaking toilet:

What You’ll Need:

  • Adjustable wrench
  • Screwdriver
  • Replacement parts (e.g., wax ring seal, fill valve, flush valve, flapper)
  • Towels or rags
  • Bucket or container
  • Gloves (for protection)

Step 1: Shut Off the Water

Find the water supply valve located on the wall or floor behind the toilet.

Turn the valve clockwise to shut off the water supply to the toilet. This stops the flow of water into the tank and bowl.

Step 2: Drain the Tank

Flush the toilet to drain as much water as possible from the tank and bowl.

If the toilet continues to run, lift the tank lid and manually close the flapper to stop the flow of water.

Step 3: Remove Excess Water

Use a cup, towel, or a shop vacuum to remove any remaining water from the tank and bowl.

Place towels or rags on the floor around the base of the toilet to catch any water that may spill during the repair.

Step 4: Identify the Leak

Inspect the area around the base of the toilet for signs of water. This will help determine if the wax ring seal is the source of the leak. If you commonly have water puddles around the toilet base, you can safely assume it’s the wax seal. 

Check the tank for cracks, and inspect the flush valve, fill valve, and flapper for signs of wear or damage. 

Step 5: Replace the Wax Ring (if necessary)

If the wax ring seal is damaged or leaking, you’ll need to replace it. First, you will need to loosen and remove the nuts securing the toilet to the floor bolts. Carefully lift the toilet off the floor and place it on its side. Scrape away the old wax ring from the toilet flange on the floor and the bottom of the toilet.

Install a new wax ring by centering it on the toilet flange. Carefully lower the toilet back onto the wax ring, aligning it with the floor bolts. Hand-tighten the nuts onto the floor bolts and then use a wrench to snugly secure them, but do not over-tighten, as this could crack the toilet.

Step 6: Inspect and Replace Toilet Components (if necessary)

Inspect the tank components (fill valve, flush valve, flapper) for any visible damage or wear. Replace any faulty or worn components as needed. Follow the manufacturer’s instructions for proper installation. You can have internal leaks at the same time so replacing the flapper at the same time can save you time and effort from doing it later.

Step 7: Reconnect Water Line

Reconnect the water supply line to the fill valve on the bottom of the tank. Tighten the nut securely with a wrench. Check for leaks and turn on the water supply. If this worked and you see no signs of leaking after 10 minutes, congratulations! If not, then take the next step and seek the help of an expert. 

Hire a Professional Plumber

Not everyone is handy with tools or skilled in fixing things around the house. When in doubt, it’s a smart move to call in a professional plumber. We know plumbing inside and out and can work our magic to fix your toilet troubles.At Always Plumbing & Heating, we’re your go-to experts for fixing leaky toilets. We’re here to take the load off and return your bathroom to the secluded oasis it was before! We understand the urgency of a leaking toilet, and we’re committed to providing quick solutions. We’ll promptly assess the issue and get to work, so you can get back to your daily routine. If you see signs that you need a repair, contact Always Plumbing & Heating at 780-489-8118.

Top 10 Causes Of Your Furnace Not Working and How to Fix Them

The absolute worst time to find out your furnace is on the fritz, is during the coldest months of winter. If your furnace dies when you need it the most, it is not merely an inconvenience but can affect the comfort of everyone in your home. Fortunately, in this comprehensive guide, we will explore the top 10 reasons why your furnace might not be working and provide you with practical solutions to get it up and running smoothly again.

Before jumping into the reasons for your furnace not working, we’ll outline a few steps you can take to determine if your furnace is working or not. Do these 3 things first, before checking the things on the list. 

Listen for Normal Operation Sounds: When your furnace starts up, it should make some typical sounds, such as the blower fan running and a gentle whooshing sound as the burners ignite. If there is no sound at all, then it is not starting.

Check the Thermostat Settings: Ensure your thermostat is set to “heat” mode and at a temperature higher than the current room temperature. You should hear the furnace kick on when raising the temperature setting.

Feel the Airflow: Stand in front of a vent or register, and you should feel warm air blowing out when the furnace is running. If you feel no airflow, then your furnace is not running. 

If you do these 3 things and get no response, then it is safe to say that your furnace is not working and you can move on to the troubleshooting guide below. Make notes for each thing you check, so if you end up needing assistance from a professional HVAC technician, you can tell them what you have done already and the results. This will help them quickly diagnose the problem and speed up the repair time.

10 Common Reasons for Furnace Not Working

1. Thermostat Troubles

One of the most common culprits behind a malfunctioning furnace is a faulty thermostat. If your thermostat isn’t working correctly, it can’t effectively communicate with your furnace to regulate the temperature. 

Check the thermostat’s batteries, and if it’s a programmable thermostat, ensure the settings are correct. If problems persist, consider replacing the thermostat. A good rule of thumb is to always keep spare batteries on hand for your thermostat.

2. Dirty or Clogged Air Filters

Dust and pet hair collected on filters can restrict airflow, making your furnace work harder to maintain the desired temperature. This can lead to overheating and a shutdown. Regularly replace or clean your air filters every 1-3 months to ensure optimal airflow and efficiency.

3. Ignition or Pilot Light Issues

If your furnace uses a pilot light or electronic ignition system, problems in this area can prevent the furnace from igniting. Inspect the pilot light (if applicable) and ensure it’s lit. For electronic ignition systems, check for error codes and consult your furnace’s manual for troubleshooting steps.

4. Lack of Fuel Supply

For gas furnaces, a lack of natural gas supply can lead to ignition failure and heating problems. Check the gas valve to ensure it’s open. If you suspect a gas supply issue, contact a professional immediately.

5. Dirty or Faulty Flame Sensor

A dirty or malfunctioning flame sensor can prevent the furnace from staying lit, causing it to shut down. Carefully clean the flame sensor using a fine abrasive pad or consult a technician for sensor replacement if needed.

6. Blower Motor Problems

A malfunctioning blower motor can result in poor airflow, leading to uneven heating or furnace shutdown. Inspect the blower motor for debris and ensure it’s lubricated. If problems persist, consult a professional for motor repair or replacement.

7. Blocked Vents or Ductwork

Blocked vents or ductwork restrict the airflow, reducing the furnace’s efficiency and effectiveness. Regularly inspect and clean vents and ducts. Ensure they are not obstructed by furniture or other objects.

8. Electrical Issues

Electrical problems, such as a blown fuse or tripped circuit breaker, can interrupt the furnace’s operation. Check your home’s electrical panel for blown fuses or tripped breakers and replace or reset as needed.

9. Overheating

Overheating can cause your furnace to shut down as a safety measure. Ensure proper airflow by keeping vents and ducts clear. If the problem persists, contact a professional technician to inspect and repair the issue.

10. Age and Wear and Tear

Furnaces have a lifespan, and older units may experience various issues due to wear and tear. Consider upgrading to a more energy-efficient furnace if your current unit is old and unreliable. Newer models are not only more reliable but also more cost-effective in the long run.

A malfunctioning furnace can be a significant inconvenience, but many issues can be resolved with a bit of troubleshooting and maintenance. Regularly servicing your furnace and addressing problems promptly can ensure it keeps your home warm and cozy during the cold months. 

However, if you’re unsure about any furnace-related issues or lack the expertise to fix them, don’t hesitate to call a professional HVAC technician to diagnose and repair the problem. A well-maintained furnace not only provides comfort but also contributes to energy efficiency and lower heating bills, making it a worthwhile investment in your home’s overall well-being.

Frequently Asked Questions

How often should I change my furnace’s air filter?

You should change or clean your air filter every 1-3 months, depending on your furnace’s usage and the type of filter.

How do I reset my furnace?

In some cases, resetting your furnace can help restore it to full operation. This can be particularly helpful after a power outage or after resetting the breaker. Follow these steps to reset your furnace:

  1. Switch off the power to your furnace. Wait for 5 minutes.
  2. Locate the reset button on your furnace (refer to the manual)
  3. Press and hold the reset button for 30 seconds.
  4. Switch the furnace power back on.
  5. Wait for the furnace to restart.
  6. Ensure it starts without issues.

It’s important to note that not all furnaces have a reset button, and the location may vary by model. If the reset does not solve the issue, or it starts but shuts off again immediately, there is some issue that is keeping it from starting normally. You should contact a professional HVAC company to troubleshoot the issue right away. 

How can I make my furnace work more efficiently?

To improve efficiency, make sure your home is well-insulated, seal any drafts, and schedule regular maintenance. This will help your furnace run smoothly and save on energy costs.

How long should a furnace last?

Furnaces typically last 15-20 years. However, regular maintenance can extend their lifespan.

Why is my furnace making strange noises?

Your furnace may make strange noises due to various reasons, including dirty air filters causing whistling sounds, loose or worn parts leading to rattling or vibrating noises, or ignition system issues resulting in clicking or sparking sounds. Proper maintenance and timely repairs can often resolve these noise-related concerns and ensure your furnace operates quietly and efficiently. If the noises persist or are particularly concerning, it’s advisable to seek professional assistance from an HVAC technician for a thorough inspection and necessary fixes.

Expert Furnace Repair

Don’t let your Edmonton home feel like an igloo. Keep your family snug and cozy with Always Plumbing & Heating! Our skilled HVAC technicians are on call 24/7, ready to provide expert furnace repair or maintenance service. We work on all makes and models, restoring the warmth to your home swiftly.

Why Choose Always Plumbing & Heating for Your Furnace Repair Needs?

  • Expert Technicians: Our HVAC technicians have extensive experience in repairing all makes and models of furnaces.
  • 24/7 Availability: We understand that furnace issues can arise at the most inconvenient time. That’s why we have professionals on call 24 hours a day to promptly attend to your concerns.
  • Efficient Maintenance: A well-maintained furnace not only ensures your comfort but also prolongs its lifespan. Our furnace tune-ups improve airflow, reduce the need for repairs, and save you money on heating bills.
  • Protect Your Investment with Our Diamond Maintenance Program

Protect Your System from Unwanted Breakdowns

If you see signs that it needs a repair, contact Always Plumbing & Heating at 780-489-8118, or request a quote right away! We’ll be right over to fix the problem so your home stays warm and comforting all winter.

Water Conservation Gardening: How You Can Keep Your Yard Beautiful and Save Money

In today’s world, where environmental sustainability is a pressing concern, water conservation plays a crucial role. By adopting water-efficient practices in gardening, you not only contribute to preserving this precious resource but also enjoy the benefits of a beautiful yard. In this article, we will explore effective strategies to achieve water conservation in your garden while maintaining its aesthetic appeal.

The Importance of Water Conservation in Gardening

Water is a finite resource, and with the increasing demands of a growing population, it is essential to use it wisely. Gardening is one area where significant amounts of water are often used, making it an ideal place to focus on conservation efforts. By implementing water-saving techniques, you can reduce your water consumption, lower your water bills, and contribute to a sustainable future.

Understanding Water Efficiency in Gardening

To achieve water efficiency in gardening, it’s important to make informed choices regarding plant selection and irrigation systems.

Choosing Native and Drought-Tolerant Plants

Selecting plants that are native to your region or have adapted to local climate conditions is a smart choice for water conservation gardening. These plants are naturally more resilient to local weather patterns, requiring less water to thrive. Research and consult with local gardening experts to identify suitable native and drought-tolerant plant species for your yard.

Here are some examples of native and drought-tolerant plant species suitable for yards in Edmonton, Canada:

  • Blanket Flower (Gaillardia aristata)
  • Western Yarrow (Achillea millefolium)
  • Canada Wild Rye (Elymus canadensis)
  • Prairie Coneflower (Ratibida columnifera)
  • Western Red Lily (Lilium philadelphicum)
  • Prairie Smoke (Geum triflorum)
  • Smooth Blue Aster (Symphyotrichum laeve)
  • Prairie Crocus (Pulsatilla patens)
  • Wild Bergamot (Monarda fistulosa)
  • Common Juniper (Juniperus communis)

These plants are well-adapted to the local climate conditions in Edmonton and can withstand periods of drought while still adding beauty to your yard. Make sure to check with local gardening experts or nurseries for more specific recommendations based on your yard’s characteristics and microclimate.

Installing an Efficient Irrigation System

Investing in an efficient irrigation system can make a significant difference in water consumption. Consider installing drip irrigation or a sprinkler system with smart technology that adjusts watering based on weather conditions and soil moisture levels. This way, you can ensure that your plants receive the right amount of water without wastage.

To determine if your irrigation system is efficient and not wasting water, you can follow these steps:

Check for leaks: Inspect your irrigation system regularly for any visible leaks or dripping water. Leaks can result in significant water wastage over time. Look for wet spots, pooling water, or damaged pipes or sprinkler heads.

Evaluate water distribution: Observe how water is being distributed by your irrigation system. Make sure the water is reaching the intended areas without excessive overspray onto hardscapes or non-landscaped areas. Adjust sprinkler heads or nozzles if necessary to minimize water waste.

Conduct a catch can test: Place catch cans or shallow containers (such as tuna cans) throughout your lawn or garden area. Run your irrigation system for a set duration and then measure the depth of water collected in each can. This will help you determine if there are any areas that receive too much or too little water. Adjust your irrigation system accordingly for more uniform water distribution.

Check for proper coverage: Ensure that your sprinkler heads or drip emitters are evenly covering the target areas without overspray or leaving dry spots. Adjust the spacing and direction of sprinkler heads, as well as the flow rate of drip emitters, to achieve optimal coverage and avoid water waste.

Consider weather conditions: Your irrigation system should be adjusted based on the weather conditions. Avoid watering during or immediately after rainfall. Install a rain sensor or use a smart irrigation controller that adjusts watering schedules based on local weather data to prevent overwatering.

When it comes to maintaining the health of your plants, it’s important not to overwater or underwater. Here are some signs to look out for:

Signs of Overwatering:

  • Yellowing leaves: If the leaves of your plants turn yellow and become limp or wilted, it could be a sign of overwatering. Excessive moisture can lead to root rot, inhibiting the plant’s ability to absorb nutrients.
  • Mushy or rotting roots: When overwatered, the roots may become mushy, slimy, or have a foul odor. Healthy roots are firm and white. Gently check the roots’ condition when inspecting your plants.
  • Leaf drooping or wilting: Overwatered plants may display symptoms similar to underwatered plants, such as drooping or wilting leaves. However, the key difference is that the leaves of overwatered plants often appear waterlogged or excessively soft.
  • Fungal growth or mold: Overwatering creates a damp environment that encourages the growth of fungi and mold. If you notice moldy or fuzzy growth on the soil surface or the base of the plant, it may indicate excessive moisture.

Signs of Underwatering:

  • Dry, crispy leaves: When plants are underwatered, their leaves can become dry, brittle, and crispy. The foliage may appear dull or lifeless instead of vibrant and healthy.
  • Wilting leaves: Underwatered plants often exhibit wilting leaves that lack turgidity. However, unlike overwatered plants, the leaves of underwatered plants may be dry and papery rather than waterlogged.
  • Leaf yellowing or browning: Insufficient water supply can cause leaf discoloration, starting with yellowing and progressing to brown or scorched edges. This is a plant’s way of conserving water and prioritizing its survival.
  • Stunted growth: Underwatered plants may experience stunted growth as they struggle to access the necessary water and nutrients for proper development. This can manifest as smaller leaves or delayed flowering.

It’s important to note that different plant species have varying water requirements, so it’s essential to understand the specific needs of your plants. Adjust your watering practices accordingly to maintain an appropriate moisture balance for healthy growth and avoid both overwatering and underwatering.

Implementing Water-Saving Techniques

In addition to plant selection and irrigation systems, several techniques can further enhance water conservation in your garden.

Mulching

Applying a layer of organic mulch around your plants helps retain soil moisture, suppresses weed growth, and regulates soil temperature. Mulching reduces water evaporation and allows plants to utilize water more efficiently, minimizing the need for frequent watering.

Proper Watering Practices

When it comes to watering, it’s crucial to follow best practices to avoid water wastage. Water your plants deeply but infrequently to encourage deep root growth. Watering early in the morning or late in the evening reduces water loss due to evaporation. Avoid overwatering, as it can lead to root rot and other plant health issues.

Rainwater Harvesting

Harnessing the power of rainwater is an effective way to conserve water. Install rain barrels or a rainwater harvesting system to collect rainwater from your rooftop. This water can then be used for watering your garden during dry periods, reducing your reliance on municipal water supplies.

Creating a Water-Friendly Landscape Design

An intelligently planned landscape design can significantly contribute to water conservation efforts.

Grouping Plants by Water Needs

Grouping plants with similar water requirements together helps in efficient irrigation. By separating your garden into hydrozones, you can tailor your watering schedule and irrigation system to meet the specific needs of each zone. This prevents water wastage and ensures that plants receive adequate moisture.

Incorporating Hardscapes and Permeable Surfaces

Including hardscapes like patios and pathways in your garden design can minimize the area that requires watering. Use permeable materials for these surfaces to allow water to penetrate the soil and replenish groundwater levels.

Maintaining a Water-Smart Garden

Regular maintenance practices are essential for sustaining a water-efficient garden.

Regular Inspections and Maintenance

Periodically inspect your irrigation system for leaks, clogs, or inefficient water distribution. Repair any issues promptly to prevent water wastage. Regularly check your plants for signs of overwatering or underwatering and make necessary adjustments.

Adjusting Irrigation Seasonally

Adjust your watering schedule according to seasonal variations in weather and plant needs. As the weather changes, modify your irrigation system settings to align with the current conditions. This flexibility ensures optimal water usage throughout the year.

Water conservation gardening is not only environmentally responsible but also cost-effective. By implementing water-saving techniques, choosing appropriate plants, and maintaining a well-designed garden, you can achieve a beautiful and sustainable yard while reducing your water consumption and saving money.

FAQs

How do native plants contribute to water conservation in gardening?

Native plants are adapted to local climate conditions and require less water to thrive, contributing to water conservation efforts in gardening.

Can I water my garden during water restrictions?

It is essential to follow local water restrictions. However, by adopting water-saving techniques and utilizing methods like rainwater harvesting, you can minimize your reliance on municipal water supplies.

Is mulching beneficial for my garden?

Yes, mulching helps retain soil moisture, suppress weed growth, and regulate soil temperature, resulting in water-efficient gardening.

What is the benefit of a smart irrigation system?

A smart irrigation system adjusts watering based on weather conditions and soil moisture levels, optimizing water usage and reducing wastage.

How often should I inspect my irrigation system?

It is recommended to inspect your irrigation system regularly, at least once a month, to identify and fix any leaks or inefficiencies.

By adopting water conservation practices in your garden, you can create a beautiful and sustainable outdoor space while contributing to a more environmentally friendly future. Embrace the techniques mentioned in this article, and start saving water, money, and the planet today. Contact Always Plumbing & Heating for more information on water-saving appliances.

Top Tips for Saving Money on Your Water Bill

Saving money on your water bill is not only beneficial for your wallet but also for the environment. By implementing a few simple tips and making conscious changes in your daily water usage habits, you can significantly reduce your water consumption and ultimately lower your water bill. In this blog post, we will provide you with valuable insights and practical tips to help you save money on your water bill.

Top Tips for Water Conservation that Will Save You Money

Conserving water is not only environmentally friendly but also cost-effective. Here are 12 effective water conservation tips that will help you save money:

1. Use a Dishpan or Basin: When washing dishes by hand, fill a dishpan or basin with soapy water instead of letting the faucet run continuously. This way, you can rinse multiple dishes at once, using less water compared to continuous running water.

2. Fix Leaks Promptly: Act promptly if you notice any leaks in your plumbing fixtures, pipes, or irrigation system. Even small leaks can waste a significant amount of water over time and increase your water bill. Repairing leaks as soon as they are detected will help conserve water and prevent unnecessary expenses.

3. Water Your Lawn Efficiently: When watering your lawn, do it during the early morning or late evening to reduce evaporation. Adjust sprinklers to avoid watering sidewalks, driveways, or other non-landscaped areas. Consider installing a smart irrigation system that adjusts watering schedules based on weather conditions and soil moisture levels, ensuring optimal water usage.

4. Insulate Hot Water Pipes: Insulating your hot water pipes helps to retain heat, reducing the time it takes for hot water to reach your faucets. This means less water wasted while waiting for hot water to flow, resulting in both water and energy savings.

5. Take Shorter Showers: Showers are notorious for consuming a significant amount of water. By reducing the duration of your showers, even by a few minutes, you can save a considerable amount of water over time. Consider using a timer or playing your favorite song to keep your shower time in check.

6. Turn Off the Water: Simple habits like turning off the water while shaving or brushing your teeth can make a big difference. Letting the water run unnecessarily while performing these tasks can waste gallons of water. Be mindful and develop the habit of turning off the faucet when not in use.

7. Collect and Reuse Water: Instead of letting water go down the drain, consider collecting and reusing it. For example, capture the water that runs while waiting for the shower to warm up and use it for plants or other household chores.

Additional Steps You Can Take

8. Upgrade to Water-Efficient Fixtures: Consider replacing old and inefficient fixtures with water-saving alternatives. Install low-flow showerheads, faucets, and toilets, which are designed to reduce water usage without compromising performance. These fixtures can significantly contribute to water savings and ultimately lower your water bill.

9. Utilize Rainwater Harvesting: If local regulations permit, consider implementing a rainwater harvesting system. Collecting rainwater from rooftops and directing it to storage tanks can provide a sustainable and cost-effective source of water for tasks like watering plants or washing outdoor areas. This reduces reliance on municipal water supply and can help save money in the long run.

10. Monitor Your Water Meter: Keep an eye on your water meter to track your usage and detect any sudden spikes or unusual patterns. Monitoring your water consumption regularly allows you to identify any hidden leaks or excessive water usage promptly. By being proactive, you can address issues promptly and prevent them from inflating your water bill.

11. Time Your Water Usage: Some utility companies have peak and off-peak pricing for water usage. Check with your local provider to determine if they offer differential rates. If off-peak rates are available, consider scheduling tasks like laundry or dishwashing during those times to take advantage of the lower rates and reduce your overall water bill.

12. Educate Your Household: Ensure that everyone in your household is aware of the importance of water conservation and actively participates in saving water. Educate family members about the various tips and encourage responsible water usage habits. By working together, you can maximize the impact of your efforts and achieve greater savings.

The Importance of Saving Water

The amount of water wasted in a year can vary depending on various factors such as individual water usage habits, household size, and efficiency of water fixtures and appliances.

However, studies estimate that a typical household can waste thousands of gallons of water each year due to leaks, inefficient appliances, and wasteful practices. For example, a small faucet leak that drips once per second can waste around 3,000 gallons of water in a year. That is equal to 180 showers. 

Similarly, older toilets can use more water per flush compared to water-efficient models, leading to substantial water waste over time.

How to Check for Leaks in the House

Undetected leaks can lead to wasted water and unnecessarily high bills. It’s essential to regularly check for leaks in your house to identify and fix them promptly. Two common areas to inspect are running toilets and dripping faucets. A running toilet can waste a large amount of water, while a dripping faucet may seem insignificant but can add up over time. By fixing these leaks, you can prevent water wastage and reduce your water bill.

To effectively identify and address leaks, you can follow these simple steps:

1. Monitor your water meter: Start by turning off all faucets, appliances, and water-consuming devices in your home. Take note of the current reading on your water meter. Avoid using any water for a couple of hours, and then check the meter again. If the reading has changed despite not using any water, it indicates a possible leak in your plumbing system.

2. Inspect your water bill: Keep a close eye on your water bill each month. If you notice a sudden and unexplained increase in your water usage or an unusually high bill, it could be an indication of an undetected leak. Compare your current bill with previous months to identify any significant deviations.

3. Listen for running water: Pay attention to any unusual sounds of running water in your home. Even a slight hissing or trickling sound can suggest a hidden leak. Start by turning off all faucets, appliances, and water outlets. Listen carefully in different areas of your house, particularly near toilets, sinks, and water supply lines. If you hear any persistent running water sounds, it’s worth investigating further.

4. Check toilets for leaks: Toilets are common culprits for water leaks. Add a few drops of food coloring into the toilet tank and wait for about 10 to 15 minutes without flushing. If the food coloring appears in the toilet bowl, it indicates a leak in the flapper valve or another component of the toilet’s flushing mechanism. Promptly repairing or replacing faulty toilet parts can help prevent significant water wastage.

5. Inspect faucets and pipes: Examine all visible pipes, faucets, and showerheads for any signs of leakage. Look for water droplets, wet spots, or mineral deposits that might indicate a leak. Even small drips can add up to a considerable amount of water waste over time.

6. Hire a professional: If you suspect a hidden or complex leak that you are unable to detect on your own, it is advisable to seek the expertise of a professional plumber. Experienced plumbers have specialized tools and knowledge to identify and repair leaks effectively, ensuring water efficiency in your home.

By regularly checking for leaks in your house and promptly addressing any issues, you can prevent water wastage, conserve this valuable resource, and save money on your water bill. Remember, even minor leaks can have a significant impact on your water consumption, so staying vigilant and proactive in leak detection is key to responsible water usage.

FAQs

Are there any government programs or incentives available to support water conservation efforts?

A: Yes, there may be government programs and incentives available to homeowners who want to conserve water. It is recommended to check with your local water authority or government website to explore potential rebates, grants, or water-saving initiatives

How can I reduce water usage in my outdoor irrigation system?

A: To reduce water usage in your outdoor irrigation system, consider the following steps: set irrigation timers to water during optimal times, such as early morning or late evening to minimize evaporation, adjust sprinklers to avoid watering non-landscaped areas like sidewalks or driveways, regularly check and maintain your irrigation system for leaks or malfunctions, and explore the option of installing a smart irrigation system that adjusts watering schedules based on weather conditions and soil moisture levels.

Implementing these water-saving tips can lead to significant savings on your water bill. If you find yourself in need of a repair, call the experts at Always Plumbing & Heating. Our experienced technicians can help identify and resolve any plumbing problems efficiently, ensuring optimal water usage and cost savings.

The Best Pipes For Your Bathroom Or Kitchen –Edmonton Plumber

Choosing the right plumbing pipe is crucial for the longevity and performance of your system, especially in harsh weather conditions like those in Edmonton. We’ll help you determine the best type of pipe for your plumbing system.

What are the types of plumbing pipes?

Here’s an overview of each type of pipe commonly used in residential and commercial
buildings.

  • PEX
  • ABS
  • PVC
  • Copper
  • Galvanized Steel
  • Cast Iron

PEX

PEX is short for cross-linked polyethylene, a flexible pipe material. It is used for water
supply and drain lines, as well as in radiant floor heating systems. It can replace older
metal pipes that are no longer working due to corrosion. It is flexible and easy to install,
and also resistant to corrosion and freezing.
The main advantage of PEX tubing is its flexibility which allows it to conform around
corners without crimping or kinking like metal pipes do, making it easy to install in tight
spaces like bathrooms, kitchens, or laundry rooms.

ABS

ABS stands for acrylonitrile butadiene styrene, a thermoplastic polymer that is often
used to create plumbing pipes due to its flexibility and durability. ABS pipes are usually
found in residential applications such as kitchen sinks and bathrooms. ABS piping is
used for drainage and venting systems in your home.

PVC

PVC pipes are made from polyvinyl chloride which makes them inexpensive but they
are not very durable and they may degrade over time when exposed to ultraviolet light
or other chemicals found in some cleaners and detergents. PVC is commonly used for
residential applications such as plumbing in the bathroom or kitchen because it’s
lightweight and easy to install.

Copper Pipes

Copper pipes have been used for water and gas lines since the early 1800s. They’re
still popular today because of their durability, resistance to corrosion, and ability to
conduct heat. Copper piping is typically used in residential homes for hot and cold water
supply lines, as well as for drain lines. The most common type of copper pipe is a solid
walled pipe with soldered fittings. It’s also available in a corrugated style that has a
ribbed wall for added strength.

Galvanized Steel Pipes

Steel pipes were used for water systems for years ago but are no longer recommended
due to the amount of labor required to install them. They will also corrode over time
resulting in reduced flow through the pipe.
Galvanized steel pipes are available in either rigid or corrugated styles (similar to
copper), but they tend to be more expensive than copper or cast iron pipes due to their
thicker walls and higher corrosion resistance requirements.

Cast Iron

Cast iron pipe is an excellent choice for outdoor or underground use because it’s very
durable and can last a long time. It is also relatively inexpensive compared to other
materials.
However, cast iron is susceptible to rust over time. This piping is more commonly used
in commercial applications.

What plumbing pipes last the longest?

PEX pipes are the most popular choice for new homes for potable water systems
because they last just as long as some of the metal pipes, but cost less.. PEX is also
more flexible than other types of pipes which makes it easier to install. It also has better
corrosion resistance and higher temperature tolerances than other types of pipe. PEX
also has two types – PEX “A” and PEX “B”.

Is PEX or PVC better?

When it comes to durability and longevity, PVC and PEX are both good choices. PEX is
a better choice for homes in colder climates like Edmonton and other parts of Alberta as
it has less joints in the water system resulting in a lower chance of flexing than PVC.

Do plumbing pipes need to be replaced?

The short answer is yes. Plumbing pipes can last for decades, but they don’t last
forever. As they age, they can become brittle and start to leak. Replacing these old
pipes with new ones helps prevent the risk of leaks and other issues down the road.
The best way to know is to check your pipes regularly for leaks and cracks. You can do
this by simply looking at the pipes and testing them with water or water pressure.
If there are any leaks or cracks, they will usually be visible, so you don’t have to get too
technical about it. If you do find any leaks or cracks in your pipes, call a plumber
because they can lead to bigger problems down the road.

How do I choose the right pipes for my home?

The right plumbing pipes for your home will depend on a number of factors. These
include the size of your home, the type of plumbing system you have (gravity or
pressure), the number of bathrooms, the layout of your floors and walls, and whether
you have any special requirements.
For homes and businesses in cold climates, the best plumbing pipe types would be
copper, PVC, and PEX.
If you need help choosing plumbing pipes or installing a new plumbing system, contact
us at Always Plumbing & Heating Ltd. We have been providing our clients with the best
possible service since 1998.
Our team of licensed and insured plumbers is trained to solve any plumbing issue you
might be having, from basic repairs to complex problems. We offer 24/7 emergency
services for all kinds of plumbing issues, and we’ll always get there fast—even if it’s 3
am on a Sunday!
Check out our website if you have a Poly B System in your home as this pipe has a
major tendency for failure.

Request Service

Close x

Fill out the service request form below and an Always Plumbing team member will be in touch to confirm your request.

Exit mobile version